You have run Windows 7, played around with the user interface and altered many of its settings. But now the actual fun begins. With the hacks outlined below, you can change fundamental settings and make it behave your way, not Microsoft’s way.
Change Buttons Darkness And Text Shadows
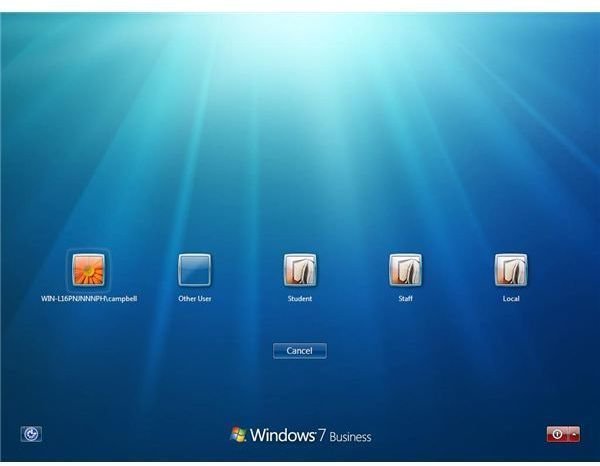
As you know the text and the buttons on the Windows Logon screen have shadows to give them a 3-D look? These shadows work well
with Windows 7 default Logon screen wallpaper but if you use other wallpaper, these shadows might not work so well. With this Windows 7 hack, you can adjust or disable the shadows to suit your particular Logon screen image.
Here is what you need to do to alter text shadows and buttons darkness on the Windows Logon Screen:
1. Open Windows Registry Editor
2. Navigate to HKLM\SOFTWARE\Microsoft\Windows\CurrentVersion\Authentication\LogonUI
3. Right-click in the right-hand pane and select New -> DWORD Value
4. Rename the new DWORD value to “ButtonSet”
5. Double-click to open the DWORD and set its value from 0 to 2. Each is explained below:
0 - Darker buttons and lighter text shadows. (This is Windows default setting)
1 - Lighter buttons and darker text shadows. (Suitable with lighter backgrounds)
2 - Opaque buttons and no text shadows. (Suitable with dark backgrounds)
Image Credit: www.manntechcomputersinc.com
Change Taskbar Button Stacked Window Behavior
Windows 7 taskbar groups together all the windows of a single application and displays them as thumbnails when you click on the app’s icon on the taskbar.
If you think it would be handier to have your Windows automatically open the last window when you click on the app’s icon, here is how you can make it happen:
1. Open Windows Registry Editor
2. Navigate to HKEY_CURRENT_USER\Software\Microsoft\Windows\Curre ntVersion\Explorer\Advanced
3. Right-click in the right-hand pane, select New -> DWORD (32-bit) Value
4. Rename the new DWORD value to “LastActiveClick”
5. Open the “LastActiveClick” DWORD and enter “1” in the “Value data” field.
6. Rename the new DWORD value to “LastActiveClick”
7. Open the “LastActiveClick” DWORD and enter “1” in the “Value data” field.
8. Click OK.
Enable Aero UI
Windows 7 comes with one of the best user interface features - Aero . Unfortunately, users with less than 128MB of video Ram, 1GHz CPU and 1GB of system memory can not see this feature in action.

If you have no chance to upgrade your hardware, here is a simple hack to force Windows 7 to enable Aero for you:
1. Open Windows Registry Editor
2. Navigate to HKEY_CURRENT_USER\Software\Microsoft\Windows\DWM
3. Right-click on the right-hand pane and create the following three DWORD entries and set value for each one:
Animations – set value to 0.
Blur – set value to 0.
UseMachineCheck – set value to 0.
4. Close Registry Editor
5. Now open the Start Menu, enter “cmd” and press Enter to open the Command Prompt.
6. Next, Enter the following commands and press Enter after each one:
Net Stop uxsms
Net Start uxsms
7. The last step is to right-click on your desktop and choose: Personalize/Windows Colors.
You’ve got the Aero interface… Enjoy!
Image Credit: www.iyogi.net
Windows 7 God Mode
If you haven’t heard of Windows 7 GodMode this hack for Windows 7 lets you access all of the control panel icons from within a single folder.
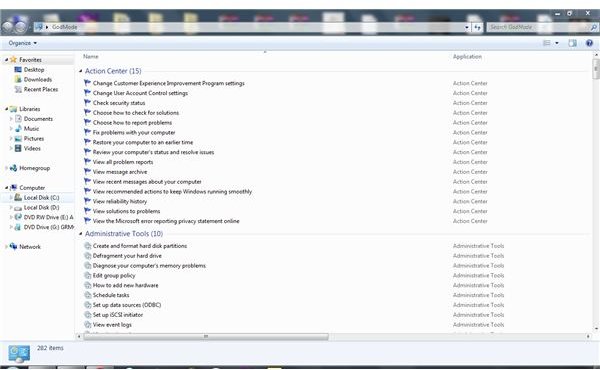
By creating a new folder and renaming it with a certain text, you will have a single place to do everything from changing network settings to changing the look of the mouse cursor, etc. To enter God mode, you will need to create a new folder and give it the following name:
GodMode.{ED7BA470-8E54-465E-825C-99712043E01C}
Once this is done, the folder’s icon will look like the control panel icon and you will find dozens of control options in the folder.
The GodMode can be very useful for those who easily forget where to access the device manager, the task scheduler or other control panel programs. You may even find in the folder a utility you did not know existed.
Image Credit: www.theitechblog.com
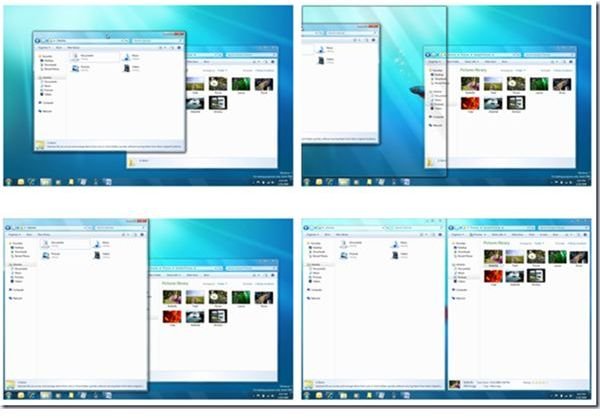
Turn Off Aero Snap
One Windows 7 hack that you might want to consider is the Aero Snap disable feature. Aero Snap is meant to make it easy for you to arrange windows on the desktop. It reduces the size of the window half the width of yourdisplay when you drag it all the way to right or left. It also maximizes a window when you drag it to the top of the screen. But, if you do not find this feature for your use, you can disable it. Here is how:
1. Open Windows Registry Editor (Open Start Menu and enter “regedit” in the search bar then press Enter)
2. Navigate to HKEY_CURRENT_USER\Control Panel\Desktop.
3. Double-click on “WindowArrangementActive” in the right pane to open it.
4. Change the number of the “Value data” field from 1 to 0.
5. Click OK.
You’re done.
Image Credit: geekswithblogs.net
Change the Delay Time of Aero Peek
Aero Peek in Windows 7 is a better substitute for the old Windows XP/Vista Show Desktop button. When you will bring your mouse cursor onto the icon at the far-right of the taskbar, all your open windows will minimize, showing your Desktop. As a hack for Windows 7 this one will simple help to eliminate the delay that occurs while using Aero Peek.
But there is a delay time associated with it. And if you want, you may shorten it. Here is how:
1. Open Windows Registry Editor
2. Navigate to HKEY_CURRENT_USER\Software\Microsoft\Windows\CurrentVersion\Explorer\Advanced
3. Right-click in the right-hand pane, choose New -> DWORD Value
4. Name the new DWORD “DesktopLivePreviewHoverTime”
5. Double-click “DesktopLivePreviewHoverTime” to open it.
6. Select “Decimal” under “Base” and enter the delay time (in milliseconds) in the “Value data” field.
7. Click OK
You are done.
Change the Delay Time of Taskbar Previews
One of the coolest features of Windows 7 is Taskbar thumbnail previews. The thumbnail previews appear when you bring your cursor over the Taskbar icon of a currently running application. But when you do this, the previews do not appear immediately. Fortunately, it is easy to speed them up. Here’s how:
1. Open Windows Registry Editor.
2. Navigate to HKEY_CURRENT_USER\Software\Microsoft\Windows\CurrentVersion\Explorer\Advanced
3. Right click in the right-hand pane and select New -> DWORD Value.
4. Name the new DWORD “ExtendedUIHoverTime"
5. Double-click on the new DWORD to open it.
6. Select “Decimal” under “Base” and enter the delay time (in milliseconds) in the “Value data” field.
7. Click OK
When you hover your cursor over one of the previews, all the other windows will automatically disappear and there is a delay time associated with this, too. To change this, create another DWORD in the same Registry location and name it “ThumbnailLivePreviewHoverTime”. Edit this DWORD and set its value to whatever you want (in milliseconds).
Delay times may not be the biggest or best Windows 7 hack but they do come in handy and can make your viewing experience a bit more streamlined.
Change the Windows 7 Log-In Screen
Now that you have upgraded to Windows 7 for the first time, are you unimpressed by its log-in screen? If so, then use this Windows 7 hack to change it. Here is how:
1. Open Windows Registry Editor
2. Navigate to ‘HKEY_LOCAL_MACHINE\Software\Microsoft\Windows\CurrentVersion\Authentication\LogonUI\Background’.
3. Double-click the DWORD value called “OEM Background” to open it. When it opens, enter 1 in the Value data field.
Note: If OEM Background is not there, just create it.
4. Locate the background image you would like to display on the log-in screen. It must be a JPEG file that is less than 245 kb in size.
5. Copy the image you want to use into the ‘%windir%\system32\oobe\info\backgrounds’ folder. (Folder doesn’t exist? Just create it!)
6. Rename the image to backgroundDefault.jpg
7. Reboot your computer to check the new log-in background is working.
Alternatively, use Logon Screen Rotator to do all the hard work for you. It lets you choose multiple images and will display a different one every time.
Enable Quick Launch
1. Right-click anywhere on the taskbar and choose New Toolbar
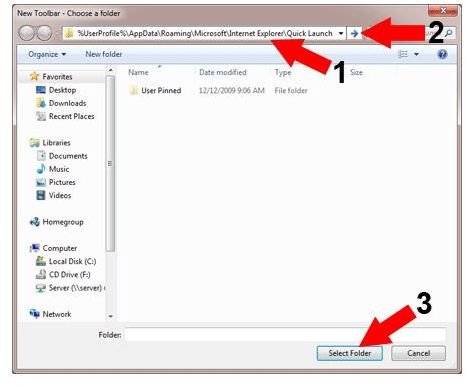
2. In the new window that opens, enter the following location
%userprofile%\AppData\Roaming\Microsoft\Internet Explorer\Quick Launch
3. Click on the “Select Folder” button
You will immediately see the Quick Launch toolbar on the taskbar.
The Quick Launch we used to see in XP and Vista didn’t have text. To hide it in Windows 7, click on the dotted lines and deselect “Show Title” and “Show Text” from the menu.
Image Credit: www.lancelhoff.com
Personalize the Internet Explore 8 Title Bar
If you use IE8 in Windows 7, you have probably seen the text that is shown in the browser’s title, which says “Windows Internet

Explorer” in the end of every webpage name. Wouldn’t it be nicer to change it to something of your own choice? Let’s do it:
1. Open Windows Registry
2. Navigate to HKEY_CURRENT_USER\Software\Microsoft\Internet Explorer\Main
3. Right-click in the right-hand panel, select new -> String value.
4. Name the new String value to “Window Title”
5. Double-click on Window Title and enter your personalized title in the “Value data” field.
6. Click OK
This was my list of top 10 Windows 7 hacks. If you know another hack that can alter Windows 7 behavior, improve performance, change interface or do something that would astonish a Windows 7 user, please share it with us in the comments box below.
Image Credit: Personal Computer


