What are Windows 7 administrative shares are and how do you enable administrative shares under Windows 7.
Overview
Administrative shares, sometimes called amin shares, are hidden shares accessible by members of the administrator group. Administrative shares are created by default for each logical drive (C:, D:, etc) you have on your computer and for a few other special folders. The administrative share allows users access to the root of a partition and is useful for performing remote maintenance or deploying software using automated means. For more information about logical drives in Windows 7, check out my article entitled “How Do I Set Up A Logical Drive Using Windows 7 .”
If you have a small home network, you may have noticed you are unable to access Windows 7 admin shares across the network. Windows Vista and Windows 7 block the ability for local users on remote computers to access administrative shares by default. The shares exist, but are not accessible.
Enable File and Print Sharing
The first step to enable administrative shares is to make sure you have File and Print sharing enabled.
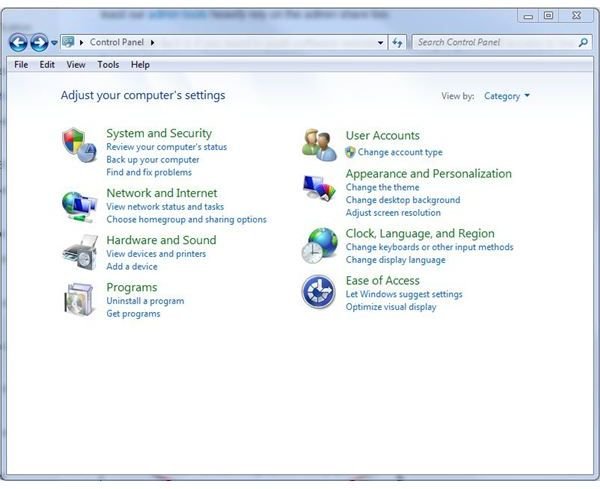
- Click the Windows button (formerly the Start button) and navigate to Control Panel.
- Click the link entitled “View network status and tasks” under the Network and Internet heading (Figure 1).
- On the left-hand side, click the link to “Change advanced sharing settings”.
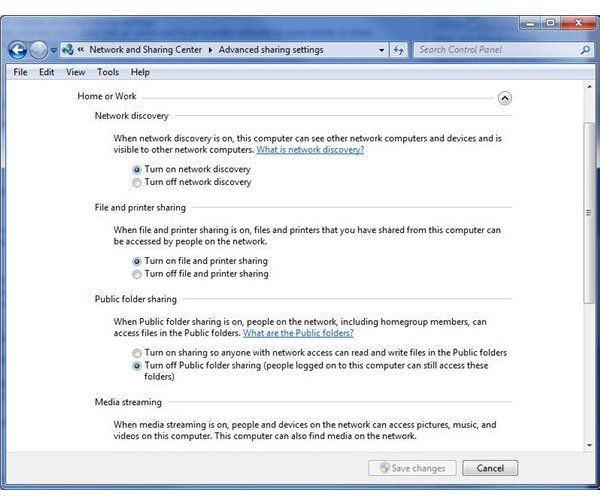
- In the window that opens, expand the “Home or Work” profile and browse to the “File and printer sharing” section.
- Click the link to “Turn on file and printer sharing” (Figure 2).
- Click Save Changes.
Note that this will only enable file and printer sharing for your home network. If you connect your computer to a public or “unknown” network, your shares will still remain disabled. If you want to change this, follow the above procedure for the “Public” profile.
The next step is to make the administrative shares accessible to local users.
Enabling Windows 7 Administrative Shares
The next step is to go into the registry and give local users the ability to access remote administrative shares. It seems a bit scary, but it’s not that bad.
- Click the Windows button and in the Search box, type “regedit”. If you get a User Access Control warning, click Yes.
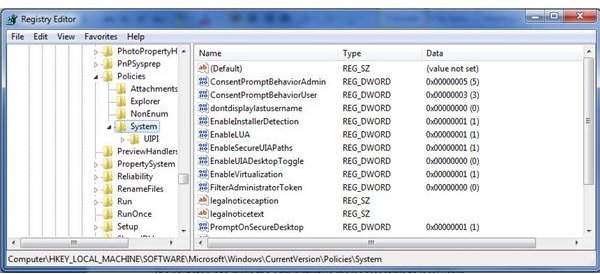
- The Registry Editor will open. Expand the items until you get to HKEY_LOCAL_MACHINE\SOFTWARE\Microsoft\Windows\CurrentVersion\Policies\System (Figure 3).
- Click Edit from the top menu then New and then DWORD.
- Type in “LocalAccounttokenFilterPolicy” for the name of the DWORD. Hit ENTER.
- Double click the new entry and enter “1” for the value. Click OK.
- Close the Registry Editor and reboot your computer.
Accessing the Administrative Share
After your computer has rebooted, you should be able to access it from your remote computer. On the remote computer, go to the Windows button and in the Search box type “\\computername\c$” to access your computer’s C: drive. Note – don’t include the quotes, but do include the backslashes (\).
That’s it! To access other shares, you can replace the c$ from above and replace with the name of the logical drive letter followed by dollar sign ($).


