If you’re migrating or upgrading from Windows Vista to Windows 7, you might opt to make your own backup arrangements rather than letting Windows 7 transfer your files and settings - this guide shows you how.
Restoring Vista Data in Windows 7
An upgrade from Windows Vista to Windows 7 should be pretty straightforward, with all of your required files migrated to the new operating system.
However it’s probably best to take precautions and run a manual file backup beforehand.
This is certainly true for anyone moving to a new machine – thanks to the Backup and Restore Center on both operating systems, you can backup and restore data from Windows Vista onto Windows 7. Using the Backup and Restore Center is similar to using a third party backup and restore tool; however this is fully integrated into Windows.
To successfully open Vista backup in Windows 7, all you need to do is use the Backup and Restore Center and restore the files and folders you backed up!
Backing up Data in Vista
To begin, you need to have created a back up in Vista in the correct way.
Go to Start, enter Backup in the Search box and open the Backup and Restore Center. From here, choose the Backup Files option.
(While using the Backup Computer option is attractive, this file cannot be restored in Windows 7.)
In the Backup Files screen, select Full Backup. If it is the first time you have done this, you will be able to select the file types and locations for backing up data. However if you have performed this task previously, an incremental backup will be performed. To avoid this, use the Change backup settings option to allow you to reconfigure.
You can back up either to DVD or an external storage device; backing up to a DVD will display an option to format the disc first.
Open Vista Backup in Windows 7
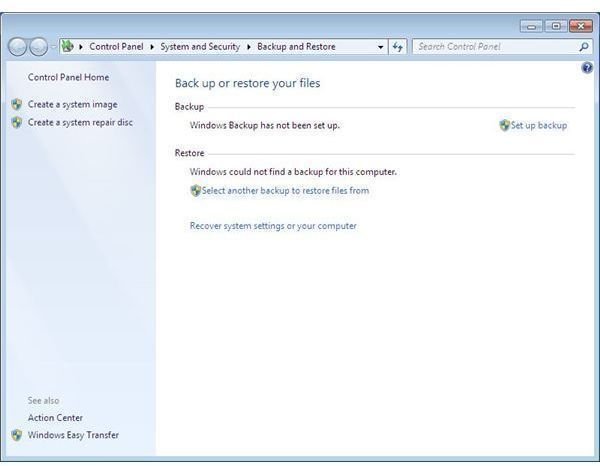
Restoring your data on Windows 7 also makes use of the Backup and Restore Center.
To begin, place your backup disc in the DVD drive or connect your external storage device.
Next, go to Start, enter Backup in the Search box and open the Backup and Restore Center. Under the Restore heading, choose Select another backup to restore files from.
The next screen gives you four options – either check the box labelled Select all files from this backup, which will restore all files from the backup or use the Search function, Browse for files or Browse for folders.
If you choose to search or browse, you will be able to Add to the list of files or folders to be restored; click Next when this is complete.
You can then choose a location to restore to. If you have the same account name on your Windows 7 as on your Vista PC, then you can Restore to original location. Otherwise, choose a new location.
Once completed, your required files will be restored as expected!


