Using Windows Fax and Scan, you can scan directly from your computer. However, you must have access to a fax modem or server and set up your computer first. Learn how to fax from Windows 7.
Faxing Requirements
Before you attempt to learn how to fax from Windows 7, you need to make sure you either have a fax modem, which is connected to an analog phone line, installed on your computer or have access to a fax server on your network. Windows Fax and Scan will not work without one or the other. Once you have established that you do have a fax modem or server available to you, you can proceed with the setup.
Set Up Your Computer
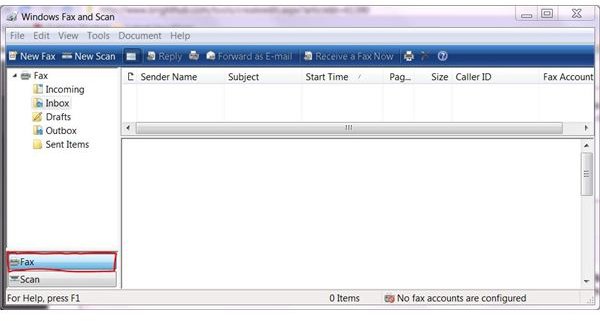
If you are using a fax modem to send faxes using Windows 7 Fax and Scan, begin setup by clicking Start. Type Fax into the Instant Search box at the bottom of the Start menu and select Windows Fax and Scan from the search results under Programs. Click Fax at the bottom of the Fax and Scan navigation pane to start the Fax Setup Wizard. Select Connect to a Fax Modem. Follow the steps in the wizard to complete the setup.
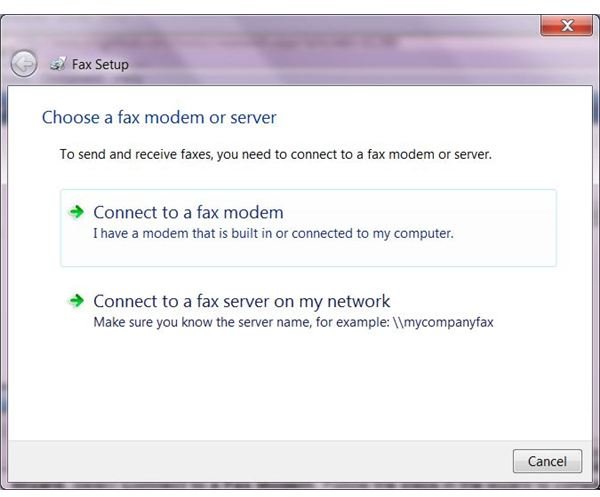
If you are using a fax server, click Start and type fax into the Instant Search box at the bottom of the Start menu. Select Windows Fax and Scan from the search results under Programs. Click Fax at the bottom of the Fax and Scan navigation pane to start the Fax Setup Wizard. Select Connect to a Fax Server on My Network. Enter the location of the server and click Next. Enter a name that will help you recognize the server and click Done.
Sending Faxes
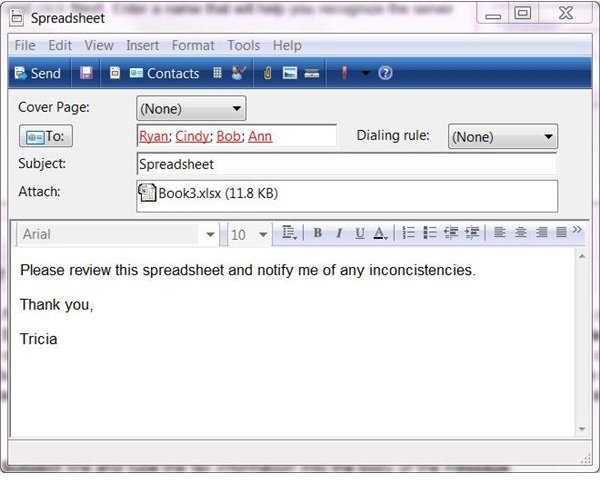
Once you have set up Windows Fax and Scan, you can learn how to fax from Windows 7. Click Start and type fax into the Instant Search box at the bottom of the Start menu. Select Windows Fax and Scan from the search results under Programs. Click New Fax on the toolbar. A New Fax window will open. Select an option in the Cover Page drop-down list. If you want to send a fax to one or more of your Outlook or Windows Live Mail contacts, click the To button and select the contact or contacts. You must have the fax numbers for these contacts listed in their contact information in order to use this method. Otherwise, type in a fax number. Separate multiple numbers using semicolons.
Type a subject for the fax in the Subject line and type the fax information into the body of the message. To include a file from your computer, click the Insert button and select the file to attach.
Receiving Faxes
Now that you know how to fax from Windows 7, you can also receive faxes directly to your computer. There are two ways to do so. The first method is to set up Windows Fax and Scan to receive faxes automatically. The downside to this is that the modem will answer all incoming calls, so you must pick up the phone before the modem answers any calls that are not faxes.
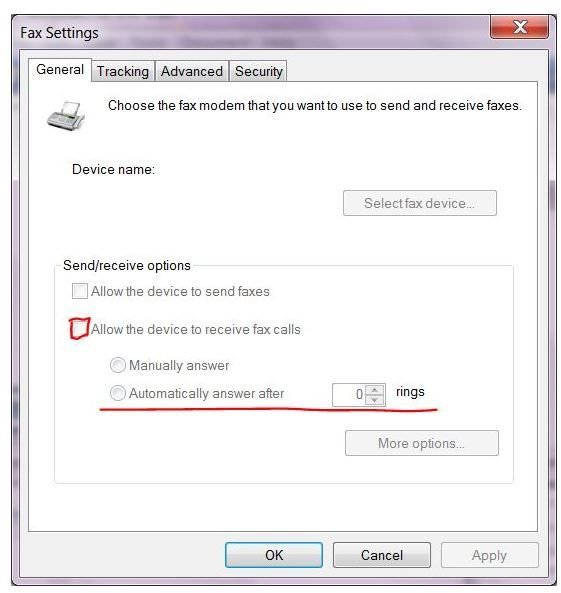
To set up Fax and Scan to receive faxes automatically,click Start and type fax into the Instant Search box at the bottom of the Start menu. Select Windows Fax and Scan from the search results under Programs. Go to the Tools menu and select Fax Settings. Go to the General tab of the Fax Settings dialog and select Allow Device to Receive Fax Calls under Send/Receive. Click Automatically Answer After and enter the number of times you want the phone to ring before the modem picks up the call. Click OK.
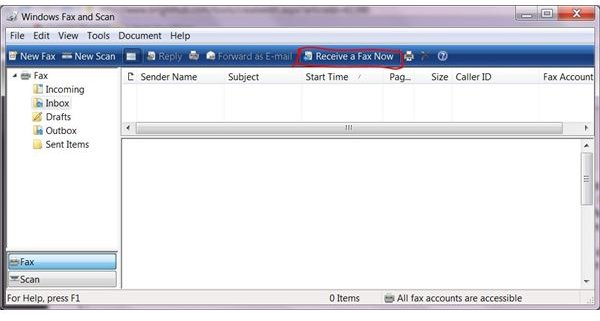
If you do not select this option, Windows will notify you of incoming calls. If you wish to answer a call as a fax, click Start and type fax into the Instant Search box at the bottom of the Start menu. Select Windows Fax and Scan from the search results under Programs. Click Receive a Fax Now on the toolbar. The Fax Status Monitor will display the progress and alert you when the fax has been received.
Related Articles
For more Windows 7 help and how-to’s, read Windows 7 Wireless Setup & Home Networking for Vista, XP, and Windows 7 , An Overview of Windows 7 Firewall and Using Windows 7 Touchscreen Features .


