Microsoft Windows has traditionally had the ability to change backgrounds, colors, screen savers and sounds, but these features have been combined in Windows 7 to allow user-customizable themes. It’s easy to make a custom Windows 7 theme, requiring only a few minutes to set it up the way you want.
Themes in Windows 7
Themes in Windows 7 combine a number of user customization options, allowing you to change the color scheme, wallpaper, screen saver, and sound scheme with the click of a button. Multiple user-created themes can be saved so that you can easily change from one theme to another. Themes can even have multiple wallpaper selections set within them, with Windows 7 automatically changing the wallpaper to another within the theme in intervals that are set by the user.
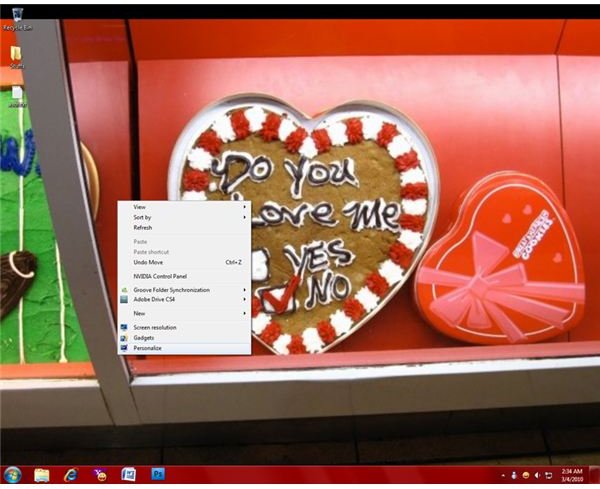
Creating a custom Windows 7 theme is easy and requires no advanced knowledge of the Windows operating system. You don’t even have to open the Start menu. Simply right-click on the Windows Desktop and choose “Personalize” from the context menu that opens to access the theme personalization window.
Creating a New Theme
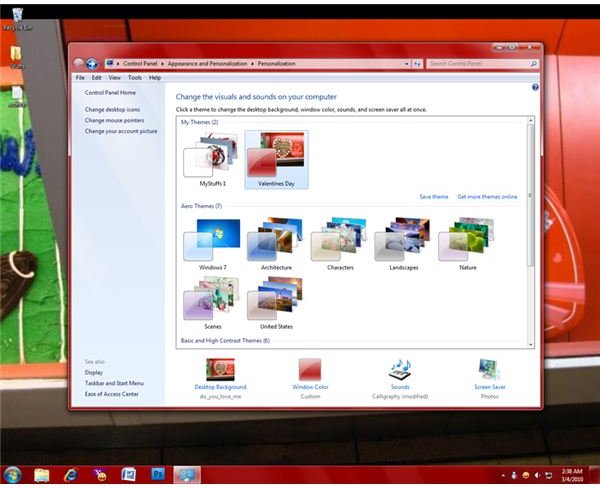
When the theme personalization window opens, you will be presented with a list of all of the themes currently saved on your computer. The currently loaded theme will be highlighted, and the four components that make up the theme (“Desktop Background”, “Window Color”, “Sounds”, and “Screen Saver”) will be previewed below the themes list. To begin creating a custom Windows 7 theme, simply click on one of these four items in order to change its current settings. A new unsaved theme will be created automatically.
Desktop Background allows you to choose one or more images that will be displayed as the background for your theme; multiple images will be displayed in a slide show format that you can set the time interval for (from 10 seconds to a full day). Window Color allows you to adjust the color, intensity, and transparency of both the Taskbar and open windows using either the provided adjustment sliders or the color mixer to find just the color that you want. Sounds allows you to choose an existing sound scheme or to create a new one based on your preferences. Screen Saver lets you choose the screen saver that Windows 7 will use and customize its settings.
Finalizing and Saving Your Theme
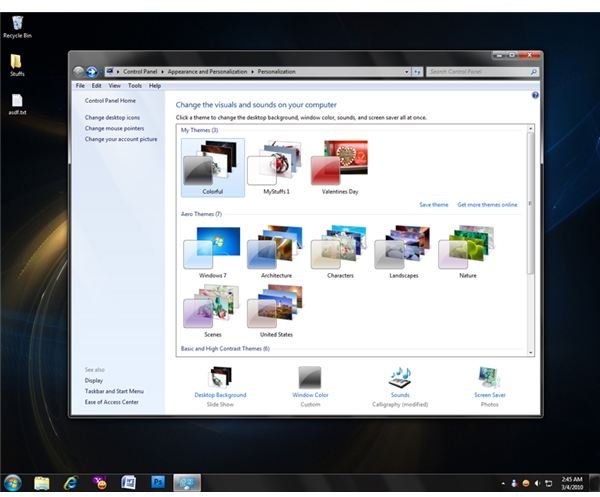
Once you have finished making all of the changes that you want to your Windows 7 theme, it’s time to save it as an entirely new theme. This can be done either by clicking on the “Save Theme” link on the right side of the user themes section, or right-clicking on the theme and clicking “Save Theme” in the context menu that appears. You will also have the option to save the theme for sharing with other Windows 7 users, creating a file with the .themepack extension that can be downloaded and installed by others. This allows you to easily make a custom Windows 7 theme that others can enjoy as well.


