The Quicklaunch toolbar in Windows 7 is not enabled be default. If you like the familiarity of using the Quicklaunch in previous versions of Windows, you can easily restore the Windows 7 Quicklaunch toolbar.
Windows 7 Quicklaunch
While the Windows 7 taskbar, now called the Superbar, provides easy access to your favorite programs, folders, and shortcuts, many users still prefer to use the Quicklaunch toolbar they are familiar with in previous versions of Windows. Fortunately, the Quicklaunch toolbar was not omitted in Windows 7, it is just not enabled by default in Windows 7. While the process of restoring the Quicklaunch is fairly involved, with a little guidance, you can easily restore the Windows 7 Quicklaunch toolbar to regain quick access your favorite programs. Follow the steps outlined below to restore access to the Windows 7 Quicklaunch toolbar.
Restoring the Quicklaunch Toolbar
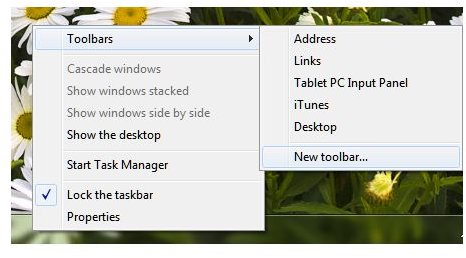
- On an empty space on the Windows 7 taskbar, right-click, mouse over “Toolbars” and select “New Toolbar…”
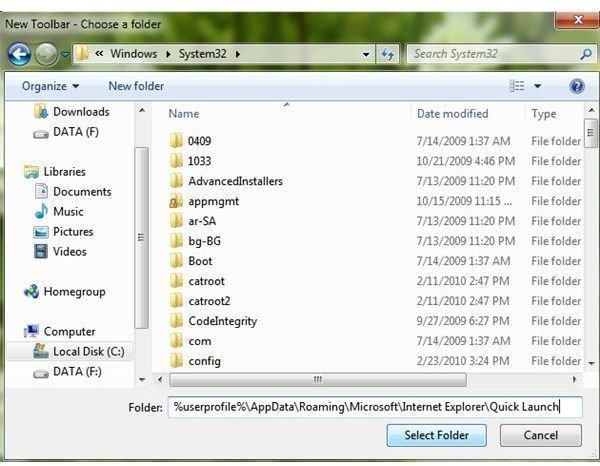
- A window titled “New Toolbar - Choose a folder” will pop up.
- In the “Folder” text box, enter the following string - “%userprofile%\AppData\Roaming\Microsoft\Internet Explorer\Quick Launch” without the quotes, and click “Select folder.”
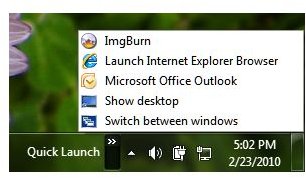
- On the right of the taskbar, you will now see a toolbar titled “Quick Launch.”
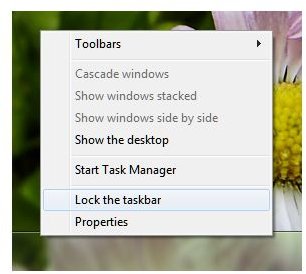
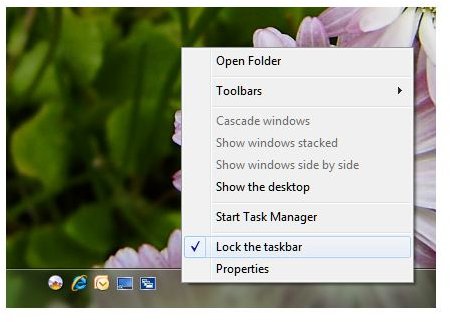
- Right-click on an empty space on the taskbar and ensure “Lock the taskbar” is unchecked.
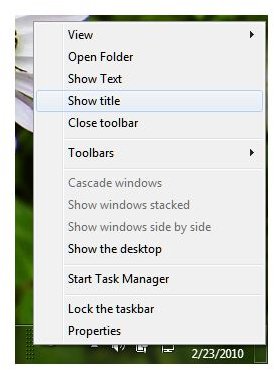
- Right-click on the Quicklaunch toolbar and uncheck “Show text” and “Show title.”
- Drag the dotted lines on the Quicklaunch toolbar to show your icons.
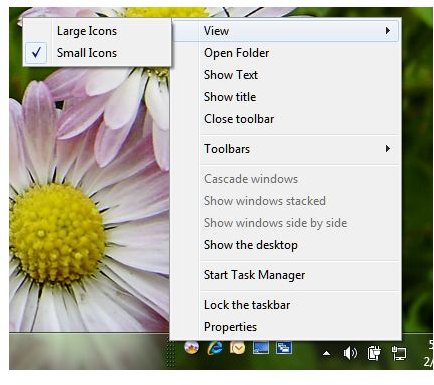
- If you would like to make the icons larger, right-click on the Quicklaunch toolbar and select “View” and click on “Large icons.”
- By default, the Windows 7 Quicklaunch toolbar is on the right of the taskbar. To move the Quicklaunch toolbar to the left, click and drag the dotted lines of the Quicklaunch toolbar and move it to the right or desired location.
- Once you are satisfied with all your options and positioning, right-click on an empty space on the taskbar and re-check “Lock the taskbar.”
- You must save your theme so your Windows 7 Quicklaunch toolbar is saved upon reboot.
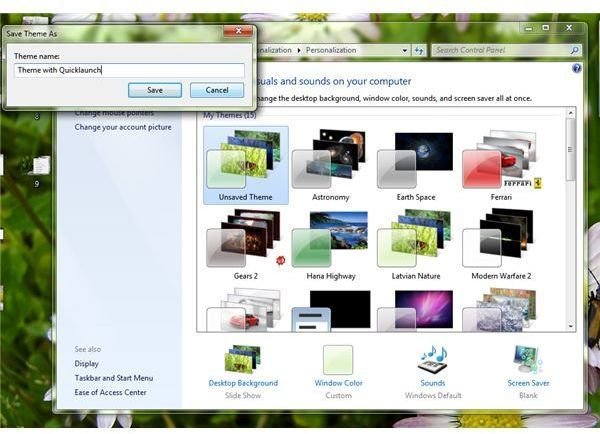
- To save your current theme, right-click on your Desktop and select “Personalize.”
- Your Windows 7 themes are listed, right-click on your unsaved theme and select “Save theme.”
- Enter a name for your theme. (Example: Theme with Quicklaunch)
- Close the Themes Windows.
- You now have a Windows 7 Quicklaunch toolbar.
Step-by-Step Images for Enabling the Quicklaunch Toolbar


Using the Quicklaunch Toolbar
You can use the Windows 7 Quicklaunch toolbar in the same way you have used it in previous versions of Windows. To add programs to the toolbar, simply drag and drop the program shortcut you wish to add. To remove a program from the Quicklaunch toolbar, right-click on the program shortcut you would like to remove and click “Delete.” If you find that the Quicklaunch toolbar is of no more use to you, you can delete the Quicklaunch toolbar by right-clicking on the Quicklaunch toolbar, mouse over “Toolbars,” and uncheck “Quick Launch.” Once you have removed the Windows 7 Quicklaunch toolbar, you will need to repeat the above steps to regain access to Quicklaunch.


