Before making certain types of changes to your Windows 7 PC, it’s a good idea to create a restore point. This process is relatively quick and easy, and it can save a lot of headaches later on down the line.
Why Create Restore Points?
In Windows 7, you can create a restore point that stores important information about your computer’s current state. By default, the operating system automatically creates restore points before major changes are made to your system, but often it’s a good idea to manually create them rather than trust that the operating system will do that job for you. For instance, if you are planning to make changes to the Windows registry or if you’re going to install a beta software application, you definitely want to have one that you can use just in case anything happens that messes up your system or causes your PC to crash.
The process of creating a restore point in Windows 7 is actually fairly straightforward and only takes a few moments. The steps required for that process are explained below.
Steps for Creating a Restore Point
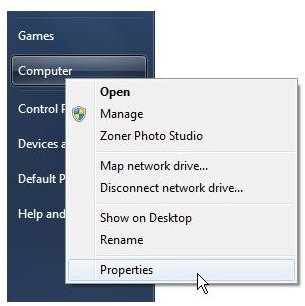
Step 1: Click on the Windows Start button, then right-click on Computer and choose Properties. (Click on any image to see a larger view.)
This will open the System category in the Windows 7 Control Panel.
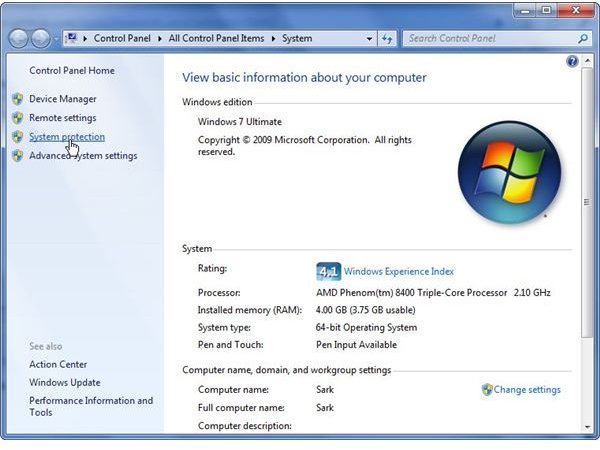
Step 2: Click on System protection in the left panel as shown in the screenshot above.
Step 3: The System Properties dialog box should now appear on your screen with the System Protection tab open.
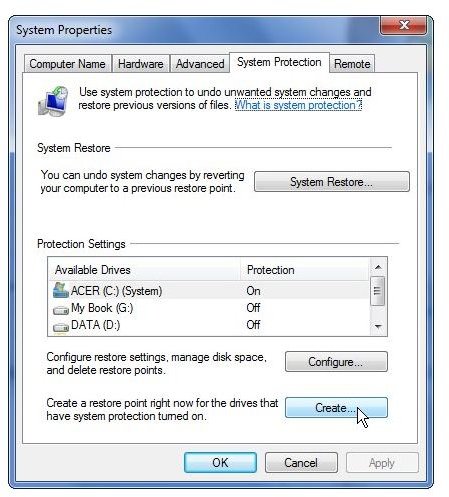
Click on the Create button to begin creating a new restore point.
Step 4: The first thing you will need to do is enter a name for the restore point. You can enter anything you like, but it’s helpful to enter a descriptive name so you can easily find it later if you need it. For example, if you are creating one before downloading a particular software update, you could enter a name that reflects that information.
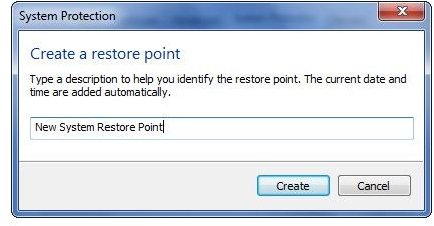
Click the Create button to continue.
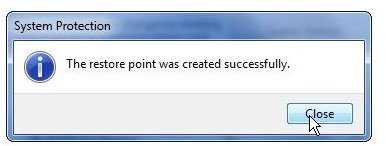
Step 5: While it is being created, you’ll see a progress bar on your computer screen. When complete, click the Close button to return to the System Properties dialog box.
Before closing the System Properties box, you can check to make sure that the point you created is available. To do this, click on the System Restore button and then select the radio button next to Choose a different restore point.
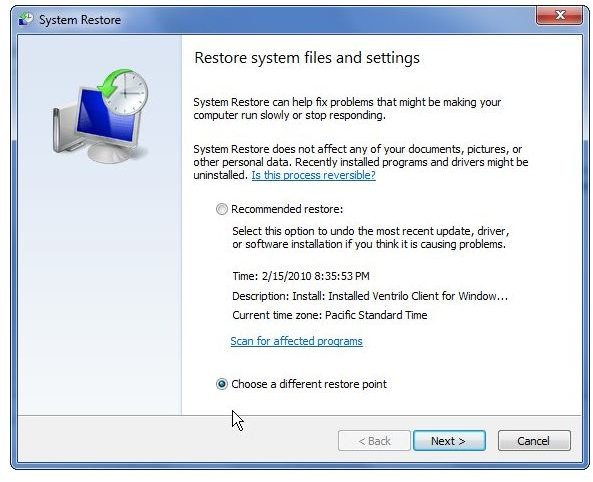
Then, click the Next button and you’ll be presented with a list of restore points along with the dates they were created like the one shown below.
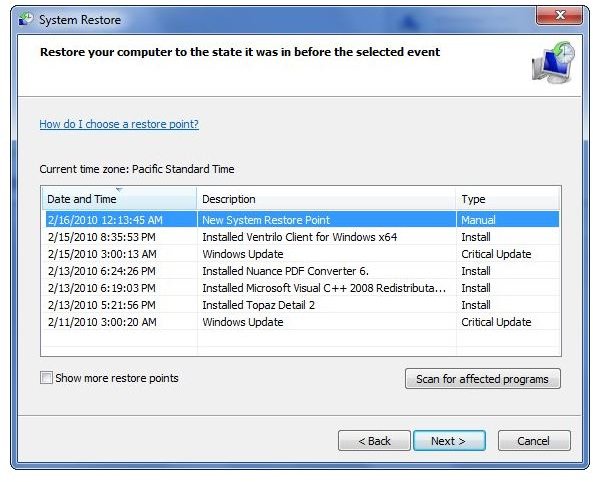
The point you just created should be at the top of the list. Just click the Cancel button to exit this list and return to the System Properties dialog box. Now you can close this box and the Control Panel.