This article will discuss how to set up and install a printer in Windows 2003 Server. The whole process is relatively painless and will save you time in the long run allowing you to set up new clients without needing to manually connect to the printer and install drivers.
Overview
If you have more than a few users at your business but only a single printer, you may find it extremely beneficial to set up a network printer for all of your users to share. This article will make a few assumptions before we get started –
-
You have a functional Windows 2003 Server.
Advertisement -
You have a functional network supported printer.
-
You have configured the printer with a static IP address (see the manufacturer’s manuals for help with this).
Advertisement -
You have the driver disc for the Printer.
Installing and Sharing the Printer
The general steps to this will be to install the printer on the server just like it was a local printer. After that we’ll share out the printer so clients can connect to it.
-
Log into the Windows Server.
-
Start the driver installation by following the manufacturer’s instructions. Typically this involves inserting the driver disc and running Setup.
Advertisement -
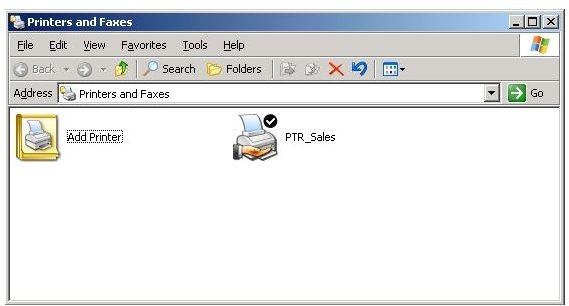
After the drivers are installed, open the Printers control panel by going to Start, Printers and Faxes.
-
Double click the Add Printer icon.
Advertisement -
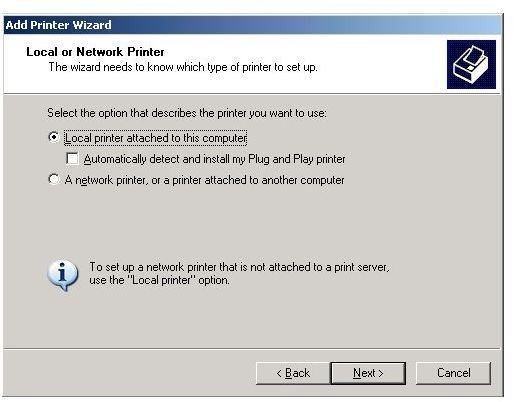
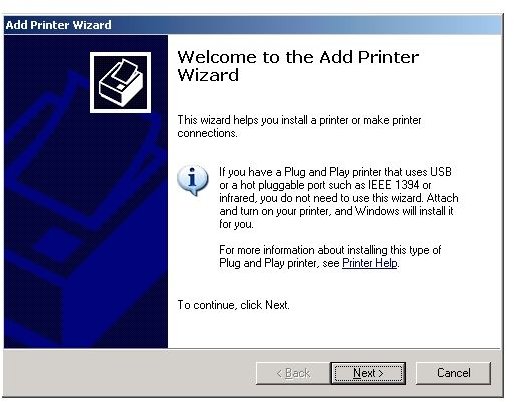
Click Next on the Add Printer Wizard (Fig 1).
-
Check the “Local Printer attached…” button and uncheck the “Automatically detect…” checkbox (Fig 2) – this may seem counter-intuitive since the printer is on the network and isn’t connected directly to server. Click Next.
Advertisement -
Select the “Create a new port” button and select “Standard TCP\IP Port”. Click Next (Fig 3).
-
The “Add Standard TCP\IP Printer Port” wizard starts. Click Next.
Advertisement -
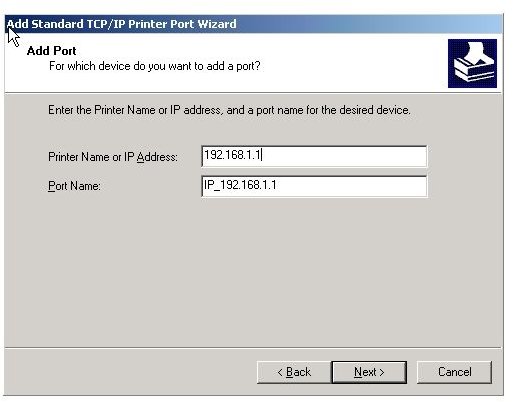
Enter the IP address of the printer and click Next (Fig 4).
-
Click Next to Finish the Wizard.
Advertisement
-
In the Install Printer screen, select the Manufacturer and model and click Next.
-
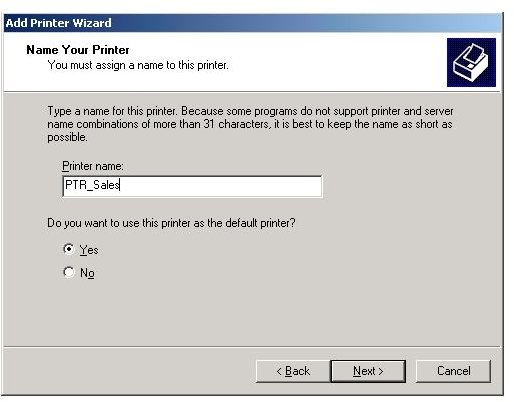
Give the printer a name and click Next (Fig 5).
Advertisement -
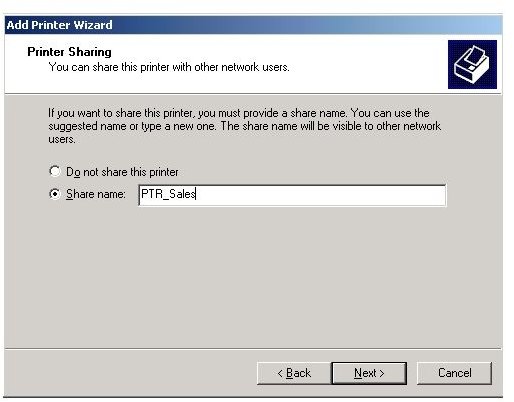
On the Sharing screen, give the printer a share name (Fig 6). When the user goes to add the printer, they will be able to connect to the server and will see the printer listed as a shared device (Fig 7). Click Next.
-
You can now give the printer a Location and Comment if you wish. Click Next.
Advertisement -
You can now print a test page if you wish. Click Next when ready.
- On the summary screen, click Finish.
You (and your users) will now be able to use the shared printer by going to Start, Run and typing in “\\
Images