A database form, particularly one with many fields, can quickly become cumbersome and cluttered. By adding tabs to the form structure, you can make the MS Access form more functional and attractive. This article shows your how.
Why add a tab to a form?
Adding a tab to a Microsoft Acces form can reduce clutter and make the form easier to use. If the form has a number of control buttons, segregating these buttons on individual tabs will also reduce confusion and make the form easier to navigate. We can create a tabbed form from scratch by beginning with a blank form, associating a table (or query) with the form, adding the tab control and dragging and dropping the field controls to the tabs.
It is important to remember that the field controls must be dragged and dropped and not added by double clicking. Double clicking the field controls adds the fields to the background of the form, not the tabs. Likewise, if you add a tab control to an existing form and decide to move existing fields between tabs, remember to cut and paste the field controls.This article will demonstrate how to create a tabbed form from scratch.
Follow these steps to create a tabbed form:
For the purposes of this demonstration, we already have our database “Sample Sapphire Sales” and will use the fields in its “Sales” table for our tabbed form.
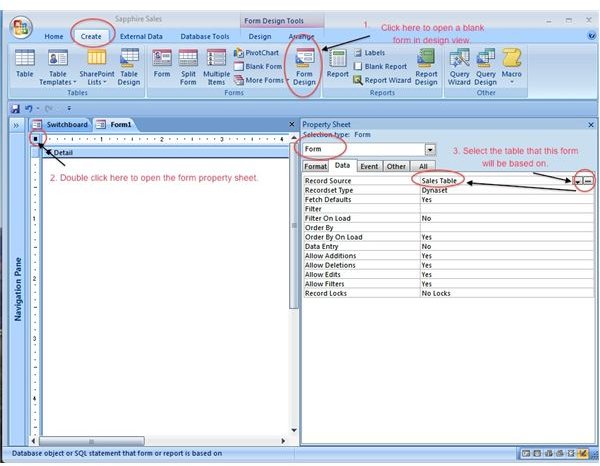
Step 1 - Open the database and create a blank form in Design View.
Step 2 - Using the form Property Sheet, associate the form with a table in your database.
The screenshot below illustrates the first two steps:
**
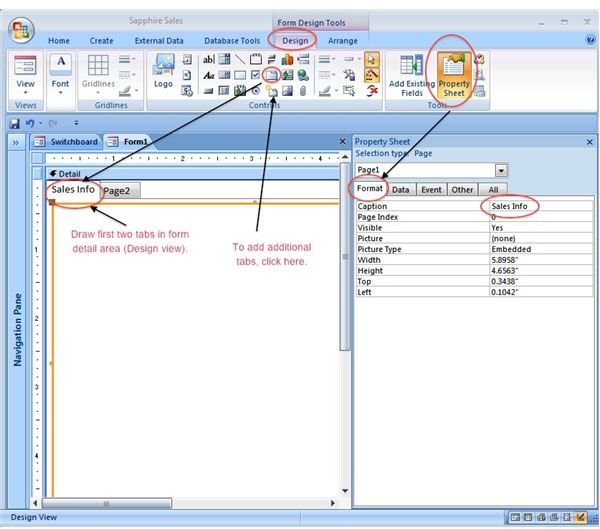
Step 3 - Create the tabs on the form by selecting the form Design tab and clicking on the Tab Control in the Controls Group.
♦ The Icon will changed to a tabbed square.
♦ Draw the tab area from the upper left corner of the form detail section.
♦ Two generic tabs will appear inside the Form Detail area.
Step 3a - Rename the tabs by double clicking on the tab title (“Page 1/Page 2” are generic tab labels that can be given new names.)
♦ The form Property Sheet will open.
♦ Click on the Format tab and add whatever you want to name the tab. (We’ll call the first tab “Sales Info.” Our second tab will be renamed “Comments.”)
♦ Each tab will be renamed once you enter its new title in the Caption box of the Property Sheet Format tab.
(Note: You can add additional tabs by clicking on the Insert Page icon just below the Tab Control icon. (See the screenshot below.)
The screenshot below illustrates Steps 3 and 3a:
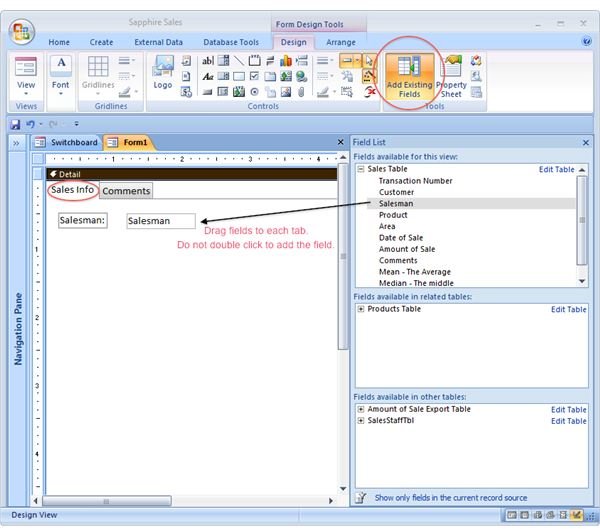
Step 4 - Add fields to your tabbed form.
♦ In the form Design View click on the first tab to make it active.
♦ Click on Add Existing Fields to open the Field List.
Important: Select and drag (do not double click) the fields to add them to the tabs.
The screenshot below illustrates Step 4:
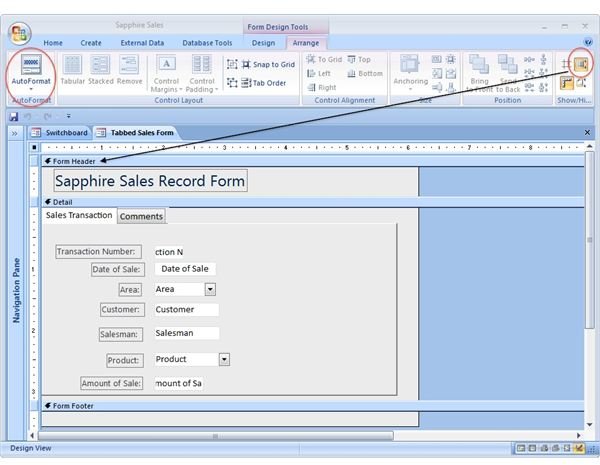
Step 5 - Improve the appearance of your tabbed form.
♦ When your fields have been added and aligned (use the Arrange tab in form Layout View), do the following:
◊ In the form Design View click on the Auto Format group (first on the left) and select a form color and font scheme.
◊ Still in the form Design View, click on the Form Header/Footer icon in the Show/Hide group (last on the right) to add a new form header.
The screenshot below illustrates Step 5:
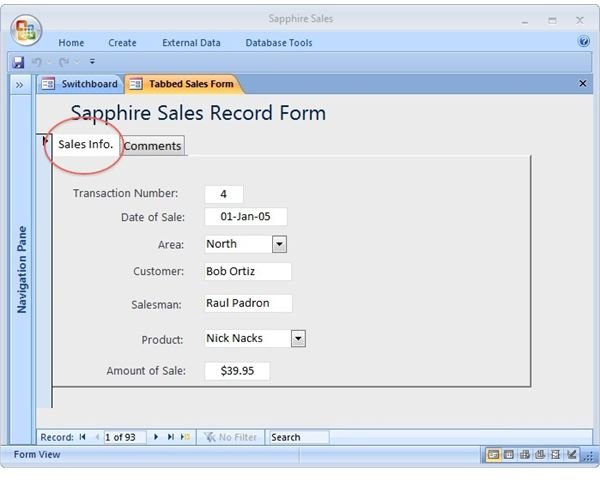
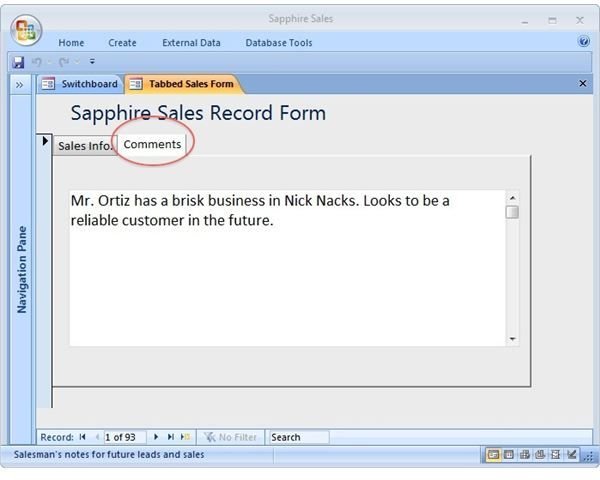
A completed form with tabs:
More Information on Creating Tabbed Forms:
Microsoft Office Online: Create a tabbed form
Make Access forms easier to navigate with tab controls


