Have you ever thought - purely for reasons of productivity - that a second (or third) monitor would be a great asset? Then reality reasserts itself. Dual monitors require a dual-output video card and a pricey new monitor. What if you could use your old laptop as the secondary monitor? Now you can!
Use Your Old Laptop as a Second Monitor
By now, most computer users have thought about adding a second (or third) monitor to their PC. Multiple monitor setups are beautiful, and having all that screen real estate allows one to view more of their work (or play) and get the “bigger picture.”
For most folks, however, outside of graphics designers, computer programmers, and financial traders, multiple monitor setups remain a dream due to the cost and complexity involved. Part of the cost is a two-headed or three-headed video card, and then there’s the cost of the additional monitor or two. Many users have already invested in one, possibly big, monitor to use as their primary and only display screen. This makes it desirable, then, to purchase a second monitor of the same size and resolution, and cost, as the primary monitor.
A dual monitor setup, with a video card able to capably drive it, provides all the features and performance of the primary screen on the secondary screen. This means that one can watch movies, television, or play games equally well on either monitor, or even stretch out an application so that parts of it appear contiguously on both screens.
But what if the second display is not needed for intensive tasks? What if you want to use it for mainly static things like watching for email and chat, and what if the purpose of the second display is actually to free up real estate on the primary display?
MaxiVista Download and Install
That’s the purpose of MaxiVista. It uses the local computer network, wireless or Ethernet (or Ethernet cross-over cable or FireWire) connection, to extend the Windows desktop to another PC. There are some considerations involved, which we’ll look at, but it works with Windows 2000 and up, including XP, Vista, and Windows 7 (in both 32-bit and 64-bit versions).
A free trial of MaxiVista is available from their website . The demo version works for 14 days or 50 startups, whichever occurs first. Hardware acceleration, OpenGL, and DirectX are not supported in Windows Vista or Windows 7- on either the primary PC or the secondary PC. This also means that Vista “Aero” effects are disabled when MaxiVista runs. This may elicit a groan from those who like their Vista “eye-candy,” but the previous version of MaxiVista didn’t work with the Vista display programming model (WDDM ) at all, so at least this is some improvement.
Since I tested MaxiVista on a 32-bit Vista desktop and a 64-bit Windows 7 laptop, I had to download both the 32- and 64-bit versions, which came in zip files of about 5 MB each. Unzipped, three files were exposed. These were “antivirus_check.txt,” which seem to only work with Avira antivirus, “Maxivista_Setup_PrimaryPC,” and “Maxivista_Setup_SecondaryPC.exe.” I dragged the secondary setup file into a shared folder and dragged it onto the desktop on the laptop using the network.
This network, by the way, is a simplified wireless network in which no one computer is the “boss” and the general rule is share and share alike. It works across Windows XP, Windows Vista, and Windows 7, and MaxiVista surprised me by how well it worked with it. You can read more about it in an article here on Bright Hub .
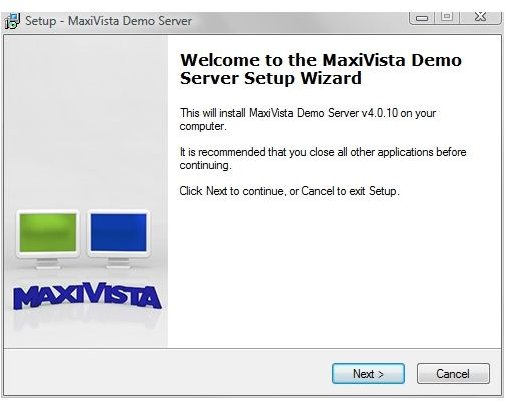
Installation of MaxiVista took less than a minute on the primary PC. Below are the first and last dialogs in the installation.
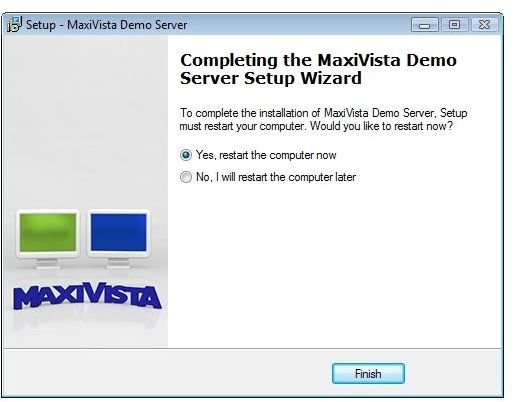
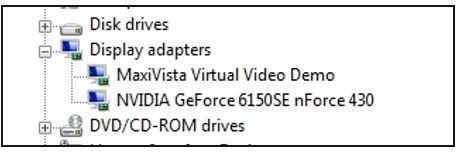
Since MaxiVista installs as a display driver, a reboot is necessary after installation. MaxiVista then shows up in Device Manager as a new Display Adapter.
Next: MaxiVista First Run, Settings and Adjustments
MaxiVista First Run
Acting on a childish impulse, the first thing I did was to drag an application so that it bridged from the desktop monitor to the laptop and shake it up and down with the mouse to find out how bad the lag was.
It wasn’t bad. The secondary display did not update quite as often as the primary, but there was no jerkiness involved. Then I looked down and noticed that my usual transparent anthracite Aero effects were gone, and in their place the Vista taskbar had became a not-uninviting glossy ebony. Gone, too, was the window dressing around applications, but it wasn’t anything terrible.
I dragged my email window to the second monitor. Then I started the Windows “Reliability and Performance Monitor” (perfmon.exe) on the desktop and looked at the network activity. It showed about 3 to 7 Kbps, which is about right for idling.
Then I dragged “Bitmeter2,” a simple, free application that I use to monitor broadband usage , to the second screen. Updating this tiny part of the screen increased the network activity to between 60 and 100 Kbps. This was still not much network activity, and a far cry from the (theoretical) 300 Mbps my Wireless-N network is supposedly capable of. (I couldn’t resist dragging perfmon as well to the second screen. That increased network activity to over 300 Kbps.)
MaxiVista Settings and Adjustments
Double-clicking the icon on in the notification area (“system tray”) of the desktop enabled the connection to the laptop. Then a splash screen that is not present on the purchased version “nags” for several seconds, and the background from the desktop is displayed on the laptop. There’s also a big rectangle that says “MaxiVista DEMO VERSION” in the center of the screen.
Right-clicking the same icon causes the main menu, as shown below, to pop up.
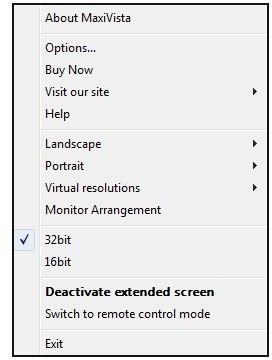
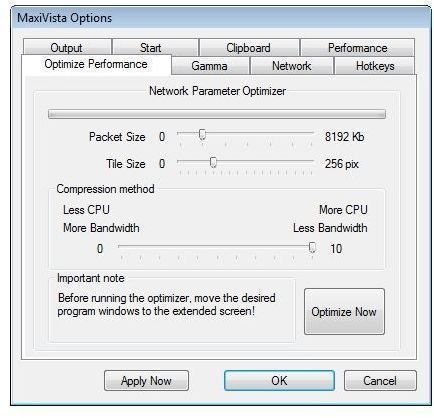
During the first run, MaxiVista runs an “Optimize Network Performance” scan. It suggests that you move the applications that you want on the secondary screen before starting the scan, and that you might want to try it in both 16- and 32-bit (display) modes to see if one holds a particular advantage on your hardware.
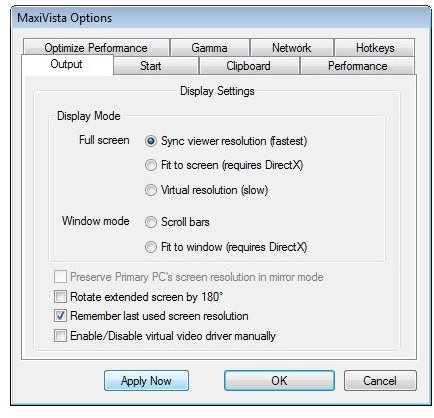
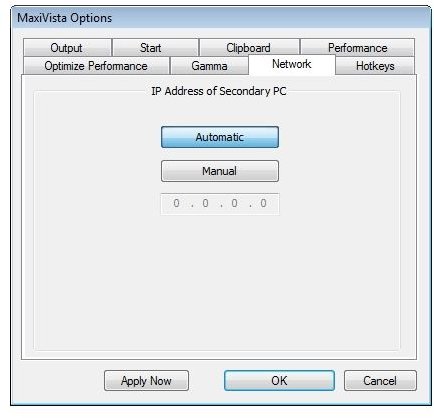
The same performance scan is found under the right-click menu: Options → Optimize Performance → Optimize Now. Other tabs concern Output (display and windowing mode), Start options, Clipboard settings, Performance (frames per second, JPG quality, compression method), Gamma (correction), Network (automatic or manual IP address for second PC), and Hotkeys.
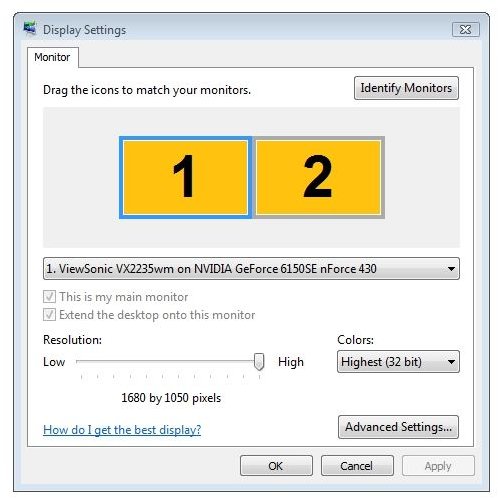
Right-click menu plus “Display Settings” brings up the standard Windows dialog with the primary monitor and video card or chipset showing. Monitor 2 is shown as “(Default Monitor) on MaxiVista Video Demo.” The “2” rectangle can be dragged and dropped to represent the real relation of the secondary screen to the primary. This is important because it determines the direction that the mouse pointer (and any dragged applications) will move to go to the second screen and return.
MaxiVista Usage Results and Considerations
As mentioned earlier, you won’t be using MaxiVista to watch highly graphical video applications on the secondary monitor. This is because it does not support hardware overlays. A hardware overlay, in a modern windowing system, is the dedication of a specific area of video memory that represents a specific area of the screen to a particular application. This provides excellent performance because the application knows exactly how much video memory is available for its immediate needs.
This leads to some annoyances. For example, Windows Media Center’s “Live TV” application does not start at all when MaxiVista is active. It reports “TV and video may not work as expected because the video card does not meet the minimum memory requirement of 64 MB of video RAM.” However, if Media Center is already started, it will continue to display live TV even when the extended desktop is switched on. Dragging the Media Center window to the secondary display causes it to stop, although the sound continues, until it’s dragged back to the primary desktop.
A DVD playing in CyberLink Power DVD did the same, but I found that if I carefully dragged the window over . . . I could get about 90% of the window displaying on the laptop. In fact, as long as a little part of the window remained on the primary monitor, it worked. This also pushed my network up to 11 Mbps, so MaxiVista is not a good streaming solution by any means.
But then again, it’s not intended to be.
Next: More Usage Results and Considerations, Demo vs. Purchased Version Differences, Our Conclusions, and a Tip
Another consideration is whether it’s a good use of the equipment. My laptop is faster and has a much more powerful graphics card than my desktop. It’s sort of wasted using it as only an extended display for my desktop, and wear and tear on laptops is more precious than on desktops.
In the normal mode, the secondary PC is running, but not acting otherwise as anything except a monitor. The “Professional” version of MaxiVista adds a remote control ability that lets the user switch to and from monitor mode on the fly. Remote control is a nice feature because it works to the extent of the network and prevents having to purchase other applications to get this capability.
Versions and Pricing
- The Standard version is $39.95 and provides only the extended desktop.
- The Professional version is $49.95 and adds remote control of the secondary device, clipboard synchronization across devices, and the ability to have up to three secondary PCs.
- A “Mirror Pro” version costs $99.95 and adds a mirror mode that might come in handy with an application like PowerPoint and a second networked PC hooked up to a projector.
Difference Between Registered and Demo Versions
Other than the trial version limitations mentioned on the first page, the installer for the purchased version also works differently from the demo version. A server needs to be installed for each secondary monitor. The installer asks you to choose one, two, or three secondary monitors and advises that you’ll have to run the installer again to select a different number. Actually, the Windows Start menu selections allow you to start the servers independently, so it’s not a problem selecting one more than you presently have.
The demo version also comes in 32-bit or 64-bit versions. Once the purchased version is installed, it can create either a 32- or 64-bit driver for the secondary regardless of what version of Windows it’s running in. (“Create MaxiVista viewer…” is a choice in the pop-up menu.)
Conclusion
Unless you only need the desktop extension feature, you’re probably going to be most interested in the Professional version. Remote control is the big extra feature, but you have to wonder at the pricing and whether it’s justified. With 19-inch monitors putting price pressure on the $100 point and several dual-head video cards selling at well under $100, is spending a quarter of that on something that will extend your desktop onto a smaller screen a great decision?
I almost decided it wasn’t. I wasn’t happy using my laptop as the secondary. The laptop is 15-inches and has the same resolution as my 22-inch desktop monitor. I had to refocus every time I peered at it, and things on the laptop were much too small for comfort.
However, then I decided to try my older laptop. It has a 1024 x 768 screen, and I found out that it scaled perfectly with my desktop. In fact, items on the screen are the same size as they appear on the 1680 x 1050 desktop monitor. So, ironically, I found that a lower resolution laptop makes a better secondary monitor.
I then experimented with raising the main monitor, placing the higher resolution laptop below and in front of it with the older laptop to the right and elevated. After a while, I found that I spent most of my time looking at the big monitor and the laptop to the right. I think that’s what I’ll keep. Three screens are a bit much, but two . . . being able to work from one and being able to run email and chat on another is great.
I haven’t used this old laptop (a single-core 1.73 GHz ThinkPad R52) much since getting my newer one, but MaxiVista is a good way to putting it back to earning its keep.
And Here’s a Tip
If you want to use one laptop as an extended desktop and also take advantage of MaxiVista to remote control another laptop or PC, install the laptop that will serve as the extended screen first. It will become server A. Then add the second computer as server B. The reason to do this in that order is that quitting server A also shuts down server B. However, quitting B does not shut down server A.
MaxiVista by Bartels Media GmbH


