
Learn how to install Microsoft’s newest operating system onto a new machine. Walk through the process step by step until you end up with a fully working system. These instructions comprise an easy to follow, no nonsense guide for everyone.
Windows 7 and New PCs
Getting a new computer is always an exciting experience. Whether you built it yourself or bought it from a store, there is nothing like setting it up and starting it for the first time.
A shop bought system should work straight out of the box once you have connected it all up. A home-made system will need an operating system installed if it’s to do something other than sit there looking good.
Windows 7 is the latest in the series of Microsoft operating systems so it is logical to install it on any new machine. It has been well tested and well received since it first made its way onto the scene. So here we will discuss how to install it onto a new computer.
To get things started, place the install disc into your drive, then set the BIOS to boot from it. You should then see a black screen telling you to “Press any key to boot from CD or DVD.” So press a key and wait a little while as the setup program loads the files it needs. The setup application creates a RAM drive in memory to control the setup process. This is so it can install onto an empty hard disk.
Once it has everything set up you should see the first Windows 7 screen prompting you to enter your region information.
Set your location and language preferences then click Next in the bottom right corner. The next thing you will see is the install screen. This is a screen you may see more than once as it is also the portal into some diagnostic tools like memory diagnostics and startup repair. If the system fails for any reason, you can also access System Restore from here thought the Repair your computer option.
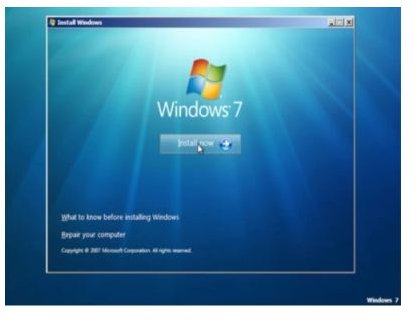
Once you have chosen the Install now option you will have to agree to the license agreement in order to proceed. The screen after that presents you with the install options. The two options are Upgrade and Custom. As this is a new install, the only one we can choose is Custom.
Select which disk or partition you want to install Windows 7 on to. Here you can create, delete or modify disk partitions until your heart’s content. For the first install I suggest making a single partition on the primary disk and moving on.
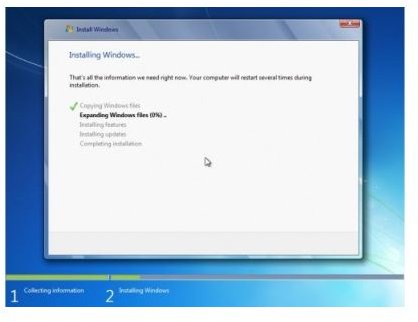
The Installing Windows dialog box should be relatively familiar to anyone who has installed Windows before. It’s more or less the same as the Vista one, and a variation of that in Windows XP.
The install process has been refined over the years and now proceeds apace. Depending on your system specs it can take between twenty minutes and one hour. The progress screen will give you an idea of how much, but not how long, you have to go.
During this time the system may reboot a couple of times, don’t “Press any key to boot from CD or DVD” when this happens as it will slow everything down. Let Windows reboot as normal.
Once the file install is complete you will be presented with another black screen with the message, “Setup is preparing your computer for first use.” There is more work for the computer to do, so it may be a few seconds until it moves on.
The next dialog box is where you enter your user and computer name. Enter something meaningful and click Next. Password time, enter one if you want, or leave it blank, the choice is yours.
The next screen is for the product key. Here you have two options. You can enter the key here and allow Windows to automatically activate once online, or ignore it and enter it later. As you are installing afresh and have nothing to roll back to if you don’t get on with Windows 7, I would do this. The other option is to leave it and enter it later. This is only normally useful for when you’re upgrading a system.
The next screen is the security screen where you choose whether or not to allow Windows to automatically update itself. I suggest setting this to Use recommended settings for now. This will allow the operating system to download updates and fixes as they become available.
Next are the time zone, then network settings. These are pretty straightforward. Most users should choose Home Network when prompted, unless you’re building a system at your place of work.
With the decision making over with, the next screen should be the Preparing your desktop one, which will probably stick around for a minute or two while the desktop is prepared.
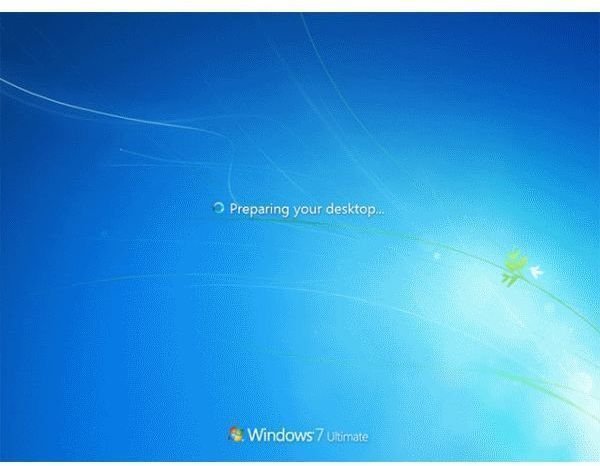
This is the last setup screen you will see. The next thing you will see is the Windows desktop! Once you have had a look around at your new surroundings it would be a good idea to install your device drivers, firewall, anti-virus and all the other applications you use.
That’s all there is to it. Most of the install has been designed to happen behind the scenes, as Microsoft has refined the whole process in order to make it as straightforward as possible. It is now as easy as ever to get your system up, running, and productive!


