You want to install Linux in your environment, but you don’t necessarily want to tie up a piece of hardware to do so. What to do? Use the free Microsoft Virtual PC 2007 to host a virtual machine with Ubuntu linux installed.
Overview
Using Virtual PC to host a Linux guest is an easy way to get your hands on Linux without needing to use a physical machine. The high level steps to do this is to start by downloading Virtual PC 2007 (free) and for this article, we’ll be installing Ubuntu Linux.
Here is the link to download Virtual PC 2007. Download and install the tool using the default options: https://www.microsoft.com/windows/virtual-pc/support/virtual-pc-2007.aspx .
Next, download the latest version of Ubuntu Linux: https://www.ubuntu.com/getubuntu/download .
Creating the Virtual Machine
Once you have Virtual PC installed and the Ubuntu image downloaded, you’re ready to create the virtual machine. Note that this step only creates the virtual machine – installing the Operating System is an additional step and will be covered in the next section.
- Start up Virtual PC by going to Start, Program Files, Microsoft Virtual PC 2007
- In the Virtual PC console, click New…
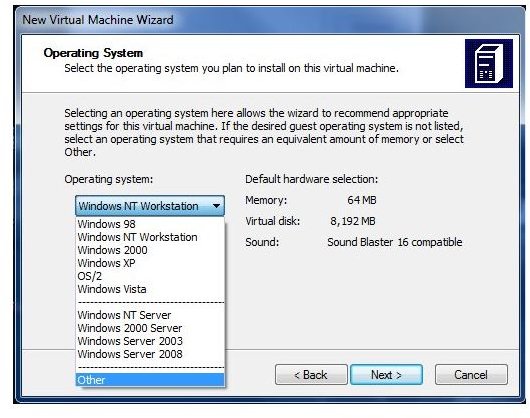
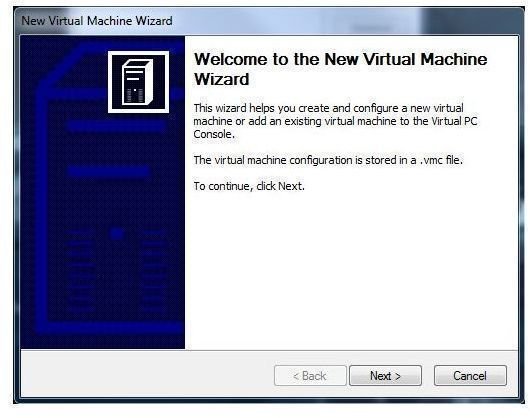
- The New Virtual Machine Wizard will start (Figure 1). Click Next
- On the Options screen, select “Create a virtual machine” and click Next
- On the Virtual Machine Name and Location screen, click Browse and select a location you wish to store the VM files. Click Next to continue
- On the Operating System screen, select “Other” (Figure 2) and click Next
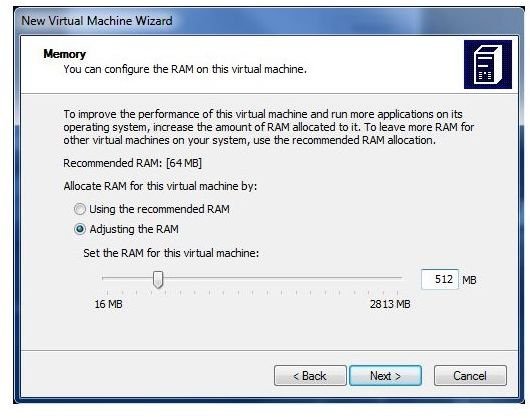
- On the Memory screen, select the “Adjust the RAM” button and increase the RAM to at least 512MB (Figure 3). Click Next when ready
- On the Virtual Hard Disk Options screen, select the option to create “A new virtual hard disk” and click Next
- On the Hard Disk Location screen, specify a location for the files and alter the hard disk size as necessary. For a basic Ubuntu install, we’ll keep the default settings of 8GB. Click Next
- Click Finish
Installing Ubuntu onto the Virtual Machine
Installing Ubuntu onto the Virtual Machine
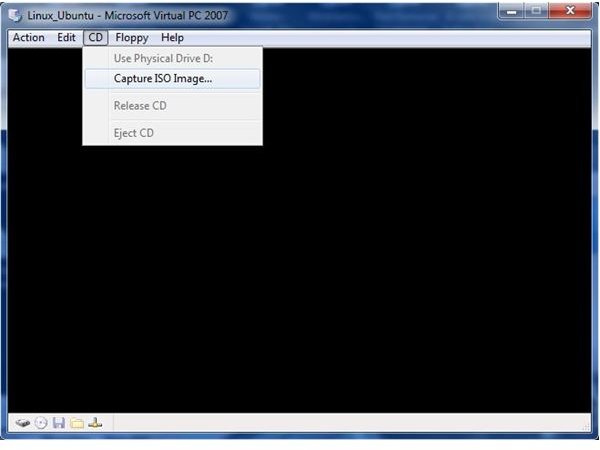
- Start the Virtual Machine. Click on the CD menu and select “Capture ISO Image…” (Figure 4)
- Browse to the ISO file you downloaded earlier with Ubuntu on it and click Open
- Restart the virtual machine by going to Action, CTRL+ALT+DEL
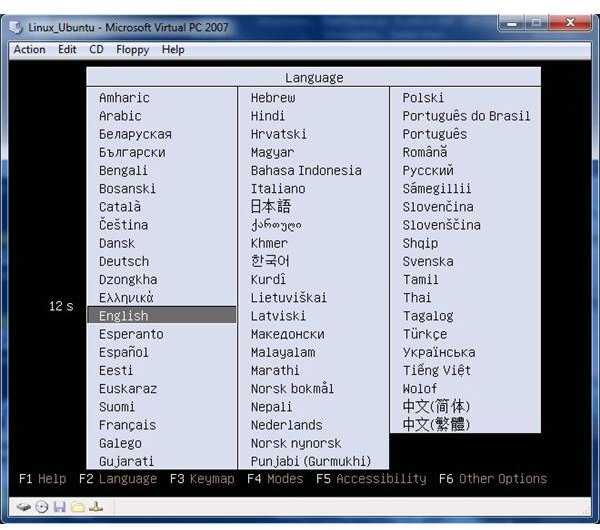
- You should be presented with the Language menu. Assuming you want to install using English, hit Enter (Figure 5)
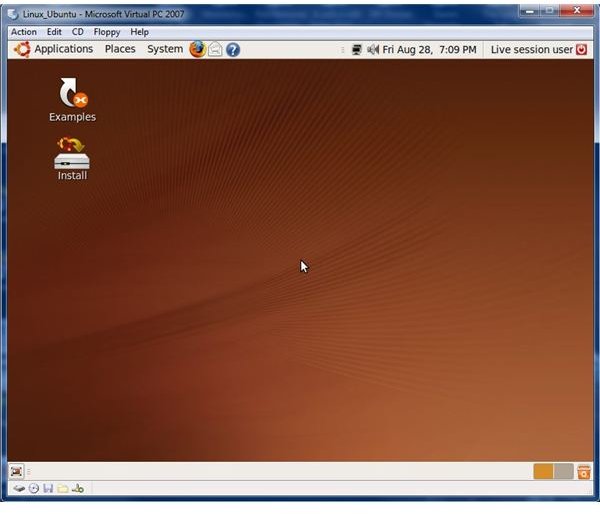
- After a few moments, Ubuntu will start in what’s called a “Live Session” – the OS running from the ISO image without installing it (Figure 6). Double click on the Install icon to begin the Install wizard
- On the welcome screen, select your favored language and click Forward
- On the “Where are you” screen, select your region and city. Click Forward
- On the “Keyboard layout” screen, select the keyboard layout most appropriate (USA for United States keyboards). Click Forward
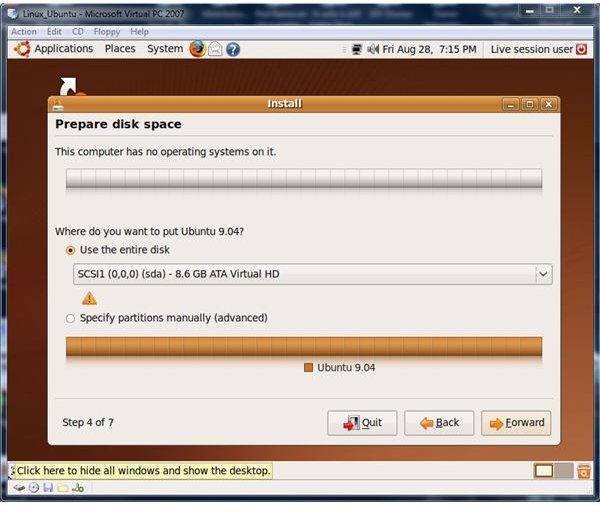
- On the “Prepare disk space” screen, select the option to use the entire disk and click Forward (Figure 7)
- On the “Who are you” screen, enter in a name for yourself, username, password, name of the computer and choose the option to require a password for login. Click Forward
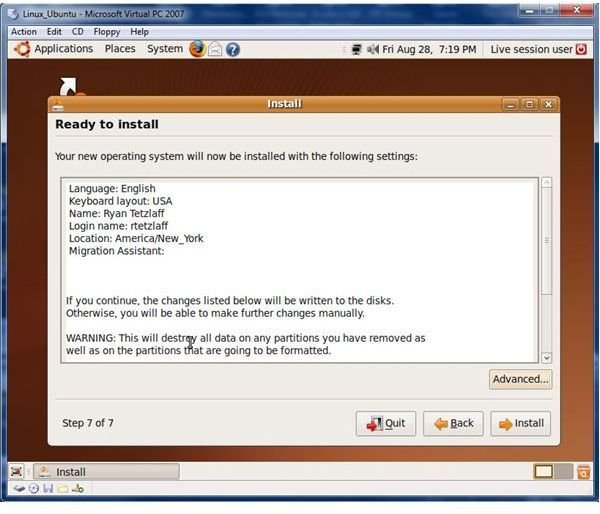
- On the “Ready to install” screen, Ubuntu will give a summary of the install with automatic options (Figure 8) – if you wish to get into the details, click the Advanced button, otherwise, click Install
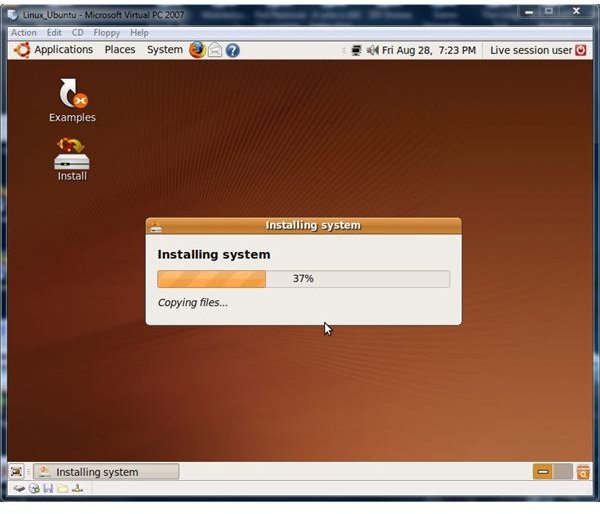
- Ubuntu will start installing. On my test system, this process took about … .minutes (Figure 9)
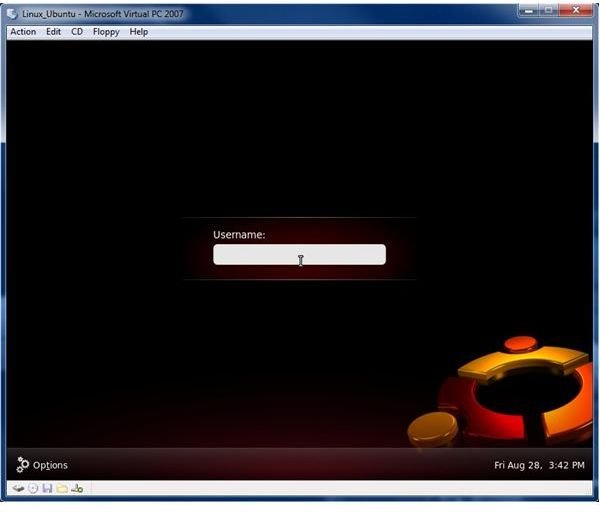
- After the installation is complete, perform a reboot and you should be prompted to log in (Figure 10)
Installation is complete – you now have a portable installation of Ubuntu Linux!
Images