You have a need for a machine running an old version of Windows, but you don’t have any spare hardware - what are you to do? How about setting up a Virtual Machine with Sun’s VirtualBox? Read on to find out how.
Overview
VirtualBox is an Open Source virtualization package developed by Sun Microsystems that allows you to run multiple virtual “machines” on a single physical host. In this article, I’ll discuss installing VirtualBox and setting up a Windows 2000 Server virtual machine.
The first step is to download the VirtualBox installer from the VirtualBox website . Note – although VirtualBox supports multiple host Operating Systems, we’ll be using a Windows XP host in this article.
- Once downloaded, run the installer and click Next.
- Agree to the license terms and click Next.
- On the next page (Figure 1) make sure all options are selected to be installed. Click Next.
- Check or uncheck the options to create a desktop shortcut and shortcut on the quick launch bar as desired. Click Next.
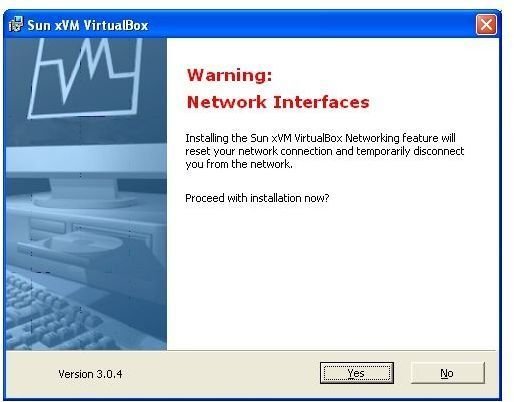
- On the Network Interfaces page (Figure 2), take note that you will lose your network connection momentarily. When you’re ready, click Yes.
- On the final page, click the “Install” button to begin installing.
- When the install is finished, click the Finish button. VirtualBox should now start.
Using VirtualBox and Creating a Virtual Machine
Once VirtualBox is installed, you can create your first Virtual Machine.
-
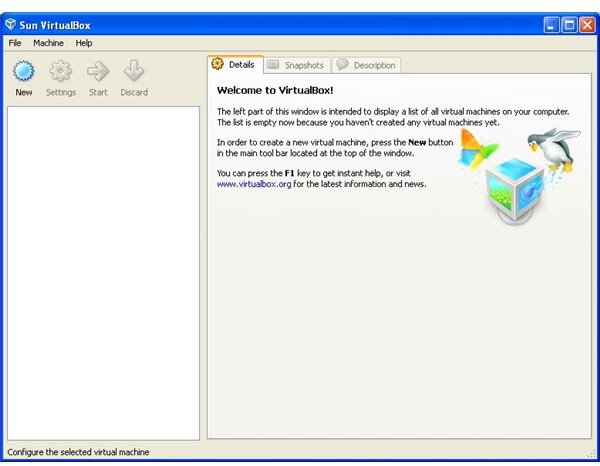
In VirtualBox, click the New button (Figure 3). The New Virtual Machine Wizard will start.
Advertisement -
Click Next on the Wizard. On the second screen, type in a name for the new machine and select the OS (Windows) and Version (2000 Server in this example). Click Next.
-
Select the amount of memory you want to allocate to the virtual machine. I’d recommend a minimum of 512MB memory.
Advertisement -
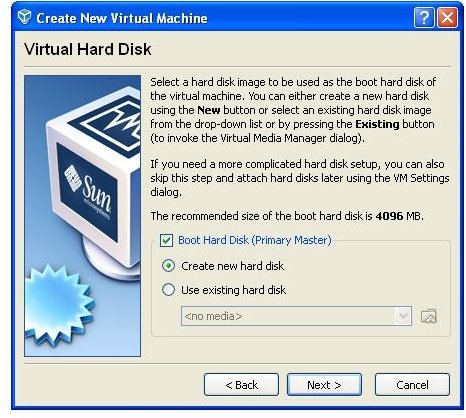
You are now given the option to create a new virtual hard drive (Figure 4). Go ahead and keep the default options and click Next.
-
The New Virtual Disk Wizard will start. Click Next.
Advertisement -
Keep the default of allowing dynamically expanding storage and click Next.
-
Give a location and size for the new virtual machine. For a basic Windows 2000 server, I’d recommend 8-12GB.
Advertisement -
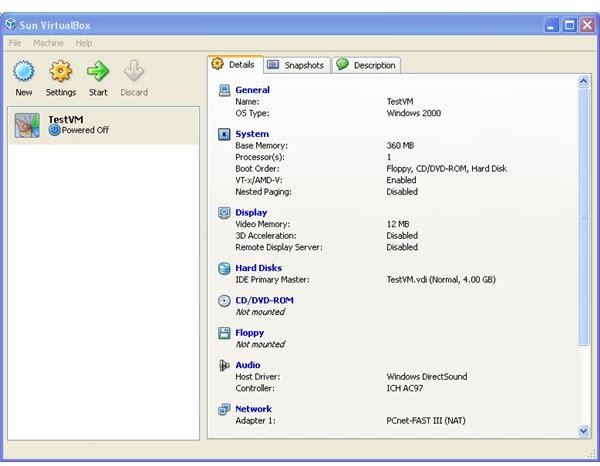
Click Finish on the next two windows. The Virtual Machine will now be displayed in the main VirtualBox interface (Figure 5). You now have a basic “machine” – it still doesn’t have an operating system installed, but the machine is ready for you to install.
-
The first time you run the new machine, you will be asked where you’d like to install the operating system from – either your physical DVD\CD drive or from an ISO image. Pop in a disk or point to an ISO image of your operating system.
Advertisement -
The standard Windows installer will begin scanning for hardware and the appropriate drivers. After a few moments, you will be shown the main splash screen. Hit ENTER to continue.
-
The next screen shows the license agreement. Scroll through and press F8 when you’re ready to continue.
Advertisement -
You’ll need to create a new partition on the virtual drive, so hit the “c” button to “create” one.
-
You should then be given the option to determine how big you want the partition to be. Enter in the full size of the disk as set in step 7 above.
Advertisement -
Next, you’ll be asked to format the partition. For most purposes, you can select the Quick NTFS format. After a few moments, Windows will start installing.
-
The installer will run for a while - up to 30 minutes before the graphical configuration options appear. This wizard will walk you through setting up the computer name, entering your product key, selecting date and time along with network settings.
Advertisement -
After basic configuration is done, the computer will reboot into Windows.
Using virtual box is a cheap and powerful option for running virtual machines. Additional information can be found on the VirtualBox website: https://www.virtualbox.org/
Images