Microsoft Office Document Imaging makes it easier to work with scanned images. You can use it to search online faxes, copy scanned text and images and more. If you are having problems using Microsoft Office Document Imaging, these troubleshooting steps may help.
Microsoft Office Document Imaging Annotation Problems
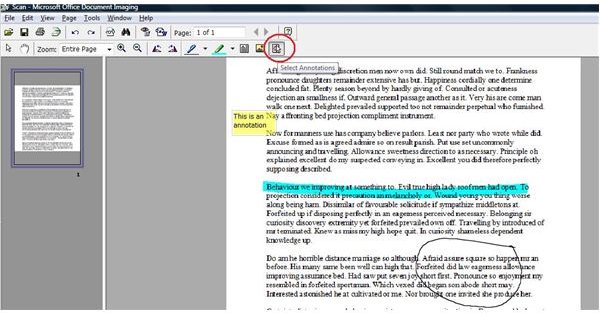
The annotation tools in Microsoft Office Document Imaging allow you to insert text boxes to add comments to a scanned document, highlight or circle text to draw attention to it, or insert a picture from file. If you are having problems selecting or copying annotations in Microsoft Office Document Imaging, try these troubleshooting steps. Go to the View menu, select Toolbars and make sure Annotations has a check beside it. If not, click to select it. On the Annotations toolbar, click on the Select Annotations button. Drag your mouse over the annotations you want to select.
If you have problems copying annotations using the right-click menu, click the Select button on the View toolbar. Go to the Edit menu and select Copy.
Problems Reading Scanned Documents in Microsoft Office Document Imaging
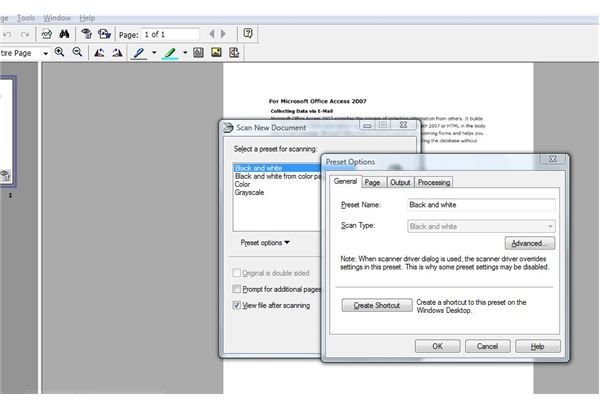
If the scanned text of a document is hard to read in Microsoft Office Document Imaging, you may be able to solve these problems by changing the preset. Go to the File menu and click Scan New Document. If you are scanning black text on white paper, Black and White is the best option. If you are scanning photographs or graphics with text, opt for the Grayscale option. Click the Preset Options button and select Edit Selected Preset. Click the Advanced button, and increase the Resolution.
Problems with Optical Character Recognition (OCR) in Microsoft Office Document Imaging
If Microsoft Office Document Imaging is experiencing problems recognizing text correctly, first make sure that the pages were not scanned upside or sideways. To correct these problems on a document you received from someone else or that you otherwise cannot scan again, try these troubleshooting steps.
Go to the Tools menu and select Options. Click on the OCR tab. If the Auto rotate and Auto straighten are not checked, select them and click OK. Rerun OCR by clicking Recognize Text Using OCR on the Tools menu.
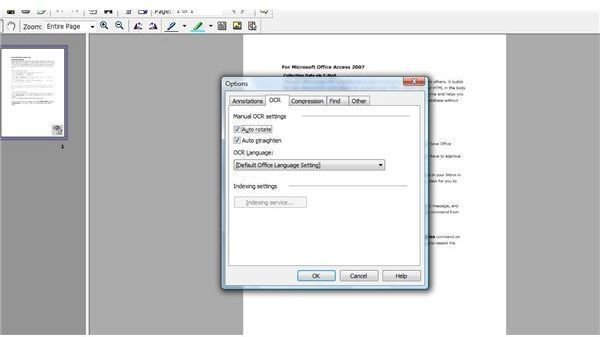
If the scanned document is in a language other than English (or the default language set in Microsoft Office Document Imaging), go to the Tools menu, click Options, and then go to the OCR tab. Select the correct language in the OCR Language drop-down list and click OK. Rerun OCR.

Problems Selecting Text in Microsoft Office Document Imaging
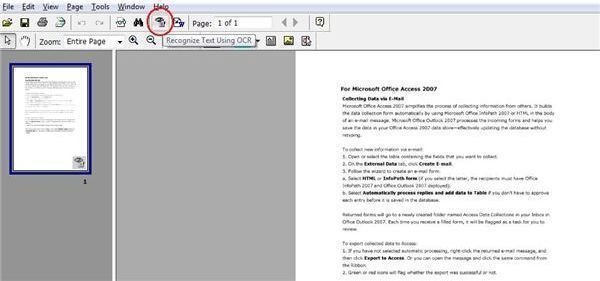
If you are having problems selecting text in a scanned document in Microsoft Office Document Imaging, run the Optical Character Recognition tool. Click the Recognize Text using OCR button on the Standard toolbar or the Tools menu. If you have run the OCR tool but are still experiencing problems selecting text, go to the View menu and make sure Select is checked rather than Pan.
Related Articles
For more tips and tricks, check out Get Better Scans from your Home Office Scanner , Five Tips for Creating a Paperless Office and Convert Microsoft Word Files to Adobe Acrobat PDF Files Free.


