If you need to physically connect two computers to temporarily share data, it’s easy if you have the right hardware and know-how.
Networking Options
There are four reasonable ways to connect two PCs (both running Windows) by a single cable:
- Connect an Ethernet crossover cable between the Ethernet network ports on the two PCs. (Easy)
- Connect a FireWire cable between the FireWire ports on the two PCs. (Easy)
- Connect a special USB link cable between the two PCs, along with some software. (Requires some fussing, some software, and a special cable.)
- Connect a serial-port crossover cable (sometimes called a null modem cable) between the serial ports on the two PCs. (Requires a fair amount of fussing, works slowly, and sometimes won’t work at all for reasons that never come clear.)
Choosing the Easiest Option
By far, the simplest, easiest, and cheapest connection between two PCs is through a Category 5 Ethernet crossover cable. Basically: you turn both PCs off, connect the crossover cable between the Ethernet port on one PC and the Ethernet port on the other, and then turn them on and boot up. In a couple of minutes, you should be connected. That’s all it takes!
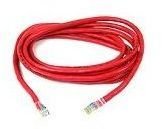
An Ethernet crossover cable is a special variety of the familiar Category 5 Ethernet patch cable. It looks almost exactly like an ordinary Ethernet patch cable, but it will be labeled somehow so that you know it’s a crossover cable. Look for the abbreviation CRS embossed in the plug on each end or for a label of some other kind. This image shows a crossover cable available from Amazon.com .
TIP: If you have a crossover cable that isn’t labeled, label it right now. If you mix them up later on and try to use a crossover cable instead of a regular Ethernet patch cable (or vise versa), you will not be able to make a connection!
What is a Crossover Cable?
What makes the cable a crossover cable? It doesn’t look any different physically, and it’s only different electrically. Old-timers may remember something called a null modem, which was used to connect PCs through their serial ports in ancient times. A crossover cable is a null modem for Ethernet ports rather than serial ports. It connects the output pins of one Ethernet port to the input pins of another and vice versa. No communication can happen between two PCs on a straight-through patch cable because with a straight-through cable, the two PCs’ input pins are connected together, as are the output pins. Inputs can’t talk to inputs, nor outputs to outputs. The crossover cable makes sure that inputs talk to outputs and outputs to inputs.
How to Create the Connection
Here’s your step-by-step for direct connection via Ethernet crossover cable:
-
Make sure the network ports on both PCs are enabled in pre-Vista PCs. To do this, click Start, then Settings, and then Network and Dial Up Connections. Look for a line labeled “Local Area Connection” and be sure that it’s marked as “Enabled.”
-
Make sure the cable in your hand is indeed a crossover cable, and connect it between the two Ethernet ports.
Advertisement -
Power up or reboot both PCs.
Once both PCs are past bootup, give them a few minutes to self-assign an IP address with APIPA and locate one another.
- For XP PCs, in Windows Explorer, expand My Network Places and click on Computers Near Me. Look and see if the name of the opposite PC is displayed. For Vista, open Network. If you don’t see the new PC, click Network and Sharing Center and enable “discovery”.
Related Reading:
>» Get the Most from FireWire Cables and Devices
>» Using Proxy Servers for Privacy
>» How to Fix the “Windows Limited or No Connectivity” Error Message
>» This Day in Computer History: August 13
>» Transferring Files Through Bluetooth in Windows Vista
References
-
The image in this article is from Amazon.com and a link to the product is provided.
AdvertisementIt is the author’s experience that this is an easy way to connect to PCs for temporary sharing of data. However, the downside is that the computers must be physically close to each other. For a permanent solution, consider a “real” network using a router, hub, Wi-Fi connection, and the like.


