The first article in this series shows how to use MS Access’ built-in Switchboard Wizard. This article goes a step beyond the restrictions of the ready-made switchboard and shows how to create a custom switchboard using a blank form.
A Database vs. An Application
A custom switchboard, like the built-in Access wizard, turns your database into an application. A database is a collection of fields, tables, queries, forms, macros and reports; whereas an application gathers the components of the database and makes the database more usable and streamlined. We can either use the built-in Switchboard Wizard in Access 2007 or make our own custom switchboard. Custom switchboards go beyond the restrictions of the built-in Access Switchboard wizard. We can add as many command buttons as we want and add a wider variety of links and design refinements.
First Things First!
Before you can make an application out of your database, you must have a well-designed database with all the objects (tables, forms, reports, etc.) in good working order. If your database runs well and everything works for you without a switchboard, you are ready to design your switchboard page(s). The foregoing may sound somewhat counter-intuitive, but it is nevertheless true. As you continually work with your database, you will find that you are repeatedly entering the same forms, executing the same queries and viewing the same reports. Your custom application (i.e., switchboard(s)) will remove the drudgery and get your database under control.
Let’s look at the steps in designing your custom application.
Step 1 - Decide on the application design.
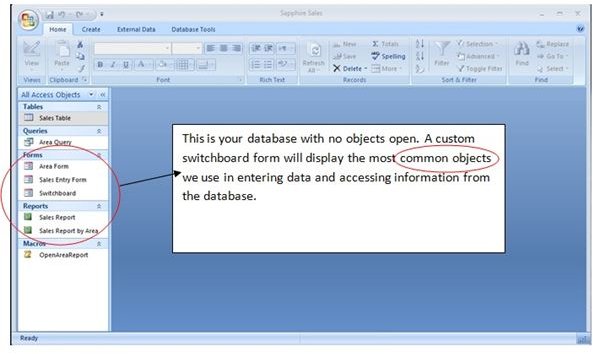
We shall use a hypothetical database called “Sapphire Sales,” which has a table, a query, two forms, two reports and a macro. Our goal is to create a custom designed switchboard page and have that page appear by default each time we open the database.
The screenshot below shows the database objects we will access through our custom switchboard form:
Step 2 - Design a custom switchboard form.
A custom switchboard form is like any other Access form, except that it is not based on a table or query. It is merely a standalone form that holds the buttons and text we will use to navigate and use our database.
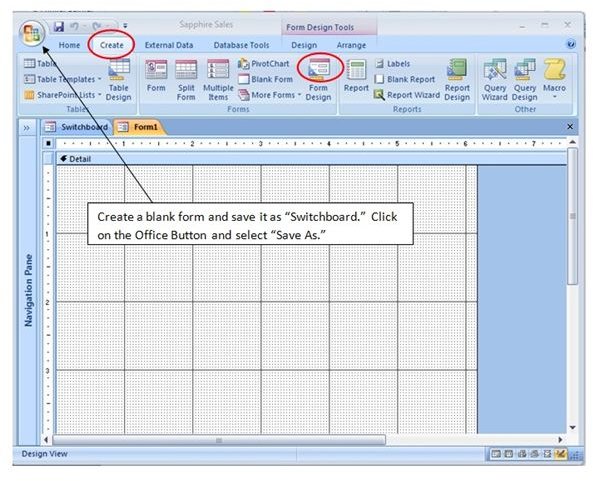
To create a custom switchboard form, create a blank form and save it as Switchboard. See the screenshot below:
Step 3 - Add control buttons to the custom switchboard form.
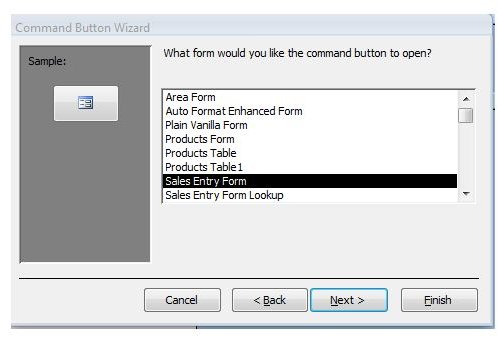
Let’s make the Sales Entry Form in our database the first item on our custom switchboard. We want that form to open when we click on the button. To create a new button, while the blank form is in the Design view, make sure the Control Wizards icon (Controls group, middle row, last on the right) is selected. Then select the Button icon from the Controls group.
When the cursor changes its shape to a rectangle with a cross in the upper left, draw a box shape in the Detail area of the blank form.

The Command Button Wizard will open. Select Form Operations in the Categories column and Open Form in the Actions column of the dialog box.
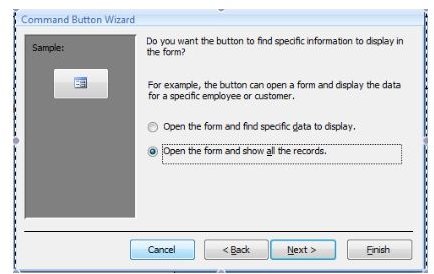
Continue through the wizard, then select Finish. The new command button will appear on the blank form. (To add a report to a button, select Report Operations/Open a Report and continue stepping through the wizard.)
At this point, you can experiment with the Command Button Wizard to create a variety of buttons from the generic text button to a number of built-in pictures to make your button more decorative. You can see the range of built-in pictures available for assignment to buttons by selecting the the “Show all Pictures” in the wizard step following the form or report selection option.
Stepping Through the Command Button Wizard
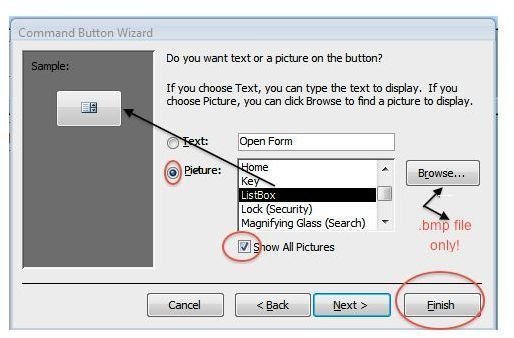
We selected a built-in icon, so we’ll need to add a label to our button. Add a label to the button by clicking on the Label (“Aa”) icon in the Controls group and drawing a text box. We added the text “Open Sales Entry Form.” You can test the button by switching to the Form view and clicking on the button.
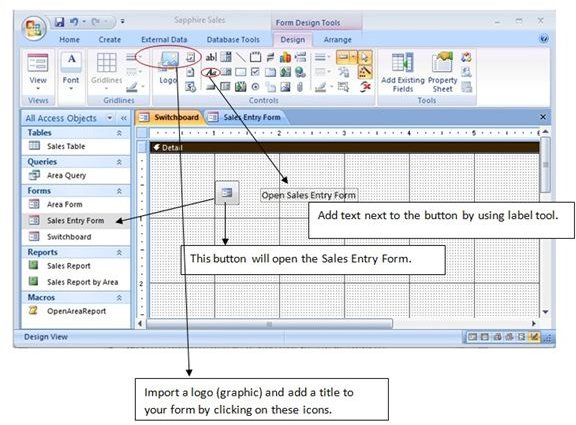
Continue adding control buttons and design your form to taste.
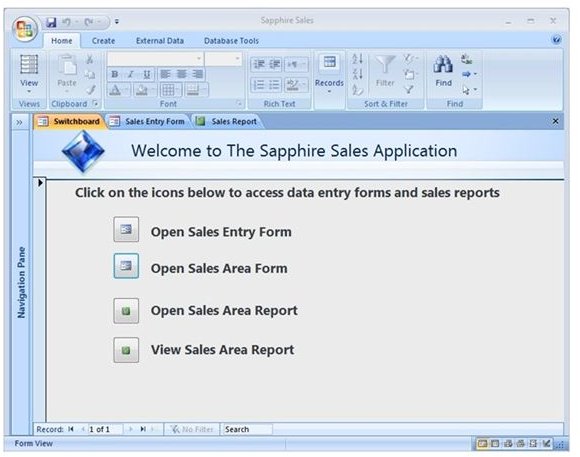
The screenshot below shows a completed Switchboard form that accesses the other forms and reports displayed by this new application. We added a graphic and a title section by clicking on the Logo icon and the Title icon (the icon immediately to the right of the Logo icon) in the Controls group.
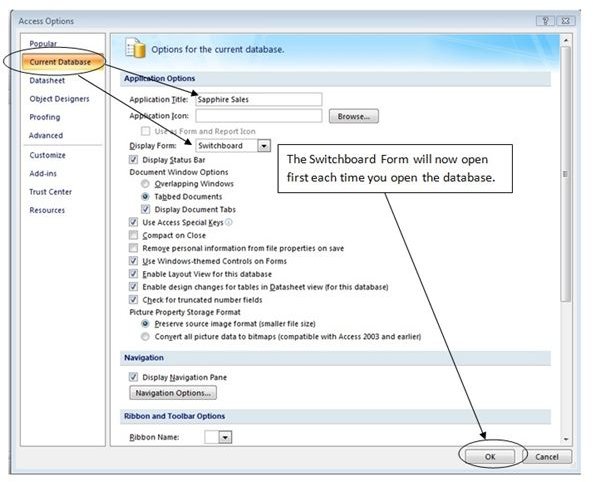
Step 4 - Make your switchboard the default opening page for your application.
To make your switchboard page the first page you see when you open your application, do the following steps:
♦ Click on the Office button in the upper left of your database window.
♦ Select the Access Options box in the lower right edge of the dialog box.
♦ Click on Current Database in the left column.
♦ Name your application in the Application Title box.
♦ In the Display Form dropdown box, select Switchboard. Select OK; close down the database and restart it. (Use the Office Button, and select Close Database.)
Related Bright Hub Articles
Using the Switchboard to Navigate Your Database
Microsoft Access: Adding an Interactive Graphic to a Form
View an excellent video on making custom switchboards at:
YouTube - Creating a Custom Switchboard
This post is part of the series: MS Access 2007: Using Switchboard Forms
Microsoft Access 2007 switchboard forms help us streamline our database. They act as a “central hub” in accessing our forms, reports, queries, etc. This two-part series demonstrates (1) how to use the built-in wizard to automate switchboard creation and (2) how to make your own custom switchboard.


