Gone are the times of changing the Internet Explorer default icon by means of editing the Registry. In this article you will find a trivial solution plus an advanced method to change the Internet Explorer default icon of Internet Explorer 6, 7 and 8 on Windows XP, Windows Vista and Windows 7.
Introduction
Are you looking for how to change the Internet Explorer default icon in the Registry? You don’t need the Registry Editor any longer to change the Internet Explorer default icon in recent Windows operating system running Internet Explorer 6, 7 and 8. In fact, one cannot edit the Registry to change the Internet Explorer default Icon on Windows XP, Windows Vista, and Windows 7 unless, perhaps, in case of a Microsoft legacy browser where entries in [HKEY_CLASSES_ROOT\CLSID\{871C5380-42A0-1069-A2EA-08002B30309D}\DefaultIcon] may work.
This article will show you two methods of how to change the Internet Explorer default icon which work for Internet Explorer version 6, 7 and 8 on Windows XP, Windows Vista and Windows 7. The easy way to change the Internet Explorer (IE) default icon is by configuring shortcuts to point to the icon of your choosing. This method is trivial but has the disadvantage that you have to change each shortcut on an individual bases. The second (advanced) method explains how to change the default icon of Internet Explorer in the executable. All default Internet Explorer shortcuts including entries in the Start menu, Program folders as well as the quick launch bar will show your new Internet Explorer default icon immediately after you have completed the steps of the advanced method.
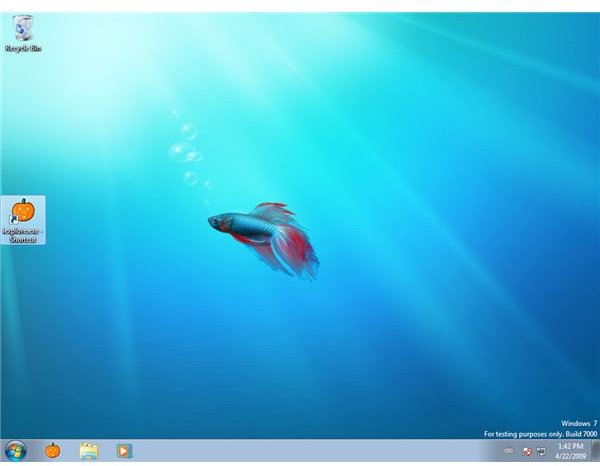
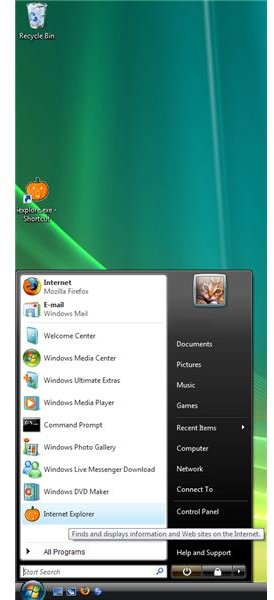
As an appetizer of the second method see the outcome depicted below for Windows 7 Beta with Internet Explorer 8:
Trivial Method – Works always on Shortcuts
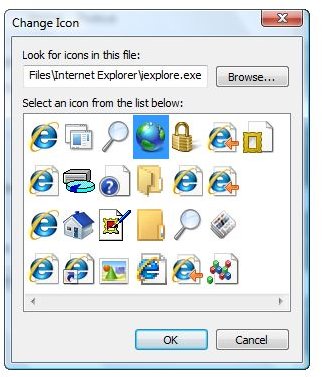
The trivial method works with Windows 7, Windows Vista and Windows XP as well as earlier Microsoft operating system with Internet Explorer installed. Change the Internet Explorer default icon by assigning its shortcut a new icon of your choice: Right-click the shortcut, then click Change Icon. Select an icon from the list or Browse to another source file. You may want to have a look for relevant icons in the following files:
%Systemroot%\System32\imageres.dll
%Systemroot%\System32\ieframe.dll
%Programfiles%\Internet Explorer\iexplore.exe
%Systemroot%\System32\shell32.dll
Select your new icon (group) and click twice OK. Then press F5.
Proceed only in case your new Internet Explorer icon is not displayed:
• If your operating systems is Windows 7 or Windows Vista carry out steps 11 – 15 of the Advanced Method – IE 7 and IE 8 on Windows Vista / Windows 7 (page 2)
• If your operating system is Windows XP carry out steps 14 – 18 of the Advanced Method – IE 6 on Windows XP (page 3)
Shortcut Method Depicted


Advanced Method – IE 7 and IE 8 on Windows Vista / Windows 7
To change the Internet Explorer 7 and 8 default icon on Windows Vista or Windows 7 with the advanced method you need the following:
• A backup of your computer configuration
• Administrator rights
• Resource Tuner (free trial version for 30 days) installed
• A group of icons with the following properties:
# 1: 48 x 48 pixels (4-bit color) - ico extension
# 2: 32 x 32 pixels (4-bit color) - ico extension
# 3: 24 x 24 pixels (4-bit color) - ico extension
# 4: 16 x 16 pixels (4-bit color) - ico extension
# 5: 48 x 48 pixels (8-bit color) - ico extension
# 6: 32 x 32 pixels (8-bit color) - ico extension
# 7: 24 x 24 pixels (8-bit color) - ico extension
# 8: 16 x 16 pixels (8-bit color) - ico extension
# 9: 256 x 156 pixels (32-bit color) – png extension
# 10: 48 x 48 pixels (32-bit color) - ico extension
# 11: 32 x 32 pixels (32-bit color) - ico extension
# 12: 24 x 24 pixels (32-bit color) - ico extension
# 13: 16 x 16 pixels (32-bit color) - ico extension
Different views, e.g. details or large icons in explorer, demand that your group have exactly these properties. You can use icons you made your with a suitable program, icons you import from other sources, or icons extracted with Resource Tuner for example. Please note that with the exception of # 9, which must be a PNG file, the icons are to have ico extension in their file name. When you are ready with your set of icons, and when you have Resource Tuner installed proceed as follows:
1. Assign Ownership of %Programfiles%\Internet Explorer\iexplore.exe to Administrators
2. Assign Administrators Full Control (Allow) for %Programfiles%\Internet Explorer\iexplore.exe
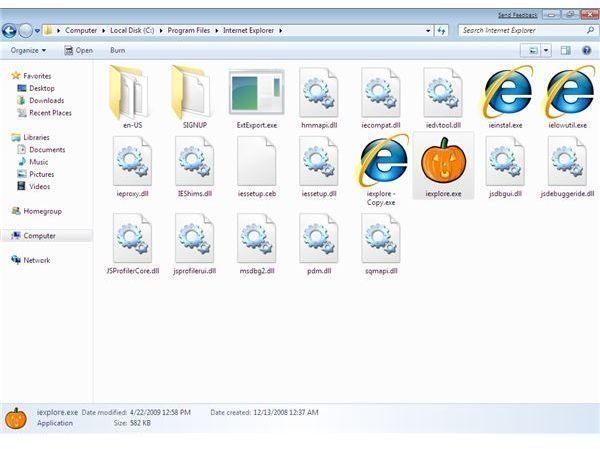
3. In %Programfiles%\Internet Explorer\ copy/paste iexplore.exe
4. Right-Click %Programfiles%\Internet Explorer\iexplore.exe. Click Open with Resource Tuner
5. Expand the folder Icon Entry. In the context menu of entry # 123 select Edit Resource
6. Click Open source file (folder symbol) in right pane of the new window and navigate to the first icon of your replacement icon group
7. Click Open, Click OK. Click Yes in the dialogue “Values have been changed. Do you want to proceed?”
8. Replace entry # 124 with your new icon number two, etc until you have replaced entry # 135 with new icon number 13
9. In File, Save Files As .. navigate to your desktop and save the file as iexplore.exe; close Resource Tuner
10. Copy and Replace iexplore.exe from your Desktop to %Programfiles%\Internet Explorer\iexplore.exe
11. Open Task Manager. On the Processes tab select explorer.exe. Click End Process. Click Yes
12. In the File menu select New Tasks (Run). In Open of Create New Task enter cmd, click OK
13. In the command prompt type attrib -h %Userprofile%\AppData\Local\IconCache.db
14. In the command prompt type del %Userprofile%\AppData\Local\IconCache.db
15. In the command prompt type shutdown -r - t 0
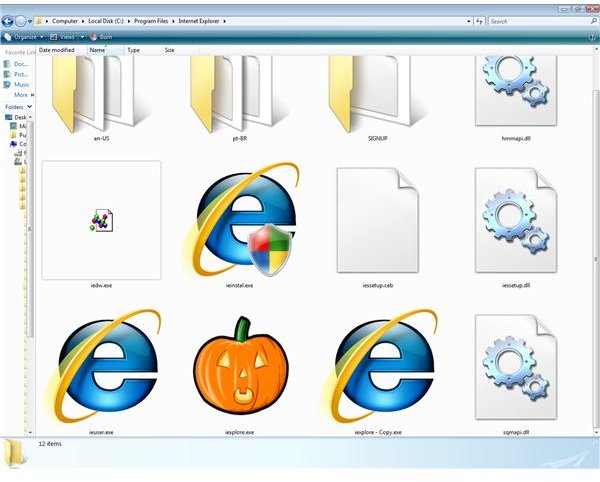
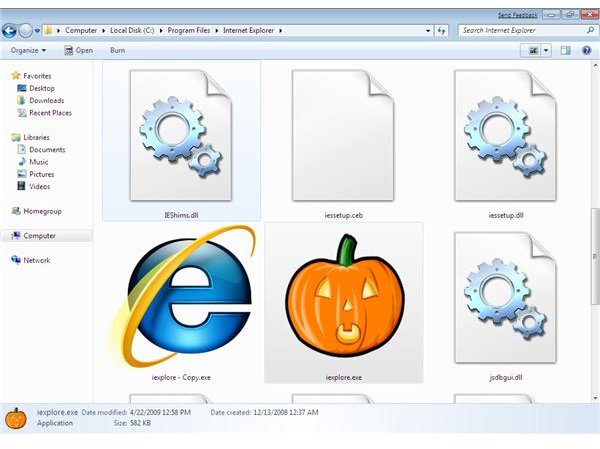
Images of Internet Explorer 7 with new Default Icon on Windows Vista

Advanced Method – IE 6 on Windows XP
To change the Internet Explorer 6 default icon on Windows XP you need
• A backup of your computer configuration
• Administrator rights
• Resource Tuner (free trial version for 30 days) installed
• A family of icons which meets the specification below:
# 1: 48 x 48 pixels (4-bit color) - ico extension
# 2: 32 x 32 pixels (4-bit color) - ico extension
# 3: 16 x 16 pixels (4-bit color) - ico extension
# 4: 48 x 48 (8-bit color) - ico extension
# 5: 32 x 32 (8-bit color) - ico extension
# 6: 16 x 16 (8-bit color) - ico extension
# 7: 48 x 48 (32-bit color) - ico extension
# 8: 32 x 32 (32-bit color) - ico extension
# 9: 16 x 16 (32-bit color) - ico extension
Different views, e.g. details or large icons in explorer, demand that your group have exactly these properties. You can use icons you made yourself with a suitable program, icons you import from other sources, or icons extracted with Resource Tuner. When you are ready proceed as follows:
1. In %Programfiles%\Internet Explorer copy/paste iexplore.exe
2. Right-Click %Programfiles%\Internet Explorer\iexplore.exe. Click Open with Resource Tuner
3. Expand the folder Icon Entry. In the context menu of entry # 1 select Edit Resource
4. Click Open source file (folder symbol) in right pane of the new window and navigate to the first icon of your replacement icon group
5. Click Open, Click OK. Click Yes in the dialog “Values have been changed. Do you want to proceed?”
6. Replace entry # 2 with your new icon number two, etc. until you have replaced entry # 9 with new icon number 9
7. In File, Save Files As .. save the files as C:\iexplore.exe; close Resource Tuner
8. Boot your Windows XP computer into Safe Mode by repeatedly pressing F8 after seeing the BIOS information, before the splash screen
9. Select Safe Mode with Command Prompt
10. In the command prompt type Copy /y C:\Iexplore.exe %Systemroot%\system32\dllcache\iexplore.exe
11. Including the quotes in the command type Move /y “C:\Iexplore.exe %Programfiles%\Internet Explorer\iexplore.exe”
12. Make sure you have no XP installation media in your CD or DVD drive
13. In the command prompt type shutdown -r - t 0
14. Open Task Manager. On the Processes tab select explorer.exe. Click End Process. Click Yes
15. In the File menu select New Tasks (Run). In Open of Create New Task enter cmd, click OK
16. Including the quotes in the command type attrib -h “%Userprofile%\Local Settings\Application Data\IconCache.db”
17. Including the quotes in the command type del “%Userprofile%\Local Settings\Application Data\IconCache.db”
18. In the command prompt type shutdown -r - t 0
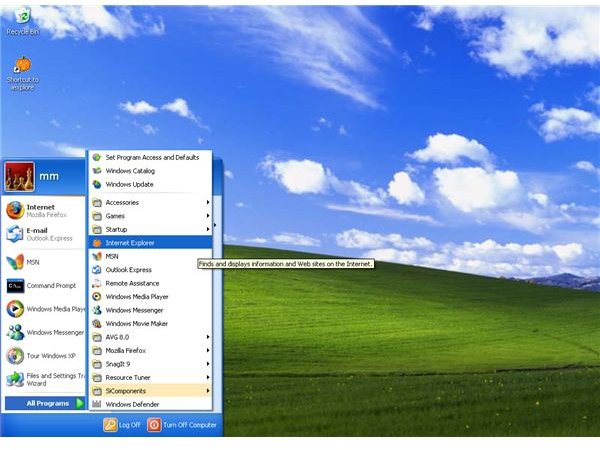
Images of Internet Explorer 6 with new Default Icon on Windows XP

Advanced Method – IE 7 and IE 8 on Windows XP
The advanced method had to be split to account for differences in the Windows operating systems. In contrast to Windows 7 and Windows Vista which employ UAC security mechanism, Windows XP uses its dll-cache to prevent unauthorized modifications of Internet Explorer. Therefore, if you run Windows XP with Internet Explorer 7 or 8, start with steps 3 to 8 of the Advanced Method – IE 7 and IE 8 on Windows Vista / Windows 7 to replace the icon, and then carry out steps 7 to 18 of the Advanced Method – IE 6 on Windows XP to trick the dll-cache.
References
Author’s own experience
Screenshots by the writer


