
This is a basic tutorial on Windows Live Mail. Teaching the basics on easy use. Adding new accounts and managing them are the key features.
Introduction
Many people have multiple webmail accounts. Managing them all can be a problem. Logging into each account separately is very time-consuming. Fortunately, there is a program that is free to download called Windows Live Mail . Its interface is similar to Microsoft Outlook and is very simple to use. The major benefit of using this e-mail client is the ability to manage all e-mail accounts in one place.
Setting up accounts
The process of setting up a Windows Live Mail account is a simple one. Simply follow the steps and repeat for each additional account.
-
Click on the button entitled Add an E-mail Account to begin.
-
Fill in the required information for e-mail address, password and display name.
Advertisement -
Ensure that the option to manually configure e-mail settings is unchecked.
-
Your account is now ready to use.
Advertisement -
Folders and e-mail will now be downloaded.
Notes:
Occasionally, an error may occur which results in server information not being configured automatically. At this point, cancel the account setup and start again. This time, the settings should be configured automatically.
Another point to be aware of is that sometimes it is necessary to log in to your webmail account to allow access through Windows Live Mail. Simply follow the instructions and your accounts will be working through Windows Live Mail.
Managing accounts
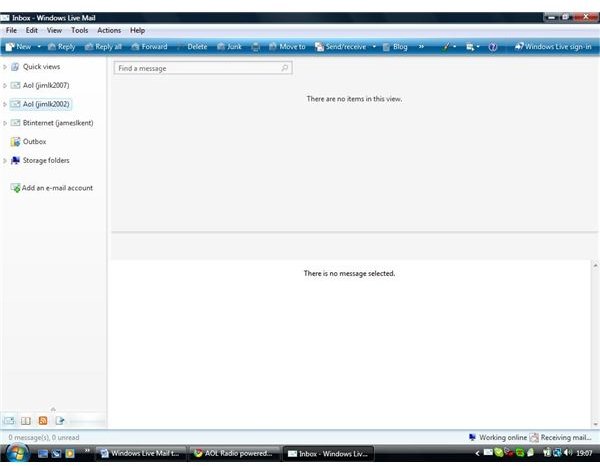
Managing different e-mail accounts within Windows Live Mail is an incredibly simple and straightforward process. As the screenshot demonstrates, e-mail accounts are shown along the left-hand side of the page. They can be in minimized form as shown or expanded to show other folders such as saved, sent and spam.
In the minimized format, the number beside the account illustrates the number of messages in the main inbox. Obviously, in the expanded format the numbers are revealed for the various folders. To expand each account, simply click the small arrow beside each account.
Notes
Typically, the folders for each e-mail account are Inbox, Junk, Sent Items, Drafts and Spam. The Deleted Items folder is usually optional and can be turned on and off in the advanced options menu, which is located under tools. It is also worth noting that the spam filters in Windows Live Mail are quite sophisticated. Even using the low filtering options, most spam mail is transferred to the Junk and spam folders. Spam filters can be altered using the safety options menu, which is located under tools.
Sending e-mail
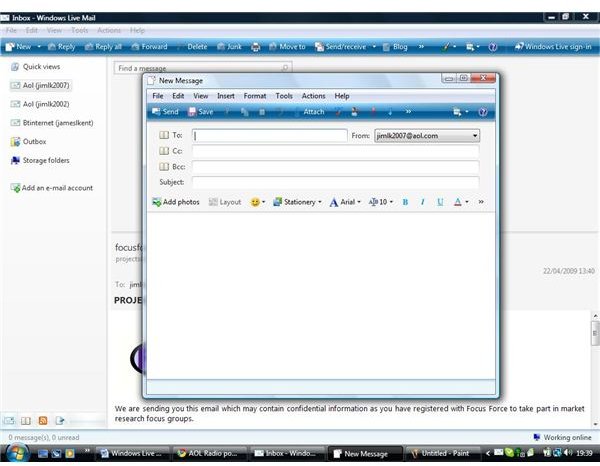
Sending e-mail from any account is straightforward. To write new messages simply click New, located at the top right hand corner as shown in the third screenshot. Now simply fill in the information for To, Subject and the body of the e-mail as you usually would. In the From section, there is a drop-down menu where you can simply select the e-mail account of your choosing.
When you have finished click the send button and the e-mail will transfer to the Outbox. The message will now be sent next time Windows Live Mail checks for new messages. If your e-mail is urgent, click send and receive at the top of the page.
Images
Want to learn more about using Windows Live programs? Check out How to Send a Photo in Windows Live Mail and How to Use Windows Live Photo Gallery .


