Use Freeze Panes and Split so you can view specific areas of your spreadsheet at all times. You can do all sorts of things with these two valuable features in Excel 2003 and 2007.
What is the Freeze Panes Option in Excel
Excel spreadsheets can go on forever, whether you scroll down or to the left. Many use headers in the spreadsheets to identify and organize data. One client I work with uses Excel for status reports.
First, a pane is an area of the document that separates itself from other parts of the spreadsheet. Freezing panes allows you to keep one part of the spreadsheet frozen and not move at all. The rest of the spreadsheet can scroll. Therefore, it makes it possible to always see one part of the spreadsheet even while scrolling.
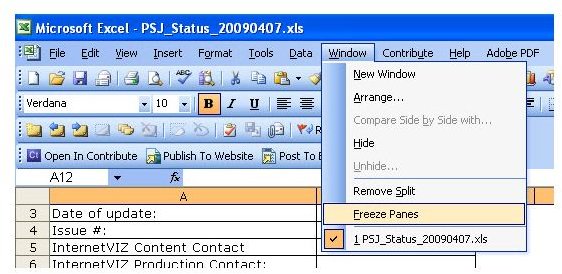
The Freeze Panes menu option appears in the Window menu in Excel 2003.
The whole document scrolls when you don’t have freeze panes or splits turned on. To freeze the top part of a spreadsheet in Excel 2003, select the last row you want to move, click the number next to it on the left and click Window and Freeze Pane. Rows 1 - 12 won’t move while the rest scroll in any direction. To unfreeze the pane, click Window and Unfreeze Panes.
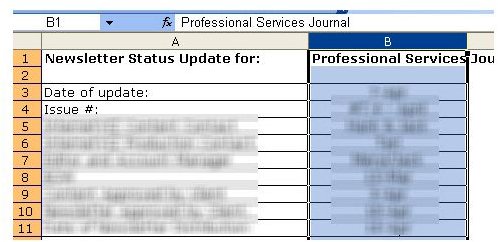
To freeze the content on the left, select the last column you want to move, click the letter on top of it and click Window and Freeze Pane. The next image shows the selection of column B. Column A, the headers column, won’t move while the rest scroll in any direction. To unfreeze the pane, click Window and Unfreeze Panes.
To freeze both column and row, select the cell below and to the right of the content you want to freeze and click Window and Unfreeze Panes. This time, you select a single cell instead of an entire row or column. In Excel 2007, go to the View tab and Freeze Panes appears in the Windows group. Excel 2007 comes with Freeze Top Row and Freeze First Column options to make it easier.
Split panes works like freeze panes except it doesn’t completely freeze the selected area. Split panes let you scroll in both panes of the worksheet while rows or columns in one pane always remain visible. Click Window and Split to insert a split. You can move splits without removing them altogether. Put the mouse pointer over the split to see it change into a two-directional arrow cursor (see the next image). Click the split line and drag it to where you want to go. Click Window and Remove Split to take it out. In Excel 2007, go to the View tab and select New Window.

You can also add a split by clicking and dragging the small gray bar on the top right (for rows) or bottom right (for columns) as the next image shows the bars. This works for both Excel 2003 and 2007. To remove the split, put the mouse pointer over the split and drag it to the top of Row 1 or to the left of Column A.

Now you can move around you big spreadsheets while keeping important information or headers in full view.


