The built-in mail client in Windows Vista is quite a nice and easy-to-use application. It offers many features, an easy interface. and much more. If you use Gmail and want to set up Vista Mail to support Gmail IMAP, this is the right place to find all the instructions to do this. Read more…
Easy Settings For Setting Up Gmail IMAP Support For Vista Mail
To set up Gmail IMAP support for Windows Vista mail, follow these steps:
-
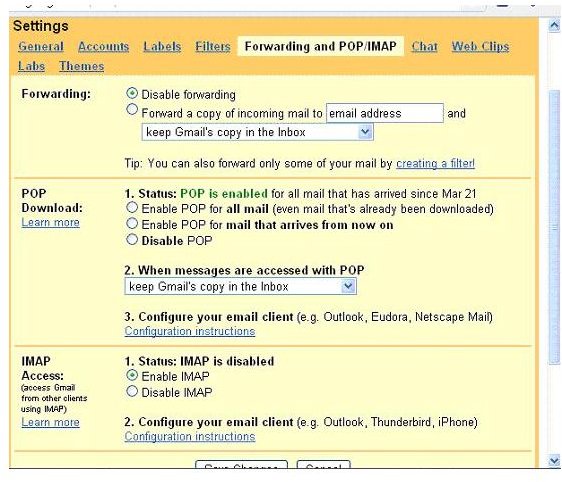
Go to your Gmail account, click on Settings then on Forwarding and POP/IMAP.
Advertisement -
At the bottom of page, select Enable IMAP.
-
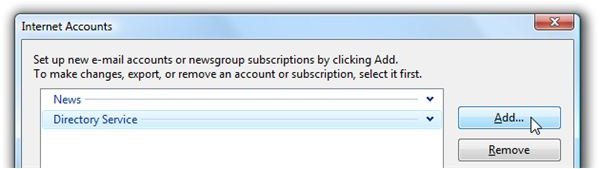
Open Windows Mail and choose Accounts from Tools menu and then click on Add button.
Advertisement
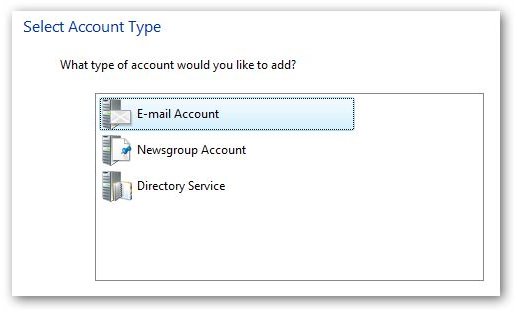
- In the pop-up, you need to select E-mail Account.
-
You will be prompted to enter your name and e-mail address. Enter them all.
-
From the drop-down menu, choose IMAP and then enter the following values:
Advertisement
Incoming Server: imap.gmail.com
Outgoing Server: smtp.gmail.com
Check “Outgoing server requires authentication”
Note: If you are from outside US, you may then need to use imap.googlemail.com and stmp.googlemail.com instead.
7. On the next screen, enter in your Gmail account address and also your password. Check the box for “Do not download my e-mail and folders at this time” if you want to fetch all your emails from Gmail to Vista Mail.
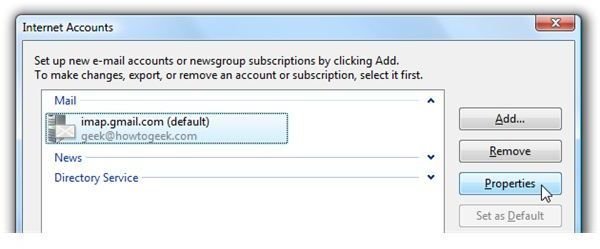
8. Click on the Finish button to get back to the Internet Accounts dialog. Now select your new account and press the Properties button.
9. Go to the Advanced Tab and check “This server requires a secure connection (SSL)” for both SMTP and IMAP.
10. Make sure that the ports are set to the following:
Outgoing mail (SMTP): 587
Incoming mail (IMAP): 993

11. Now choose the IMAP tab and uncheck the box for “Store special folders on IMAP server”.
Note. If you do not uncheck this option, you will end up with duplicated sent items.
12. All settings are done; you can now close the Properties window.
An Important Setting
You might want to make sure that when you start Sending/Receiving, Windows Mail doesn’t try to download everything i.e. Spam or Gmail messages. To prevent them from downloading, click on the “imap.gmail.com” item (in the left hand folder pane of Windows Mail’s main window) and then adjust these settings:
- Uncheck the box in front of [Gmail] and [Spam]. You might want to uncheck the [All Mail] box if you have a lot of messages and want to lighten the storage.
- Set all other folders (or could leave Inbox) to “Headers only”.
This one’s done as well, you can now hit the Send/Receive button and everything will work fine.


