Windows Live Photo Gallery allows you to share and manage photos, making it easy to import, edit and show off your favorite pics. Learn how to use this free Windows Live application.
Install Photo Gallery
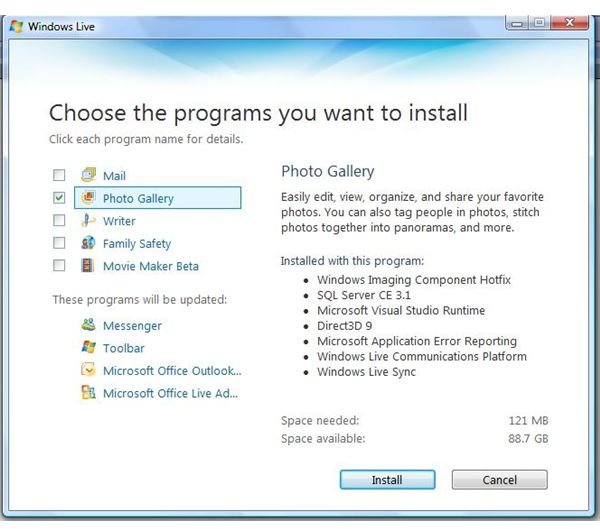
The first step to using Windows Live Photo Gallery is downloading the application. If you have not already done so and you are running Windows XP SP2 (32-bit edition only), Windows Vista, Windows 7 Beta or Windows Server 2008, you can click here for the free download. Once you click the Download button and click Run or Save, the Installer will run. You will be prompted to choose the Windows Live programs you want to install. For this example, we will select Windows Live Photo Gallery and click the Install button.
If you have any programs open that may conflict with the Windows Live installation, you will be prompted to close them. These include Microsoft Office applications, so be sure to save any documents you are currently working on, select Close These Programs for Me, and then click Continue. The Windows Live Photo Gallery installation will proceed. This may take several minutes, depending on your system and Internet connection.
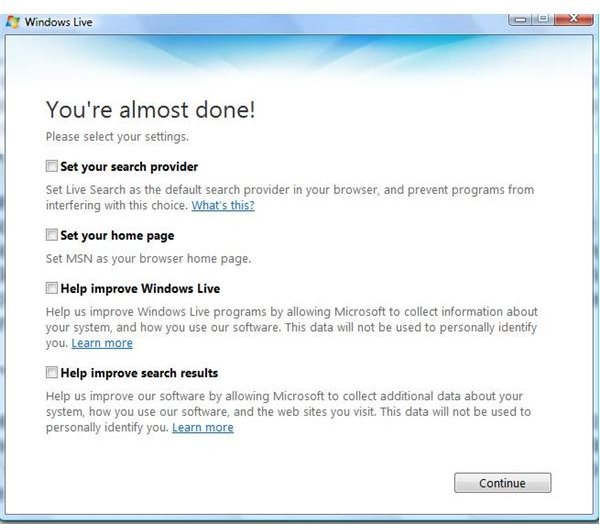
Once the Windows Live Photo Gallery is complete, a Windows Live dialog will open, giving you the option to choose Windows Live Search as your default browser search provider, and other similar options. Select the options you want, clear the ones you don’t and click Continue.
Set Up Photo Gallery
When the installation is complete, open Windows Live Photo Gallery from your Programs list, or by typing Photo Gallery in the Vista Start Search box. You may also see Windows Photo Gallery, which is a program included with Vista; Windows Live Photo Gallery is an upgraded version of this application.
After clicking Windows Live Photo Gallery in the list, you will be prompted to sign into Windows Live. You can use an existing Windows Live ID or sign up for one.
The next prompt you may see will ask if you want to associate graphic files, such as JPGs and PNGs, with Windows Live Photo Gallery. If you choose to do so, when you double click this type of file on your computer, it will automatically open in Windows Live Photo Gallery. There is no right or wrong choice; it is simply a personal preference.

Edit Photos
Now it is time to check out all of the tools and features. In the File menu, you can import pics from your computer or from your camera or scanner. You can sync photos on two computers or make a screen saver using your photo gallery.
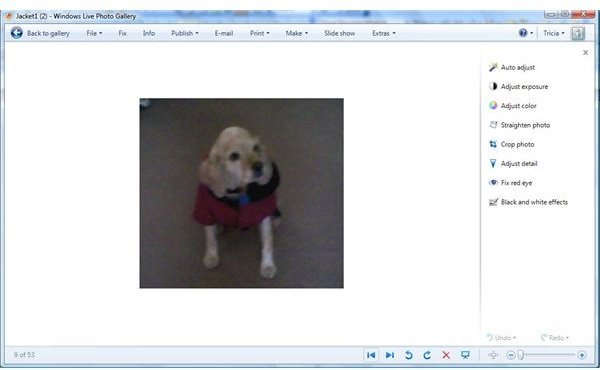
Select a photo from the gallery and click the Fix button. You can fix red eye, crop the photo, auto adjust it and more.
Click Info on the toolbar when viewing a photo from the gallery. You can easily tag people in your photos, and if you are logged in with your Windows Live ID, your contact list will pop up making it easy to tag a contact. Add captions to a photo, descriptive tags and more.
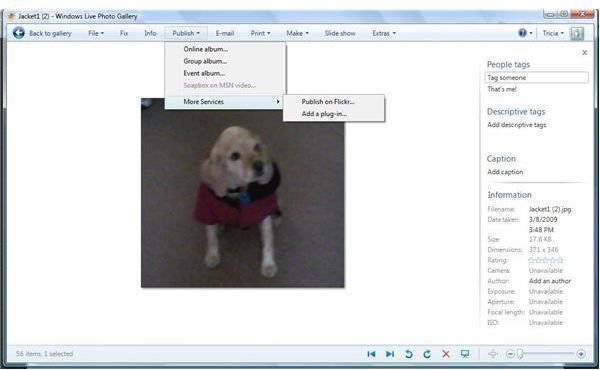
The Publish button allows you to publish a photo to a Windows Live Gallery Album, or even to Flickr and other networking sites such as Facebook or YouTube. To publish a photo to a networking using Windows Live Photo Gallery, go to the Publish menu, point to More Services and click Add a Plug-in.
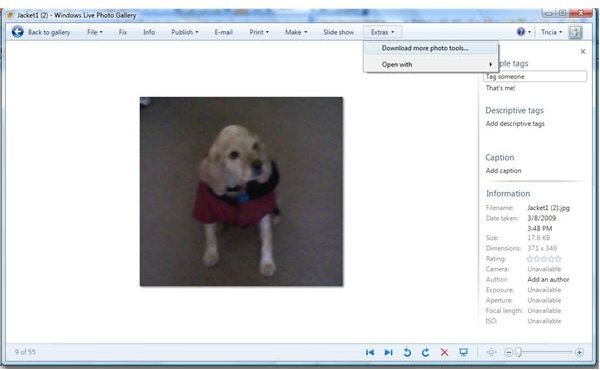
Keep checking out the toolbar options and you will find that you can email or print pics or videos, make a movie or burn a CD. Download even more photo tools to the Windows Live Photo Gallery application by going to the Extras menu and clicking on Download More Photo Tools.
Share Photos
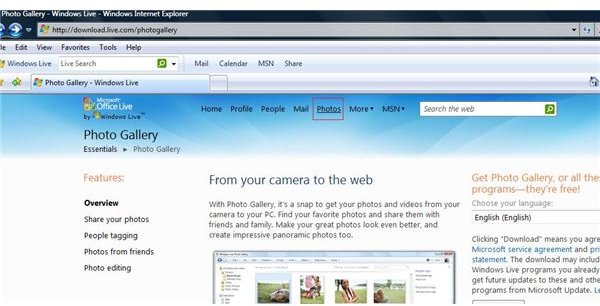
Finally, when you have published photos to an album on Windows Live Photo Gallery, you can begin viewing and sharing them. Go to photogallery.live.com and click on Photos. Sign in with your Windows Live ID if prompted. You can create more albums, and add photos by uploading them from your computer or dragging and dropping them from your Windows Live Photo Gallery.
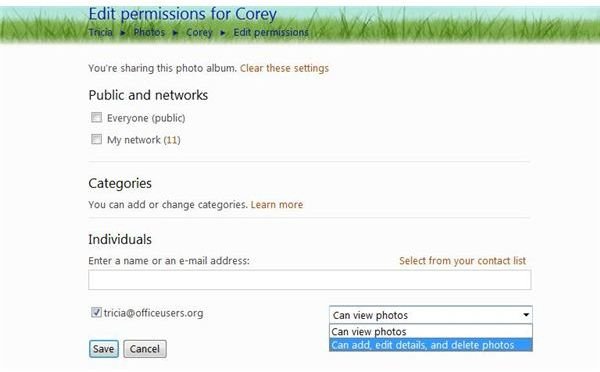
To allow certain people to view an album, select it and click on the link next to Shared With. Select Edit Permissions, and enter people with whom you want to share the album. Choose whether they can view photos or edit them as well, and then click Save. You can then send a message, letting them know about the Windows Live Photo Gallery album.