Need to convert a delimited text file into an Access 2007 table? This step-by-step guide will walk you through the importing process.
Delimited Files and Access 2007
One of the easiest ways to transfer data between two applications is to use a delimited text file. While it may have a technical-sounding name, a delimited text file is simply a text file containing raw data where each record is listed in one row of the file and each field is separated by some special character. Often, the character used to separate these fields is a comma, so you may hear these types of files referred to as CSV, or comma-separated value, files. However, it doesn’t matter what type of character is used to separate fields in delimited files – the method of importing these files into Access database tables is the same.
How to Import a CSV or Other Delimited File
Step 1: Open the database (or create a new one) in which you want to import the delimited file.
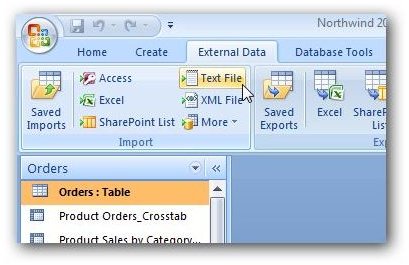
Step 2: Select the External Data tab on the Access Ribbon. Click on Text File in the Import group. (Click any image for a larger view.)
Step 3: When the Get External Data window appears, click on the Browse button to locate the delimited file that you wish to import. Select the option to Import the source data into a new table in the current database.
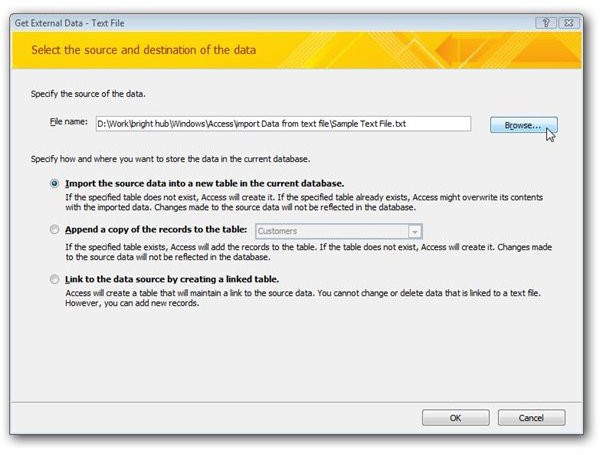
Click OK to continue.
Step 4: Next, the Import Text Wizard will appear on your screen. It should recognize that your data is in the delimited format, but make sure that the radio button next to Delimited is selected just in case.
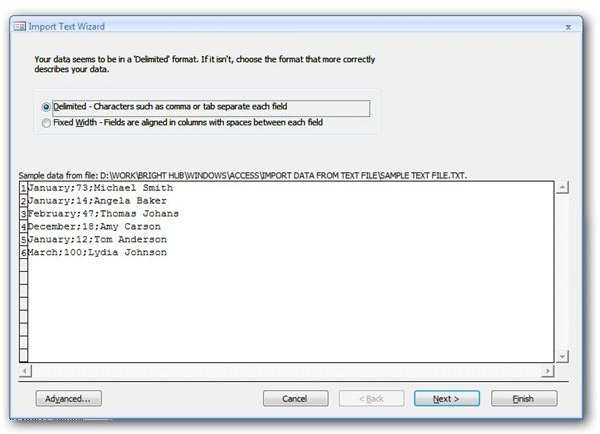
Click Next to continue.
Step 5: In the next screen, you’ll be asked to specify the Delimiter (the character used to separate the fields in each row). Access will recognize common delimiters such as commas and semi-colons. Select the radio button next to the delimiter used in your data. If you are using some special character that is not listed, select Other and enter that character in the space provided.
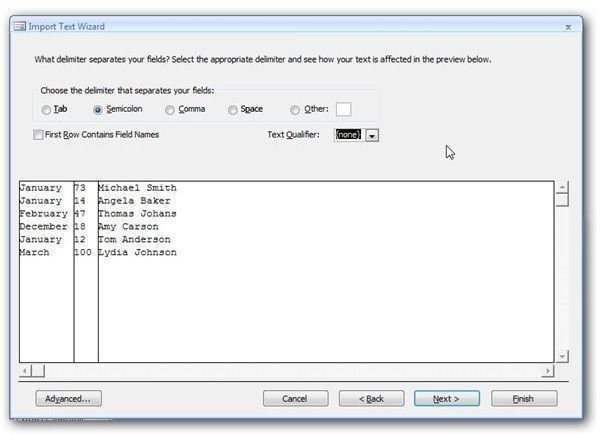
If the first row of your text file contains the field names for subsequent records, check the appropriate box. Click Next to continue.
Step 6: Now, click on the first column of the table containing the text data you are importing. If you don’t want to import this column, put a check in the appropriate box. If you do want to include this column in your new table, choose a Field Name and Data Type for the column. (See Microsoft Access: Understanding Data Types for more information.)
At this point, you can also specify whether or not you want this field to be Indexed.
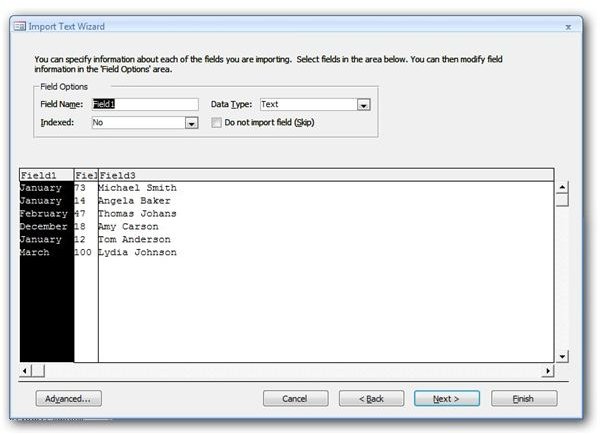
Repeat this step for each column in your source date. When done, click Next to continue.
Step 7: In the next screen, you will be asked if you want to assign a primary key. Unless you have specific reasons for not wanting to use a primary key or for wanting to use an existing field as one, choose the first option to Let Access add primary key.

Click Next.
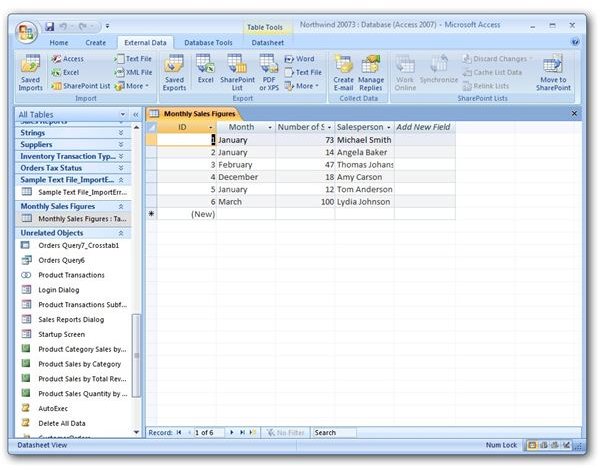
Step 8: Choose a name for your new table and enter it into the box under Import to Table.
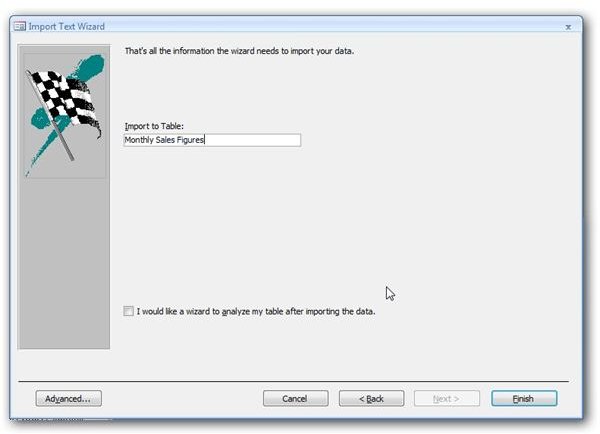
Click Finish and the new table will be created. Before returning to Access, you will be asked if you want to Save import steps. Check this option if you want Access to remember the choices you made when using the Import Data Wizard.
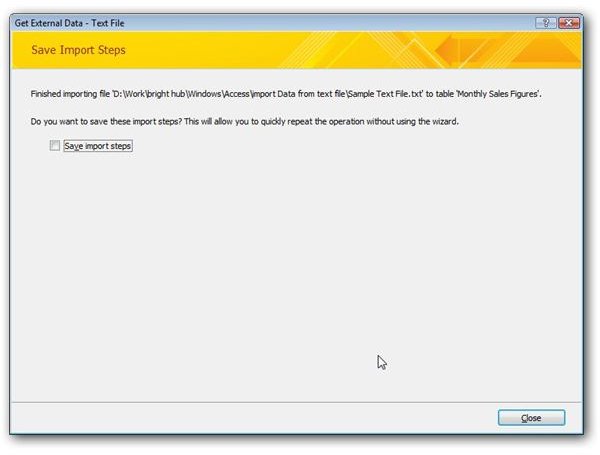
Click Close and the new table will be added to the database.