This Windows XP tutorial shows you how to speed up XP by configuring computer processor performance options. Learn how to speed up computer performance by manually managing CPU processor scheduling.
The Windows XP operating system allocates resources, runs programs and manages devices according to pre-determined settings. You can, however, use XP’s System Utility to change these default settings so as to optimize system resources and enhance the performance of your computer. Read on to learn a few tips and tricks on how to configure performance options in Window XP.
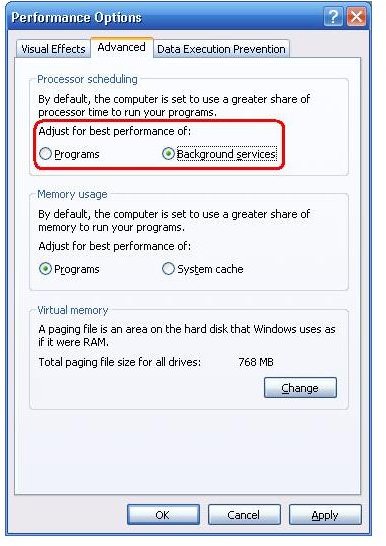
Manually Manage Processor Scheduling
There is a limited amount of resources that are available to your computer’s CPU. Windows automatically manages these resources, allocating tasks between multiple processors or allocating several tasks to a single processor.
In allocating resources, Windows prioritizes between the main programs running in the foreground and background services. By default, Windows places a priority on foreground programs. You can manually change these priorities if you want more resources allocated to a background service or utility such as a printing task or disk backup, so as to enhance its responsiveness.
- Click the Start button to open the Start menu.
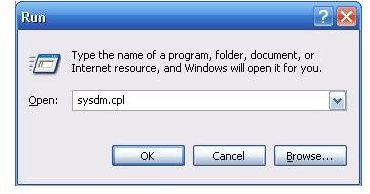
- Click Run. Type in sysdm.cpl and click OK.
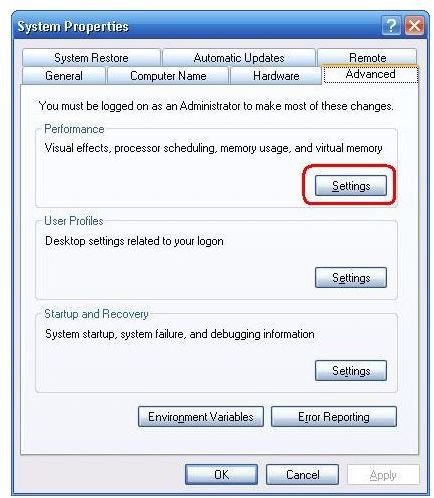
- Click the Advanced tab in the dialog window that opens.
- Click on Settings in the Performance section.
- Click the Advanced tab.
- Select either Programs or Background Services under the Processor scheduling section. Your choice will determine how much processor power will be designated to your selection.
- Click OK to apply your preferences.
Manually Manage Your Computer Memory
When your computer’s random-access memory, or RAM, is running low, Windows will increase available memory using a paging file. This is a form of virtual memory, which simulates physical RAM.
By default, the virtual memory paging file is 1.5 times the size of the physical RAM on your computer. You can manually change the size of the paging file to make it larger or smaller. In addition to this, you can optimize virtual memory by dividing the paging file space between multiple drives and removing allocated space from heavily-accessed drives. Here’s how:
- Click the Start button located in the bottom-left corner of the desktop and select Run. Type in sysdm.cpl and click OK.
- Click the Advanced tab in the dialog window that opens.
- Click on Settings in the Performance section.
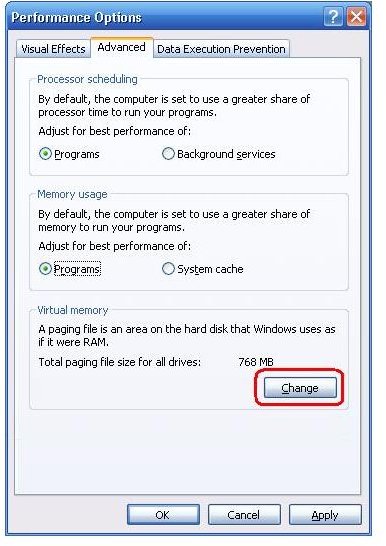
- Click the Advanced tab. Under the Virtual Memory section, click on the Change button.
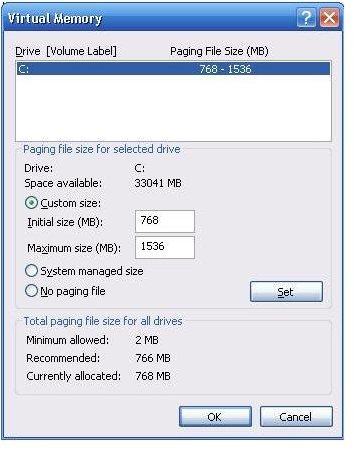
- Under Drive, select the drive that contains the paging file you want to change.
- Type in a new paging file size in megabytes. Click Set when you are done.
And you are done!