Learn how to use the indent markers on Microsoft Word’s ruler bar to indent paragraphs in your Word documents. Learn the benefits of using Microsoft Word indent markers as opposed to using the tab key for indenting paragraphs. This works for any version of Microsoft Word, even Word 2007.
What is an Indent Marker?
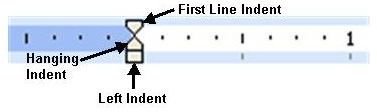
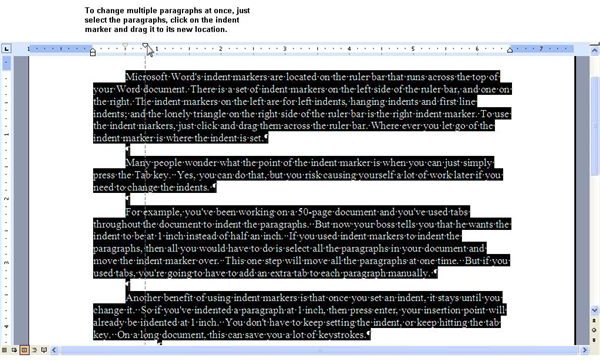
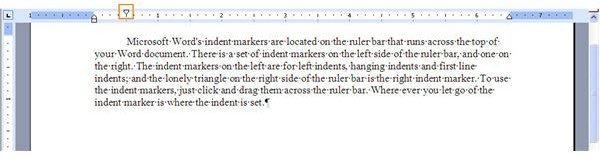
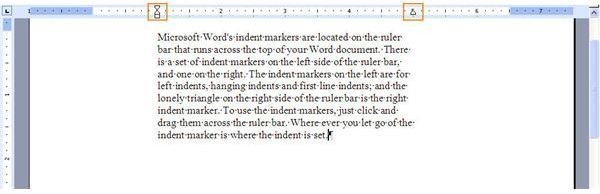
Microsoft Word’s indent markers are located on the ruler bar that runs across the top of your Word document. There is a set of indent markers on the left side of the ruler bar, and one on the right. The indent markers on the left are for left indents, hanging indents and first line indents; and the lonely triangle on the right side of the ruler bar is the right indent marker. To use the indent markers, just click and drag them across the ruler bar. Wherever you let go of the indent marker is where the indent is set.
Why Use Indent Markers?
Many people wonder what the point of the indent marker is when you can just simply press the Tab key. Yes, you can do that, but you risk causing yourself a lot of work later if you need to change the indents.
For example, you’ve been working on a 50-page document and you’ve used tabs throughout the document to indent the paragraphs. But now your boss tells you that he wants the paragraphs indented at 1 inch instead of half an inch. If you used indent markers to indent the paragraphs, then all you would have to do is select all the paragraphs in your document and move the indent marker over. This one step will move all the paragraphs at one time. But if you used tabs, you’re going to have to add an extra tab to each and every paragraph manually.
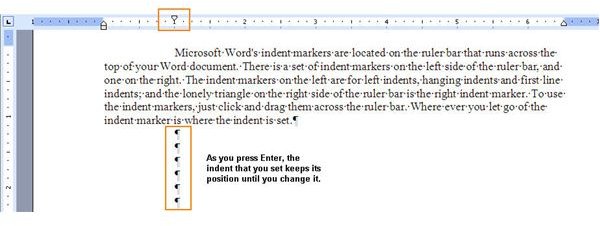
Another benefit of using indent markers is that once you set an indent, it stays until you change it. So if you’ve indented a paragraph at 1 inch, then press enter, your insertion point will already be indented at 1 inch. You don’t have to keep setting the indent, or keep hitting the tab key. On a long document, this can save you a lot of keystrokes.
Next: Now that we understand the importance of properly indenting paragraphs in Microsoft Word, continue on to page 2 for a closer look at how the different types of indents are created.
Creating a First Line Indent
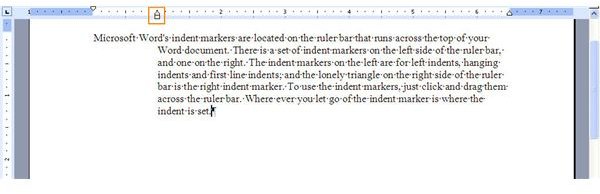
A First Line Indent is just how it sounds - only the first line of the paragraph is indented. To create a first line indent, place your cursor in the paragraph you want to indent. Then click on the top “triangle” of the left indent marker on the ruler bar. Drag the “triangle” to the desired location and let go. The paragraph will then be indented at that position. If you wanted to indent several paragraphs at one time, just select the paragraphs first, and then click and drag the indent marker.
Creating a Hanging Indent
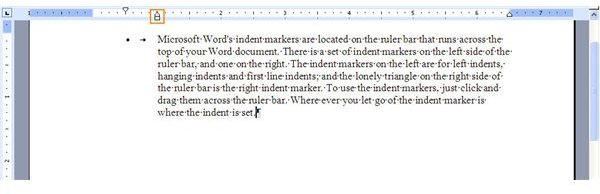
A Hanging Indent is used when you want all the lines of a paragraph indented at a certain position, except for the first line. Now you might be wondering why anyone would ever have the need for such an indent, but actually you use a hanging indent when you create numbered or bulleted paragraphs. And you may come across other situations when this type of indent might come in handy.
To create a hanging indent, place your cursor in the paragraph that you want to indent and click on the bottom “triangle” of the left indent marker. Then drag the bottom triangle to the desired location on the ruler bar and let go. All but the first line of the paragraph will move to that location.
Creating a Left Indent
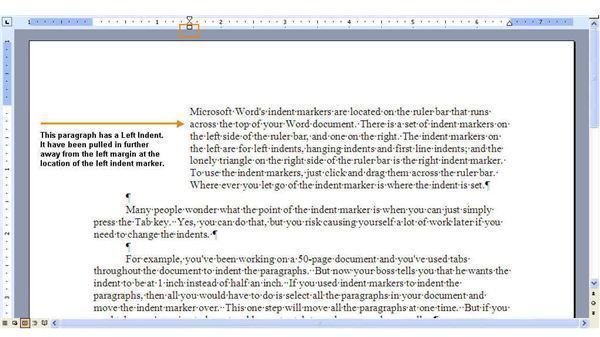
Have you ever needed to move an entire paragraph over further away from the left margin? Well, you can do this very easily by using a Left Indent. You can also think of a left indent as a temporary left margin. Just place your cursor in the paragraph that you want to move, or select multiple paragraphs or the entire document, then click on the bottom “square” part of the Left Indent marker and drag it along the ruler bar. Let go at the desired location and the selected paragraphs will move to that position.
Creating a Right Indent
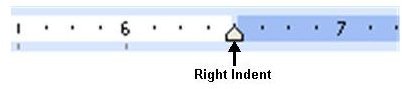
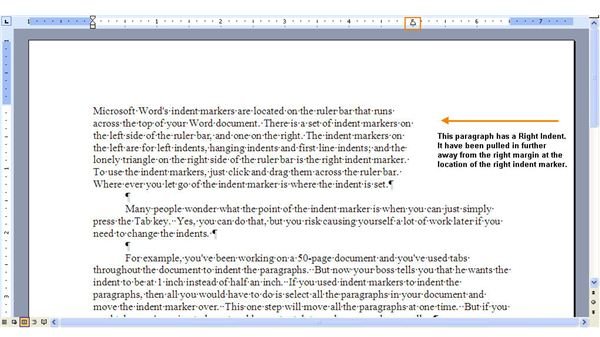
A Right Indent is very similar to the left indent, except that it moves the paragraph further away from the right margin instead of the left. You can also think of a right indent as a temporary right margin. Just place your cursor in the paragraph that you want to move, or select multiple paragraphs or the entire document, then click the right indent marker (the “triangle” at the far right of the ruler bar) and drag it to the desired location and let go.
Creating a Block Indent
A Block Indent is where you indent both sides of a paragraph by using a Left Indent and a Right Indent. This is generally used to offset a long quote. Just place your cursor in the paragraph, and create a left indent and right indent.
Conclusion
Now that you know how to properly indent your Word documents, you no longer have to use the Tab key for indenting. Consequently, you will be able to format your documents more quickly and have more professional looking documents.


