Read on to learn how to create a fill-in form in Microsoft Word for surveys, applications or other purposes.
Fill-in forms are used by organizations and individuals for a number of purposes such as questionnaires, surveys and applications. This step by step tutorial walks you through the process of creating a fill-in form in Microsoft Word.
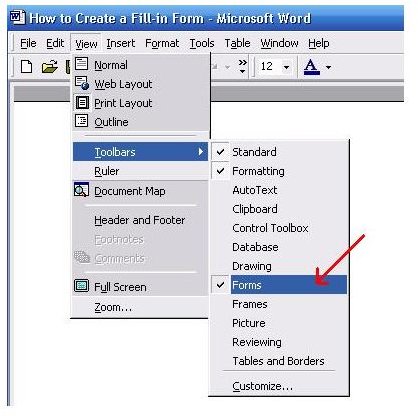
Open the Forms Toolbar
- Click on the View button at the top of the screen.
- Select Toolbars from the drop down menu that opens
- Click on Forms in the drop-down menu that opens.
.
Create Your Fill-in Form
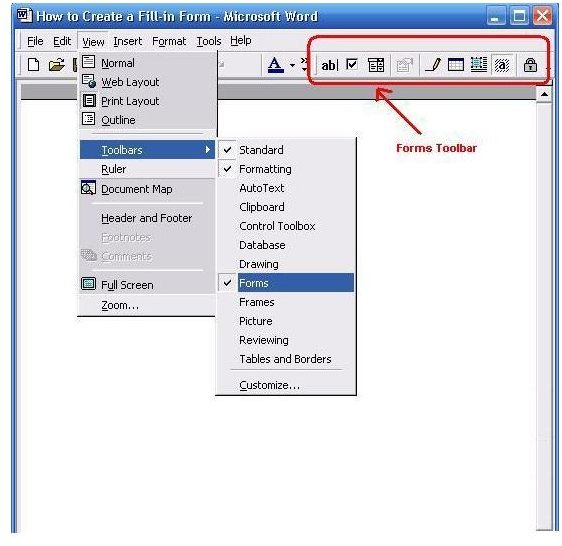
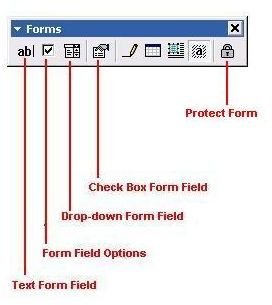
Use the various options in the Forms Tools menu to create your form.
TIP: To find out what each icon represents, hover your mouse over the icon.
The Forms Toolbar
Create a Text Form Field
1. Click on the Text Form Field icon. This will insert an entry field to enter text into.
2. Double click in the field to open the Text Form Field Options dialog box. Alternatively, click on the Form Field Options icon.
3. Format the text form using the options in the dialog box.
*Change the field type by clicking on the arrow next to the “Type” box, and selecting the desired field type from the drop-down box, such as date or number.
*Set the maximum length of each entry, which will limit the number of characters that can be entered.
*Select your capitalization using the Text Format box
4. Click on the OK when you are done.

Create a Check Box Form Field
Click on the Check Box Form Field icon to create checkboxes for your fill-in forms.
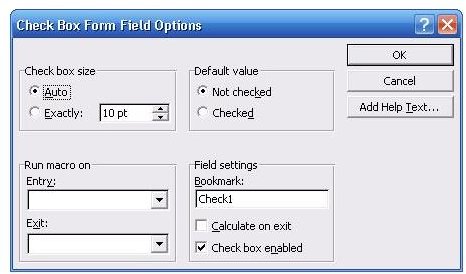
Double click in the field to open the Check Box Form Field Options dialog box.
Select your check box size. This can be automatically set by Word, or you can set a specific size.
Choose whether or not you want your default value to be checked or not.
Click the OK when you are done.
TIP: These checkboxes are somewhat limited, however. If you insert two or more checkboxes, for example, then multiple checkboxes can be selected. To limit the selections so that only one check box can be selected, you will need a macrocode or VB script.
Create a Dropdown List Box
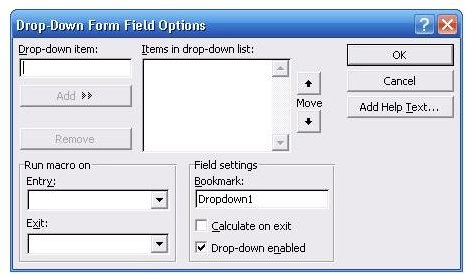
This option is designed to create a drop-down menu on your form. You can design the drop-down menu with up to 25 selections.
- Click on the Drop-down Form Field icon.
- Double click in the field to open the Down Form Field Options dialog box.
- Type in each choice you want for your dropdown list.
- Click the Add button.
- Click the OK when you are done.
TIPS
- Enter spaces to create a blank entry
- Use the Up and Down arrows to re-arrange the entries in your preferred order.
- To remove an entry, select it and click on the Remove button
Test Your Form
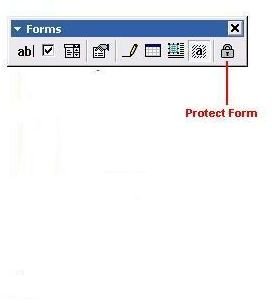
Once you finish creating your form, click on the Protect Form button so that you can test your form. You can then try out your form fields to see how well each field works. When you are done testing, simply click on the same button to unprotect it. You can edit further or save it.
Save Your Form
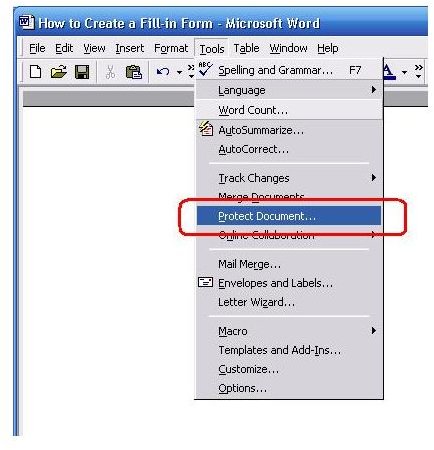
- Click on Tools in the Word menu at the top of the window.
- Click on Protect Document from the dropdown menu that opens.
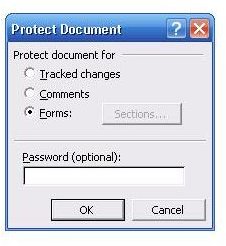
- Place a checkmark next to the Forms option.
- Enter a password if you want to password-protect the form.
- Click on the OK button. And you are done! You can now distribute the form.