The advanced PDF capabilities of WordPerfect X4 allow you to open, create, edit, and publish PDFs all within the same application. In this guide, we take a look at how to use these features.
PDF Capabilities of WordPerfect X4
Although it is possible to save a document as a PDF in many applications, WordPerfect X4 is one of the few programs on the market that actually lets you open and edit PDF documents. WordPerfect also offers much more advanced options for saving documents as PDF files so you can easily protect your content or prepare it for commercial printing.
How to Open and Edit PDF Files
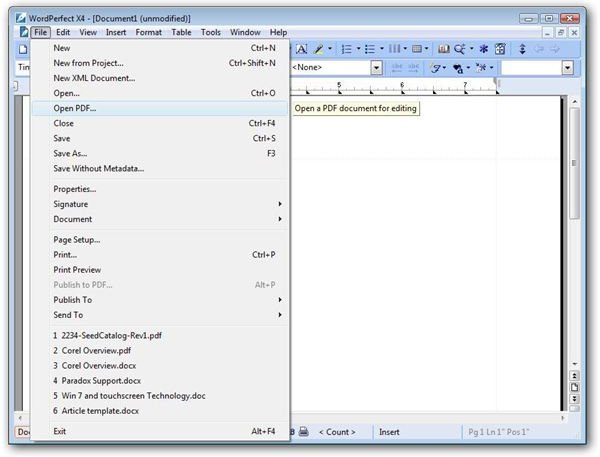
Step 1: From the File menu on WordPerfect’s main toolbar, select Open PDF. (Click any image for a larger view.)
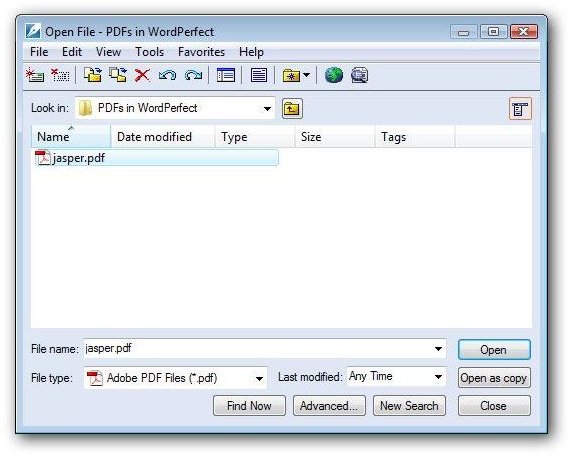
Step 2: Navigate to the directory containing the file. Select the file and click either the Open or Open as copy button. If you want to preserve the original document, it’s a good idea to use the Open as copy option here so you don’t accidentally save your modifications to the source file.
Step 3: Next, the PDF Settings dialog box will appear on your screen. If the document is password protected, you will need to enter a password here. If it’s not, that area will be grayed out as shown in the screenshot below.
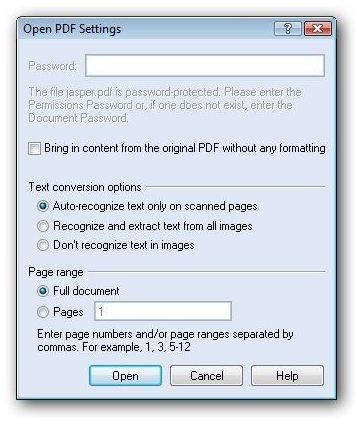
If you don’t want WordPerfect to import the text formatting of the PDF, put a check in the appropriate box. You can also determine how you want WordPerfect to import text found in images in the document. Once you’ve selected the options you wish to use, click Open to continue.
Step 4: WordPerfect will now begin importing the PDF. Depending on the size and complexity of the document, this may take a few moments to complete. During this process, the PDF Import dialog box will show the progress of the file conversion.
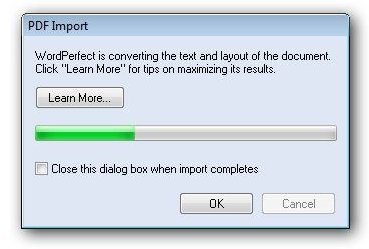
When the process completes, click the OK button and the document will open, and be available for editing in WordPerfect.
How to Save a Document as a PDF
After creating a new document or making changes to an existing PDF, you can save that file in any format supported by WordPerfect X4, including PDF. Follow these steps to convert the document to a PDF.
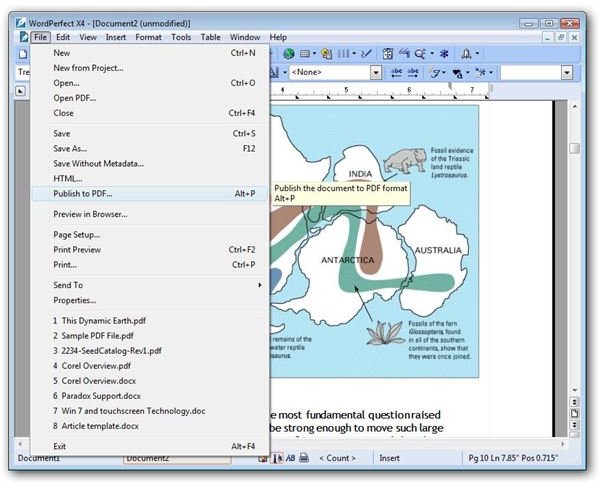
Step 1: From the File menu, select the Publish to PDF option.
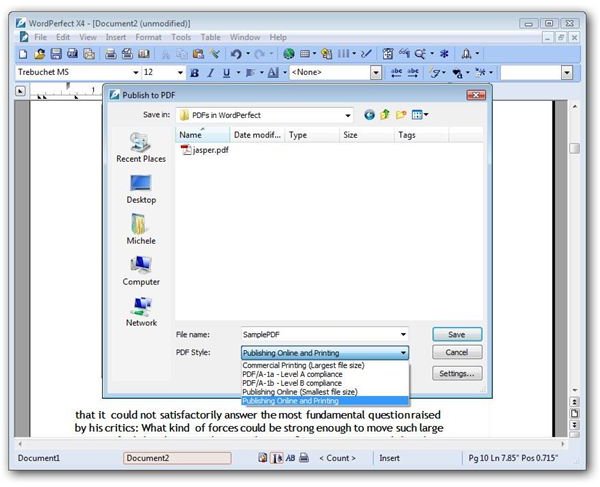
Step 2: Navigate to the directory where you want to save the new file and choose a name for the document. Also, from the PDF Style drop down list, select the type of PDF that you wish to create. Choose one of the PDF/A options if you are creating a document that will be archived for long-term use. This will ensure that the fonts used in the document creation are embedded in the file. (Always check to make sure it is legal to redistribute these fonts first! If you’re not certain, you can download this free tool from Microsoft to determine the copyright details of your chosen fonts.)
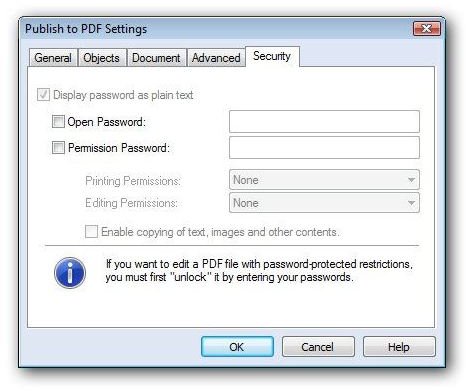
Step 3 (optional): Click the Settings button if you want to specify other options to be used in the PDF creation. This will bring up the Publish to PDF Settings dialog box. Here, you can select a password to protect the file from viewing or editing, change the color palette, determine the initial view of the PDF, and more.
Click OK to continue.
Step 4: If you want to view the PDF immediately after creation, put a check in the box next to Open PDF After Saving. Click Save to begin the export process. A progress bar will appear on the screen while the PDF is being created.

Once the process is complete, the dialog box with the progress bar will close and the PDF will be ready for viewing.


