You might think that parents, schools, bosses and governments are the only ones who need to create rules. However, by creating rules in Outlook, you can have messages practically sort, forward, and respond to themselves.
What are Outlook Rules?
Everyone knows that rules are important. Parents create rules for their children to help them learn the safest and most beneficial ways to accomplish things in life. Governments create rules to keep people safe and keep society somewhat organized. While Outlook rules might not carry such importance, you can certainly create order and make things easier on yourself by setting up a few rules in Outlook.
There are two basic types of Outlook rules. The first type is notification rules. For example, you can create a rule to have an alert sent to your cell phone when you receive an email from a specific sender. The second type of Outlook rule is organizational rules. For instance, you might create a rule to send messages with a certain word in the subject line to a specific mail folder. Once you learn how to create rules in Outlook, you will likely find myriad uses for them.
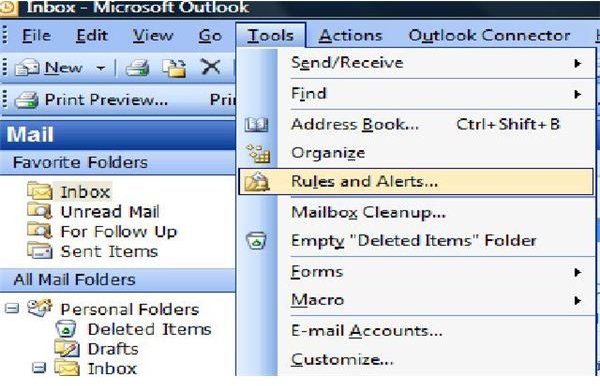
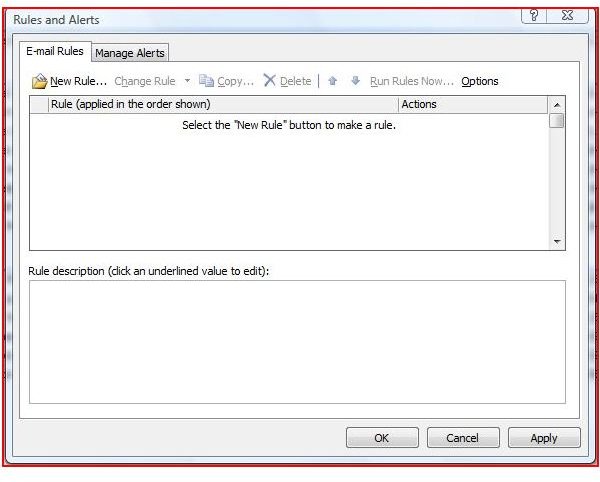
To create a rule, start by clicking on Rules and Alerts in the Tools menu. Click the New Rule button, and the Rules Wizard will open. Select either the Start Creating Rule from a Template radio button or the Start from a Blank Rule radio button.
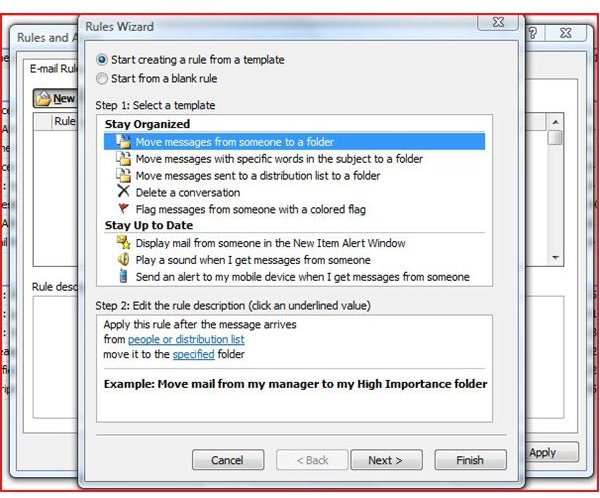
If you choose to create a rule from a template, click on the type of template you want to use from the list displayed. In the Edit the Rule Description box, click the underlined links to make specifications for your rules. For instance, if you choose the template Flag Message from Someone with a Colored Flag, you can then determine whom this “someone” is as well as what color flag you want.
Once you have edited the rule descriptions, you can move on to the next step of the Outlook Rules Wizard by clicking Next. Select more conditions for your rule by checking the appropriate boxes, such as Sent Only to Me or With Specific Words in the body. You have another chance to edit the rule description here, as well. Ready? Click Next again.
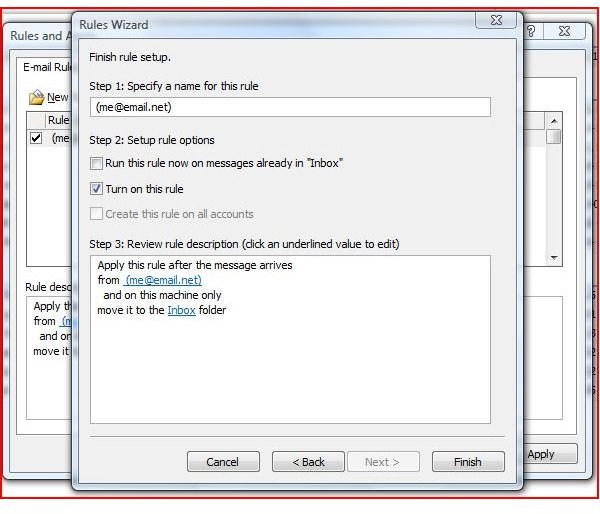
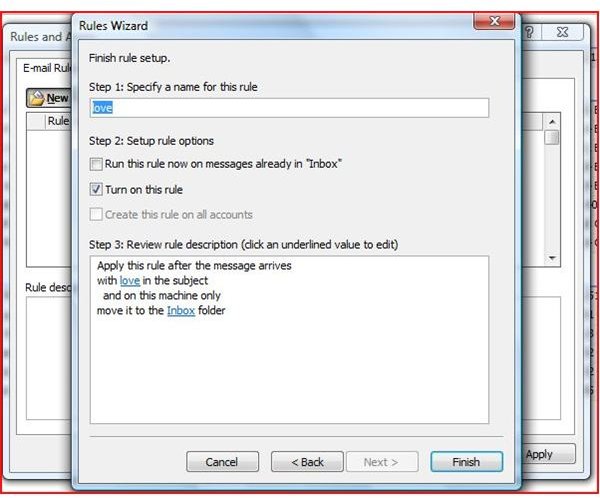
The next step in the Outlook Rules Wizard allows you to create exceptions to the rule, if you choose. Like the previous steps, select any exceptions, click any underlined links in this exception and edit the rule description. When you are finished with this step, click Next once more. Enter a name for the rule you created, make sure the Turn on This Rule checkbox is selected. Click Finish and then Apply, and you are done!
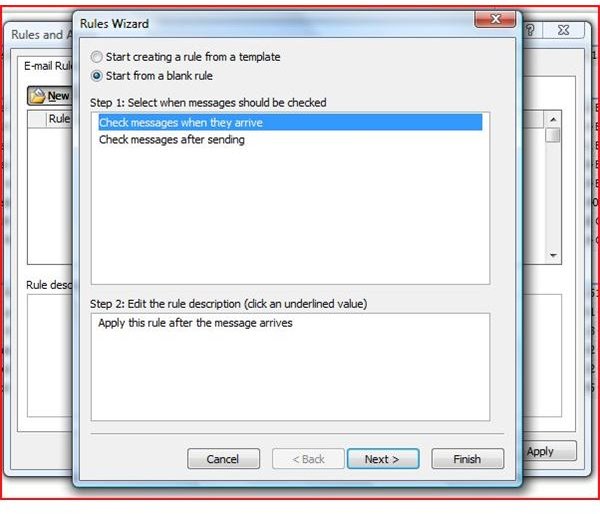
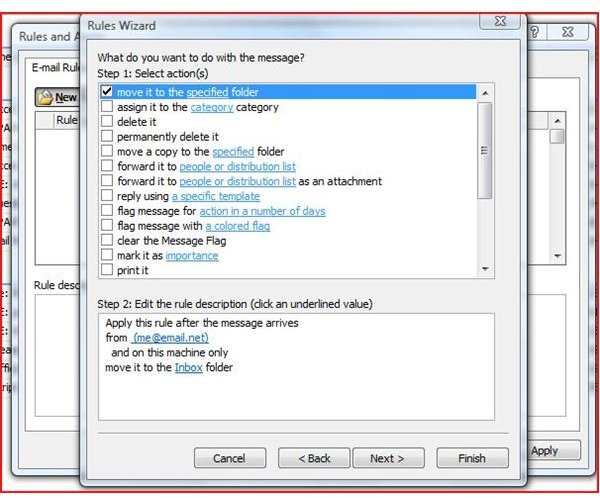
If you decide to Start from a Blank Rule, select either Check Messages when they Arrive or Check Messages After Sending. Click Next and then select a condition or conditions. Click the highlighted links in the conditions you chose for your rule, and edit the rule description. Click Next again. Select an Action from the list provided in the Outlook Rules Wizard. This will determine how you want messages handled that meet the criteria you set in the previous setting.
Edit the rule description by clicking the underlined link and making a selection. After you click Next again, you will be able to select any exceptions to this rule, as well as edit the rule description once more. Click Next one more time. Give your Outlook rule a name, make sure Turn on this Rule is selected and click Finish. Click Apply and OK, and you are officially a rule maker.