Need to setup a wireless network in your home? Wireless routers are manufactured by several companies. These routers provide NAT (Network Address Translation) allowing for multiple computers to share the same internet connection.
Home Wireless
Wireless routers are manufacturered by several companies. These routers provide NAT (Network Address Translation).
The Wide Area Network (WAN) connection on the back of the router is for your DSL or cable modem. With home users purchasing several computers for a household, wireless laptops and PDAs are becoming common place, so wireless home network use is booming.
Tutorial
The first step you should take to setting up a wireless home network is to disconnect the power from your modem. These modems ‘hold’ the MAC address of your computer. Disconnecting the power allows the modem to ‘forget’ the MAC address of the connected computer.
The next step is to connect your wireless router. The RJ45 (network cable) plug should connect from your modem to the WAN port on your router.
Connect the network cable from your computer to any of the network ports on the back of your router.
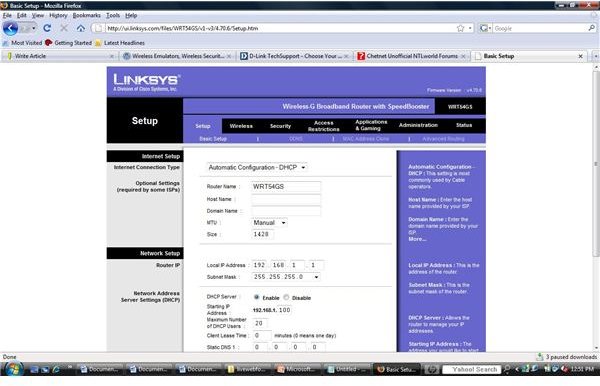
Power on your modem and power on your computer that is connected to your router. With DHCP (the automatic giving out of IP addresses) enabled by default, your desktop or computer that is connected to the router should request and receive an IP address.
Next, you will open your browser (IE or Firefox) and go to the router’s IP address. Usually this number is https://192.168.0.1 - https://192.168.1.1 - https://192.168.0.254 or https://192.168.1.254. This number can be obtained by downloading the quick start guide from the manufacturer.
You should be prompted by a username and password if you typed in the IP address correctly. Once prompted, you should enter the authentication information as necessary. The router at this time will give you a home page.
DSL Notes
Note for DSL users- Typically, cable ISPs automatically assign an ip address to the device (router or computer) connected to the modem. DSL users may have to go to the PPoE settings and enter their username and password for their ISP.
Practice with Emulators First!
Practice setting up your router by using an emulator if you are uncomfortable programming your router. These links are for common routers and devices.
DLink emulators
Linksys emulators
Netgear emulators
Setup Pictures
Important- You should go to the administration tab (this tab may be different) and set a new password for the administration of your router. Apply the settings after setting the new credentials. This will protect you from having a ‘drive by’ hack.
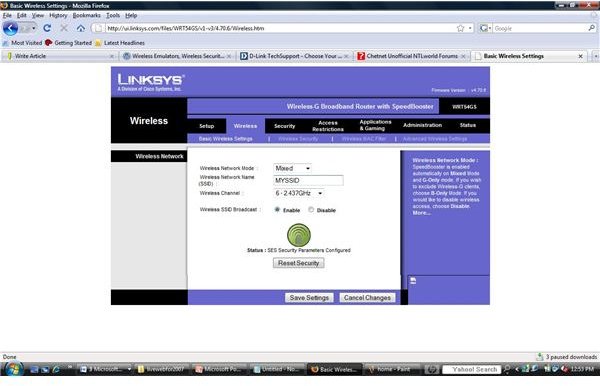
On the wireless tab, change the SSID. (the name of your wireless network)
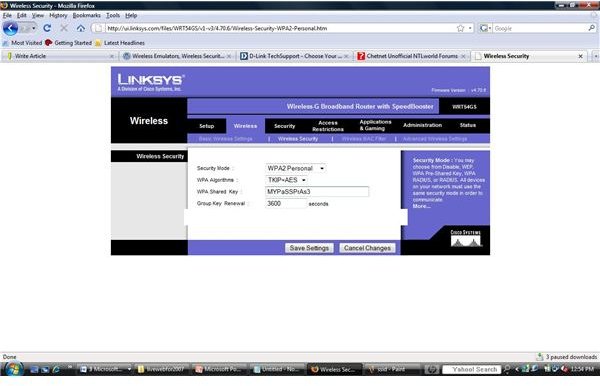
Go to the wireless tab or menu and click on wireless security. As you can see by the above links to emulators that wireless routers will be slightly different. On the wireless security menu, select WPA2 and enter a pass phrase. Make the passphrase complex yet easy to remember. Apply the settings.
On your Windows XP or Vista computer, make sure the wireless card is on and select the appropriate SSID (name for your wireless network). You should be prompted to enter a passphrase. Enter the passphrase and wait for your connection. (Your computer will obtain an IP address after authentication.)
You should now be on the network. If you share a folder on a computer, make sure you only share the folde r to a specific user and not to the ‘Everyone’ group.
Never program your router via wireless connection. Settings can be lost. Your router can be ‘bricked’ if your computer loses connection during a firmware upgrade.
Wireless Survey
You can perform a wireless survey by walking through your residence with inSSIDer installed on your computer. Remember that -80db should be an absolute minimum signal for a reliable connection. This software will give you a real time ‘picture’ of your signal. If you need a greater signal, raise the router, place it on a wall or install larger antennas.


