BitLocker is available to anyone using Windows 8.1 Pro or Enterprise editions. Learn how to turn on BitLocker using the default settings or use a Group Policy workaround, instead.
Encryption Is Important
For the security-conscious user, full-disk encryption is a necessity of digital life, especially when using mobile laptops that are commonly stolen.
Without encryption, a thief could readily circumvent the meager Windows password to gain access to sensitive files. Once encryption is enabled, however, a thief would need to provide an additional boot key before ever encountering the traditional Windows login. Failure to provide this key prevents access to any data, even if the hard drive is imaged or relocated to another operating system. This security does impose a small performance overhead, but with ever-quickening processors, the effect is negligible compared to the benefits.
That said, encryption has its limits. For one, it does nothing to prevent an Internet hacker from breaking into a running, Internet-connected computer and accessing on-the-fly decrypted files. If you smartly kept your Windows Firewall enabled, you need not worry excessively about this scenario.
Encryption also doesn’t protect your files after you’ve entered your boot key and have your system running, because access is already authorized (however, it does lock down again when entering hibernation or shutting down).
Finally, files copied to an unencrypted drive are potentially accessible on that drive, even if the originals are safely locked away on the encrypted drive. These limits, however, are easily countered with good habits: Keep your firewall and anti-virus software enabled, keep backups encrypted and don’t leave an open computer unattended, especially where others could access it.
BitLocker Drive Encryption
Although there were once several encryption solutions for Windows, BitLocker Drive Encryption is now the obvious choice for Windows 8.1 due to its ease of use and full integration in the operating system. Unfortunately, this utility is only available in the Professional or Enterprise editions. It also requires a 1.2+ Trusted Platform Module (TPM) on your motherboard, at least using the default settings. This chip securely stores your boot key, so you could optionally boot the computer without ever entering a password. Automatic authorization seemingly defeats the purpose of full-disk encryption, but it at least prevents access to files on a cloned hard drive or when the hard drive is installed on another computer, for example to bypass Windows login using another operating system.
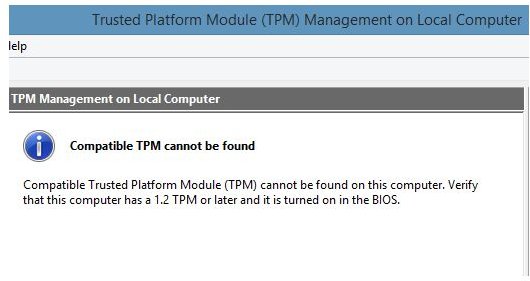
To test if you have a useable TPM, press Win-R to open the Run dialog, type tpm.msc and press Enter. If you don’t have an appropriate chip, you will see “Compatible TPM Cannot Be Found” in the resulting window. You can also start the BitLocker setup, and it will tell you if no TPM is found.
If you don’t have a 1.2+ TPM, which is quite possible, don’t fret. Windows 8.1 gives you a workaround through Group Policy, which optionally configures BitLocker to use a USB key or password in place of TPM. Group Policy also lets you enable “Enhanced PINs” for TPM, which supports alphanumeric characters and symbols in the boot PIN, instead of only Function-key-entered numbers.
Using Group Policy to Bypass TPM
1. Press Win-R, type gpedit.msc and press Enter.
2. Open Computer Configuration\Administrative Templates\Windows Components\BitLocker Drive Encryption\Operating System Drives.
3. Double-click Require Additional Authentication at Startup.
4. Check Enabled.
5. Check Allow BitLocker Without a Compatible TPM.
6. Click OK.
Using Group Policy to Enabled Enhanced PINs
1. Press Win-R, type gpedit.msc and press Enter.
2. Open Computer Configuration\Administrative Templates\Windows Components\BitLocker Drive Encryption\Operating System Drives.
3. Double-click Allow Enhanced PINs for Startup.
4. Check Enabled.
5. Click OK.
Enabling BitLocker
1. Press Win-X to open the utility menu and select Control Panel.
2. Click System and Security and then BitLocker Drive Encryption.
3. Click Turn BitLocker on in the C: section. Assuming you have a compatible TPM or have chosen to bypass it, BitLocker will check your PC’s configuration and present a setup screen.
4. Click Next and follow the onscreen prompts. The selections vary depending on your setup, but it does a good job walking you through. For example, a TPM-enabled computer will reboot, request that you setup TPM and then open the BitLocker setup again. A non-TPM-enabled might run a system check or shrink your C: drive to house an encryption key. When the preliminaries are over you’ll arrive at a screen to select your authentication method.
5. Choose your preferred authentication method.
- If you have a 1.2+TPM, you have three options:
- BitLocker Without Additional Keys: This option boots straight from the TPM key, so no additional keys or PINs are required; although convenient, this option is also less secure, because someone with physical access to your computer wouldn’t need a boot key either.
- Require a PIN at Every Startup: This option requires a four to 20-digit PIN in addition to TPM; by default, you can use only numbers unless you previously enabled Enhanced PINs.
- Require a Startup Key at Every Startup: This option requires a physical USB drive to serve as an additional key. However, your computer must support reading USB devices in the pre-boot environment; the BitLocker setup will test this automatically.
- If you bypassed TPM, you have just two options: “Enter a Password” or “Insert a USB Flash Drive,” which are similar to the latter two TPM options.
6. Save your recovery key. This 48-digit key is vitally important. If Windows detects a change in the boot environment, such as newly installed hardware, it may ask for this recovery key. It also allows access if you lose your primary key or forget your password. You can (and should) choose multiple methods of saving the recovery key, just to be safe. Your options are:
- Save to Your Microsoft Account: This option allows recovery from just about anywhere.
- Save to a USB Flash Drive: Although you could save it to the same startup key USB drive, you shouldn’t, because if you lose the drive, you lose both keys.
- Save to a File
- Print the Recovery Key: This provides a physical printout of the recovery key.
7. Choose how to encrypt the drive. Your options are:
- Encrypt User Disk Space Only (Faster and Best for New PCs and Drives): This option only encrypts existing data and ignores empty sectors. However, this potentially leaves previously deleted files vulnerable. Therefore, only choose this option if you are on a brand new computer that never had personal files on it.
- Encrypt Entire Drive (Slower but Best for PCs and Drives Already in Use): This is the best option for maximum security and should be chosen if you are at all uncertain about which option to choose.
8. Wait for BitLocker to encrypt your drive. The encryption process could take hours, but you can still use your computer during that time.


