Word 2013 offers many of the same features as previous versions of Word, but maybe you’re having a tough time finding some of these commonly used features. This article hopes to clear up any confusion and lead you in the right direction.
Common Tasks
Most people have the basics of Word down – how to format text, change the font and modify paragraph settings such as bullets and numbered lists. However, some other helpful common tasks may not be as well known. This article will cover the following topics:
- How to format line spacing
- How to insert lines
- How to insert pages
- How to work with section breaks
Let’s get started!
Line Spacing
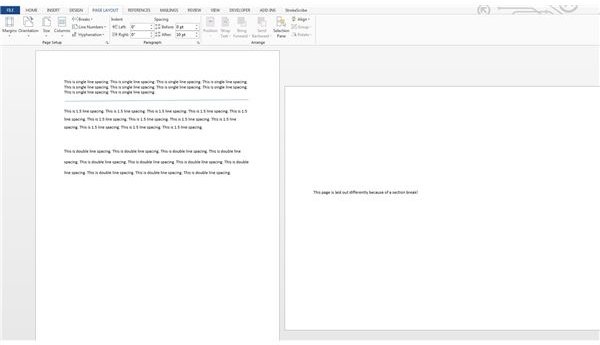
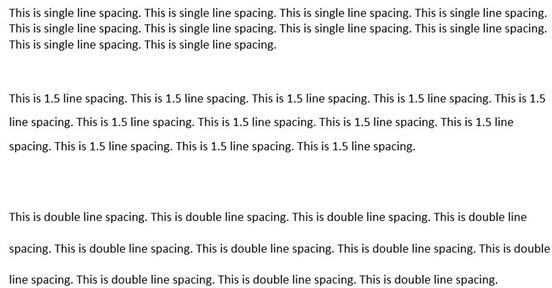
Line spacing refers to the amount of space between each line of text. If you have a lengthy document, you may want to consider increasing the line spacing to 1.5 or 2 times to make it easier for your reader. On the other hand, if you are squeezed for space, one way to get space back is to decrease the line spacing while keeping the font the same size. You can get a picture of the difference in line spacing by taking a look at Figure 1.
To change line spacing, first highlight the text you wish to change. Click the Line and Paragraph Spacing button under the Home -> Paragraph tab and select the spacing option you wish to use. If you want to add a single line space between paragraphs, click the Line and Paragraph Spacing button and select Add Space before Paragraph.
Inserting Lines
If you want to add a vertical or horizontal line in Word to break up the space in your document, it’s easy to do using the Insert tab. Click the Insert tab and then select Shapes. Under Shapes, select the line type you wish to add. Next, draw the line using the crosshairs and let go at the end point of the line. Now you’ll have a line in your document. You can modify the color and weight of the line by clicking on it and selecting the Format tab. The color and weight options will be under the Shape Styles box and the Shape Outline button (Figure 2).
Working with Pages and Breaks
When working with a longer document, it is useful to break up sections of logical text by page just like a new chapter of a novel always starts on a new page. To do this, use the Insert tab and either the Blank Page or Page Break buttons. The Page Break button tells Word to immediately end the page and start a new page. The cursor will automatically jump to the new page. A blank page can be inserted when you want to leave a blank page for printing reasons, such as making sure a new chapter starts on an odd page.
The other type of break is a section break. Section breaks allow you to differ formatting and page layout from the rest of your document. I find this useful when I want to write text vertically and then insert a horizontal graph or chart in the middle of my document. To do this, I’d create a document with the horizontal orientation. When I come to the section where I want to create my graph I use a Section Break (Page Layout -> Breaks -> Section Break), change the page orientation and after my horizontal page I insert another section break and set the orientation back to vertical. As you can see in Figure 3, I’ve inserted a section break and changed the orientation of page two.
I hope with these simple tips you’ll be more effective in using Microsoft Word 2013!
Images