In this guide to embedding audio into your PowerPoint 2013 presentation, learn how to optimize for compatibility and avoid unwanted issues.
Getting Started
Embedding audio in PowerPoint used to be a chore. You had to use specific audio codecs and store the files along with the presentation. This often led to issues with the computer not having the correct codec installed or presenters forgetting to copy the audio files when they moved presentations to another computer. With PowerPoint 2013, embedding audio into a presentation couldn’t be easier.
We’ll walk through the ways you can embed audio into your presentation along with the types of audio formats that are supported.
Supported Formats
PowerPoint supports several types of audio file formats. Below are the supported formats:
- ADTS
- AIFF
- AU
- MIDI
- MP3
- MP4
- Windows Audio (WAV)
- Windows Media Audio (WMA)
Although PowerPoint supports importing and embedding these formats, PowerPoint is smart enough to know not everyone can read these types of files without a 3rd party codec installed. A codec allows a computer to decode a file enabling it to be played.
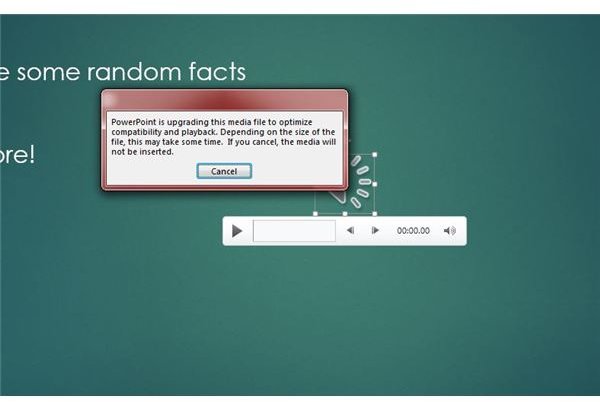
When you embed a supported file that would require others to use a 3rd party codec, PowerPoint will alert you to this fact and will automatically convert the audio to a more widely supported format.
In some cases you will be alerted as you embed the file itself (Figure 1). In other cases you will be notified if you view the File -> Info Menu.
Embedding Audio from Your PC or Online
There are three ways to import audio clips and which way you choose will likely vary depending on what you are trying to do.
If you have audio files on your computer and you want to have one or more play when you go through your presentation you can use the Insert menu and select Audio -> Audio on my PC (Figure 2). Once you’ve selected a file, PowerPoint will embed the file and you will see controls on the slide you inserted the audio into.
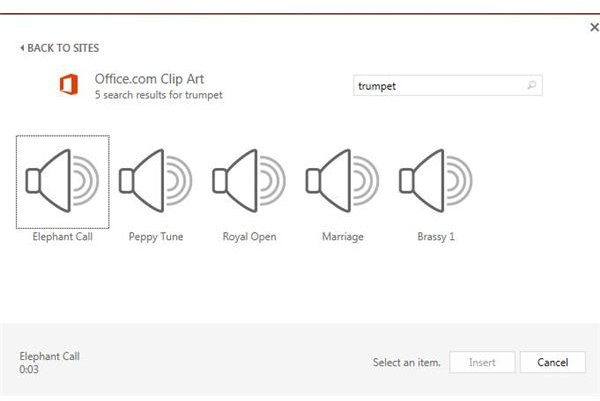
You can also embed audio from an online source. Click Insert -> Audio -> Online Audio. Enter a search term (Figure 3) and select a clip you like.
The third way to embed an audio clip is to record the clip yourself. To do so, click the Insert menu and select Audio -> Record Audio.
Give your recording a name and click the recording button. Record your audio and press the stop button. Click OK and your audio will be embedded.
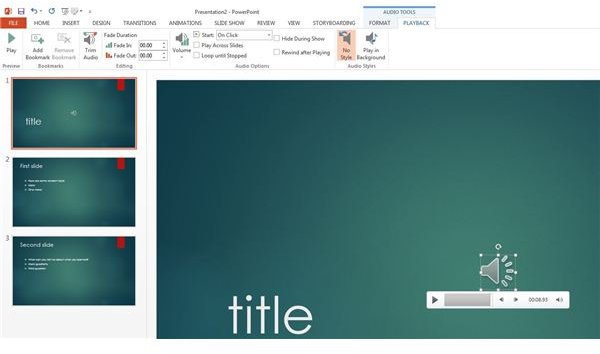
If you click on the audio icon you will see new menu options appear including Audio Tools -> Format and Playback. The Playback menu gives you options to hear your audio, trim the length and specify if you want the audio to start only when clicked on or automatically when the slide appears (Figure 4).
Embedding Narration

If you wish to narrate your presentation for a kiosk or other unattended presentation you can easily do this within PowerPoint. To do this, click the Slide Show menu and select Record Slide Show -> Start from the beginning. Next, be sure to select both check boxes and click Start Recording (Figure 5).
Your presentation will go full screen and you’ll see a small timer and slide controls at the top of the screen (Figure 6). From left to right you can advance to the next slide, pause recording, view the amount of time spend on the current slide, undo the current slide and finally view the total amount of time spent in the presentation. This is a powerful feature and will let you create unattended presentations with ease.
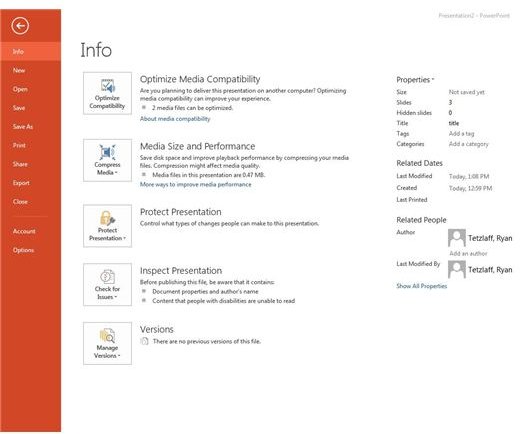
Once you are done adding your audio be sure to check the File -> Info tab. If you have files that need to be optimized, you will see the Optimize Media Compatibility button (Figure 7).
Click the button to optimize your presentation. You’ll be notified when the audio has been optimized.
You can now save your presentation and feel confident that others viewing the presentation won’t run into compatibility issues.


