Whether it’s for a class, a presentation or personal use, you can create an electronic questionnaire in Word by following this tutorial.
Getting Ready
Be sure you have a basic layout of your questionnaire written down either on paper or in a Word document. I find it useful to actually draw out what I want my questionnaire to look like on paper before I get started working in Word. Once you have the basic design ready let’s open up Word 2013.
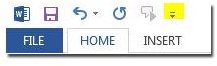
First you need to add the Developer tab to Word if it’s not already there. To do so, click the small drop down arrow in the quick access toolbar (Figure 1).
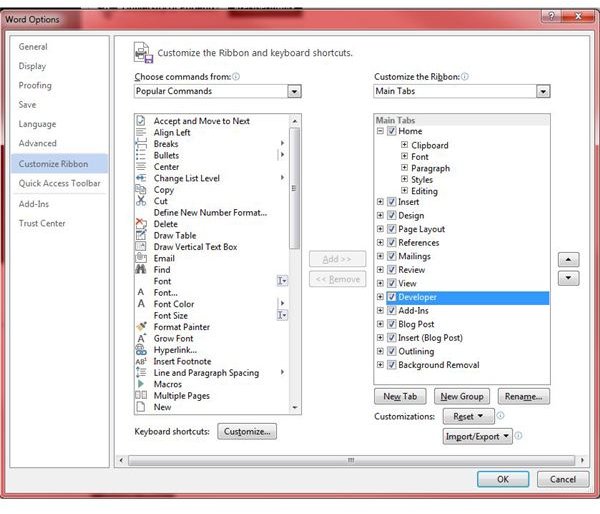
Select More Commands. Click on the Customize Ribbon option in the left hand side of the window. Next, select the Developer tab (Figure 2) and click OK. You should now see the Developer tab in your list of tabs.
Creating the Form
You will be using the Controls section of the Developer tab. Controls let you create areas where an end user would be allowed to type in information or interact with an item like a drop down box or date picker.
My sample questionnaire will have a title, heading section and a few questions with various types of controls.
Start by giving your questionnaire a title. Next, for my sample I’m going to have a heading where users can type in their name, select the date and a few other items. To make sure data like this lines up we’ll add a table. As you can see in Figure 3, I’ve added my title and table with a few labels for the information we want the end user to fill out. Next, we’ll add some controls to the table.
- Click on the Developer Tab.
- Click Design Mode in the Developer tab.
- Put your cursor next to the Name label.
- Click the Plain Text Content Control. You should now see a control box added next to the Name label.
- Click inside the control where it says Click here to enter text. Delete the text and replace it with Type your name here.
- Place your cursor next to the Date label and insert the Date Picker control (Figure 4).
- If we want to change the format of the date picker from mm/dd/yyyy to yyyy-mm-dd we can right-click the control and select Properties. Next, select the appropriate format and click OK (Figure 5).
Keep adding controls until your header is complete. Next, we’ll add a few questions to our form. First we’ll add a drop down box followed by check boxes and a picture chooser. The process for adding each control is exactly the same as we used to create our heading.
Drop Down
Once you’ve added a drop down control you can right click on it and select properties. In the bottom section called Drop-Down List Properties, click the Add button to add the values you want to let users pick (Figure 6).
Check Box
The check box control is either checked or unchecked so there isn’t much to do other than place it next to a label. As you can see in Figure 7, I created another table, entered a label into each column and then added the control next to each item.
Picture Chooser
The picture chooser allows end users to insert a picture into their questionnaire. Simply add the control and end users will be able to browse for a picture to insert.
Locking Down the Form
Next, we need to “lock down” the form so end users can only edit the controls we put in place. On the Developer tab select Restrict Editing. Under section 2 – “Editing Restrictions” choose “Allow only this type of editing in the document” and select “Filling in forms”. Under heading 3 click “Yes, start enforcing protection” (Figure 8). You can then protect your document with a password if so desired.
Once protected, end users can only edit the controls you allow them to edit. As you can see in Figure 9, I’ve filled out our questionnaire.
Creating electronic questionnaires is not hard and gives your end users a bit more excitement over filling out a paper form. Don’t be afraid to experiment with some of the developer tools and more advanced functionality of the various control types.


