Want to make your Word document look more polished and professional? Create a unique header that includes your logo, your organization’s colors, or any other combination of images and text.
Add a Little Pizzazz to Your Word Doc
Whether you’re creating a Christmas newsletter to send out to your friends and family or you’re putting together a price quote for your latest client, there are lots of little ways you can dress up your Word document. One fairly quick and easy thing you can do is add a header.
In this tutorial, we’ll cover how to insert, customize and save headers in Word 2013. Many of these instructions apply to previous versions of Word as well, but Office 2013’s new layout and design features really give you a lot more power in this area.
Inserting a Header
Start out by going to the Insert tab and clicking on Header in the Header & Footer section. This will open a pane that shows all of the default header designs that come preloaded with Word 2013 as well as any other designs you may have downloaded or created.
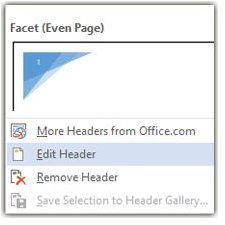
You have a couple of options here. You can either select one of the preloaded header designs to modify or you can click on Edit Header to start building your own custom header from scratch. The first option is particularly nice if you see an existing design that is close to something you’d like to use, so we’ll look at that one first.
Modifying an Existing Header Design
Scroll through the various designs available and select one with a style you like. As an example, I’ll choose the one called Banded. This particular header design is made up of a blue rectangle with a placeholder for the document title in the middle of the page. I’ll modify it so that the color of the rectangle is green and the document title is right aligned.
To do this, first select the rectangle and right-click to bring up the floating tool panel. Then, click on the Fill bucket and choose the new color.
Next, select the placeholder for the document title. Right-click on that area and select Paragraph. Change the alignment from Centered to Right.
Saving the Header
To save the design, hold down your CTRL key and click on each element in your header design until all of the ones you want to save are selected. Or, you can hit CTRL-A to select everything in the header. Go back to the Insert tab and click on Header. Select Save Selection to Header Gallery.
A pop-up called Create New Building Block will appear. Give your new header a name. You can also enter a description and modify the other settings if you like, but that’s not necessary. Click OK to save your header.
The next time you select Insert Header from the Insert tab, your new header will be shown along with all of the other designs.
Creating a Brand New Header Design
If you want to create a custom header from scratch, the steps are very similar to what we’ve already described. Go to the Insert tab and click on Header. This time, instead of selecting a pre-existing design, choose Edit Header.
Now, you’ll be presented with a completely blank header. Return to the Insert tab to add shapes, text boxes, page numbers, pictures, or anything else you like.
For instance, if you want to add your logo to the header, click on Pictures and browse for the image file on your hard drive. Once you insert the file, you can scale it down to the size you want. You can also drag it to any location in the header area – but you may need to modify your text wrapping settings first.
Moving Pictures Around in Your Header
In Office 2013, you have a lot more control over layout and design – and you can drag and drop images for better placement if you have certain text wrapping settings chosen.
If you want to reposition your logo (or any other image in a Word document), right-click on the picture, choose Wrap Text and then More Layout Options. On the Text Wrapping tab, select Through as your wrapping style and Both sides as your wrap text option. Click OK to save the settings.
Now you can move your picture to wherever you like. When you’re ready to save this new header, follow the same steps we used before (in the Saving the Header section).
Deleting Saved Headers
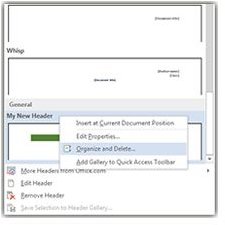
It doesn’t take long for all of the custom headers you’ve saved to start cluttering up your collection of header designs – especially if you’re just practicing to see what types of designs you can create.
To get rid of any saved headers that you no longer need, just go to the Insert tab and click on Header. Locate the design you want to delete and right-click on it. Select Organize and Delete. This action will bring up a new window in which you can preview and delete any of your saved headers. You’ll also have the option of categorizing them as well if you’d prefer to reorganize rather than permanently delete the items.


