
Migrating your data from Windows to Mac OS X just became a whole lot easier with VMware Fusion and the VMware converter tool. Simply turn your Windows PC into a virtual machine and copy it to your Mac!
Switching between different computers can be a bit of a chore, not to mention something of a bore, if you have access to two computers with completely different operating systems.
While it might be a simple task to swap data between two Windows computers, swapping data between a Windows computer and a Mac is a little more difficult, and one reason why many people resist switching to Mac OS X when the time comes to buy a new PC. Their need to keep hold of as many legacy applications and filwa as possible outweighs the benefits.
But it doesn’t have to be this way.
If you are interested in migrating wholesale to Mac OS X, or have a Windows PC at your place of work and a Mac at home and want to create an environment with which you can carry on with work-related tasks, then you might want to consider the power of VMware Fusion, the superb Mac OS X utility that not only allows you to create and run a virtual version of Windows on your Mac, it also allows you to do the following.
Convert your existing PC into a virtual machine and run it on Mac OS X!
Typically, a virtual machine is one that you configure and install the operating system for, but with VMware it is now possible to virtualize a live machine!
Image credit: Wikimedia Commons/JohnHWiki
Advantages of Migrating to a Mac
There are various advantages of migrating to a Mac, from improved hardware to a pleasing and easy to use operating system. While older Apple Mac computers (up to 2005) had difficulty in keeping pace with their PC competitors, since the adoption of Intel processors by Apple this has changed, resulting in a range of fast and powerful desktop and laptop computers.
One of the advantages of this is that virtualization is as easy with a Mac as it is in Windows – current Macs are equipped with Intel Core i5 and later CPUs, plenty of RAM and gobs of hard disk space, making the whole task of creating and installing a virtual machine a walk in the park.
Regular Uses for Virtualization
Regardless of whether you are virtualizing an existing Windows installation or starting from scratch, you need to be aware of the advantages that this delivers.
For instance, some people use virtualization for running older versions of popular operating systems, something that allows the continued use of legacy applications that may not run correctly on a current OS. Development environments that are unsuitable for use under the host operating system can also take advantage of virtualization.
Alternatively, a VM may be used for testing so that a system administrator can judge how effective the use of a new piece of software (or even the operating system) will turn out to be.
Most commonly, virtualization is used all across the World Wide Web, where medium-sized websites employ web servers that regularly use the technology in order to serve pages efficiently.
Converting a Windows Desktop OS into a Virtual Machine
In order to convert a physical Windows desktop installation into a virtual machine you will first need to visit www.vmware.com/products/converter/ from a Windows machine and select Download to grab the VMware converter tool. Note that you will be required to register to use the software, which is offered free by VMware.

The file is about 120 MB, so you can use this time to check that you’re happy with everything that is going to be virtualized. For instance, you might have considerable disk use assigned to personal documents, music, photos, and videos and downloads, things that could impact the speed of the conversion and the performance of the VM once it is created. It is a good idea to spend a few minutes sorting out these files, perhaps copying them to a separate hard disk partition on your Windows computer for full migration later on to your Mac.
One thing to be aware of when installing the converter is that if you have the Windows PC and Mac on the same network, you can download the converter for both platforms and use the Client-Server installation option; otherwise, the Local installation should be fine.
After you have downloaded and installed the converter, you will be ready to begin the process of conversion!
We’re going to assume that the machine you are converting to a virtual machine is the Windows computer and that you have installed the converter locally. Begin by running the converter and selecting Convert Machine. In the conversion wizard, select Powered-on machine as the source and This local machine; you can check information about the machine with the View source details… link.
Click Next to proceed, and then use the Select destination type drop-down menu to switch to VMware Workstation or other VMware virtual machine. In the Select VMware product drop-down, select VMware Fusion 3.x and then give your VM a name and Browse… to find a location to save it to, typically an external hard disk drive.
Once again click Next, and select and ignore the hard disk volumes that you wish to copy. You should restrict choices here to the system volume where Windows is installed, and when done click Next to view a summary of what is to be copied. When you’re happy with these options, click Finish to proceed – the process of creating a virtual machine from your physical Windows computer is beginning!
Image credit: screenshot by author
Copying the Windows VM to Your Mac
When it comes to copying the data to your Mac, you need to make sure of a few of things.
First of all, a high capacity (and preferably fast) external hard disk drive or USB flash memory device should be used.
Second, you should be copying the VM to a Mac with plenty of storage space, processing power and memory to deal with the data when it is running in VMware Fusion.
Third, you need to make a decision as to how you plan to store the virtual Windows file long-term. If you have space on your hard disk drive then this is fine, but if not then you should consider purchasing an external drive specifically for the task of storing the VM.
Depending on the speed of the storage device and the connection type, you could potentially spend quite a bit of time moving the VM to and from your Mac, so if you are looking for a new storage device, look for one that offers fast data transfer speeds.
Importing a Windows VM into VMware Fusion
With the data stored on an external device or already copied to your Mac (depending on the size of the virtual machine) the time has come to download VMware Fusion, which you will find available from www.vmware.com/products/fusion/overview.html - use the Try for free button to download the software to your Mac.
It is available free for 30 days, and if you’re happy with the results of this conversion then you might feel that the full price of the software is worth the money. Note, however, that you will need to register with a valid email address.
The VMware Fusion 3 download is 150 MB, so shouldn’t take too long to download. Once this has completed, install the software on your Mac, choosing the default options.
After installation you will be ready to begin the process of importing the Windows virtual machine into VMware Fusion.
To import your virtual machine file into VMware Fusion, first browse to it in the Mac OS X Finder and then drag the file to the VMware Virtual Machine Library. Once copied across, select the Windows virtual machine and click Run. The virtual machine created from your physical Windows desktop will then load up on your Mac, in exactly the same state as it was when you created the virtual machine earlier on!
It really is that easy to setup, and once you’re up and running you will find that it is a simple matter to drag and drop files to and from your Windows VM and Mac OS X desktop or Finder.
Most impressive of all, however, is the way in which VMware Fusion allows you to run Windows applications on your Mac’s desktop using the Unity button. Begin by launching the app - perhaps Microsoft Word - and then clicking the Unity button. You can then drag the app window out of the Windows virtual machine and onto your Mac OS X desktop, where the application can be arranged and layered anywhere on your Mac’s desktop!
Enjoying Windows Within Mac OS X
With your Windows machine successfully converted and imported into VMware Fusion, you will now be able to carry out pretty much all of the same tasks on your Mac as you could on your PC, simply by launching VMware Fusion.
This means, for instance, that you can develop and test in Microsoft specific languages without worrying about the results, or even play a game that is Windows-only.
But there is one pretty cool thing that you should check before you get really excited about what has just happened (if you weren’t paying attention, you just converted Windows into a virtual machine and loaded it up on your Mac) – the explanation as to why the software is called VMware Fusion.
This is more than just a naming convention to distinguish the software from the Windows version; VMware Fusion is so-called because it genuinely fuses the two operating systems together in a unique way. You might have seen a VM running in the past and know that in order to access the applications within it the virtual machine needs to be displayed on your desktop.
Well, that’s not the case with VMware Fusion, a piece of amazing software that allows you to drag your Windows applications from the virtual machine and use them on your Mac OS X desktop!
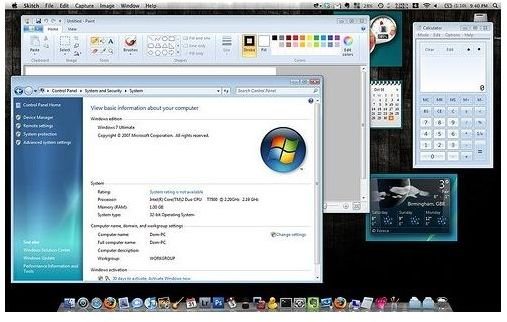
Image credit: VMware Blog, https://blogs.vmware.com/teamfusion/2008/10/windows-7-in-a.html
References
Author’s own experience.
VMware Fusion Tutorial, https://www.youtube.com/watch?v=8q _f_9bQXGc
VMware Converter, https://www.vmware.com/products/converter/


