Windows Movie Maker is a fun and easy-to-use video creating and editing application that you can use to produce decent home video comprised of photos, audio, and video content - all for free. Here’s a simple, yet effective guide to help you in creating your first video
First Things First
Contrary to what some others perceived it to be, Windows Movie Maker is an easy-to-use and fun tool for simple video presentation. It is free software that comes with every legal installation of Windows XP. The current version for Windows XP is Windows Movie Maker 2.1 which is available for free download at the Microsoft Windows XP Home Page. With Windows Movie Maker, you can easily create, edit, and add special effects to simple video presentation using the drag and drop method. You can also quickly share your home-made video right after you create through the Web, email, or by CD.
The Main WMM Screen
The main screen of Windows Movie Maker that you will see upon firing up the application is divided into 4 screens. On the upper right are the main tasks which you do when creating your video presentation. It contains the three procedures that you need to do to produce your video and these include;
-
Capturing your video’s content - from a video device, from importing video, and from importing pictures
-
Editing your video - displaying your collection, viewing video effects, viewing video transitions, making titles or credits, and making an auto-movie
Advertisement -
Finishing your video - saving the video to your computer, CD, e-mail, web, and DV camera
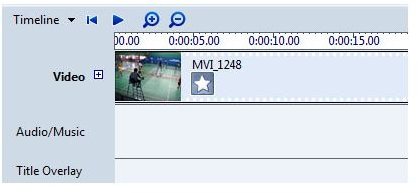
The middle screen displays your collection, the upper left screen previews your video, while the lower screen is your work area. You can use this screen to shift between two essential elements of the Windows Movie Maker - the Storyboard and the Timeline.
Preparing Your Video
The first thing you need to do upon selecting New Project is to import the materials that you would use into the current project’s Collection. These could include still photos, video files, and audio files for background music. Once you have all the materials in the collection, drag them off to the squares in the Storyboard. You can either drag the materials into their order of appearance on your video or select them all and drag them off altogether and the application will put them in their respective boxes. You can then re-arrange them later according to your preferred sequence.
Once you’re done arranging your video contents, it’s time to edit it by adding video transitions, video effects, and titles and credits. If you want a faster way, you can choose to Make an Automovie where you will be given a pre-defined set of video effects and animation to use for your video presentation.

To add video transition, simply select from the available transition effects and then drag it into the smaller box in the storyboard in between two bigger boxes which holds your contents. Video transition determines the animation/effect in between the display of two contents. Video effects on the other hand, put some animation on a specific content before it progresses to further content. To add video effects, simply drag an effect from the preloaded selection and drop it unto content in the storyboard.
To make your video more professional, you may add another slide that would contain titles and credits information about your video.
To complete your video, you may want a musical background by dragging an audio into the storyboard. You can trim this audio file to make its running time fit into the length of your video. Unfortunately, you are limited to trimming the beginning or the ending part of the audio file.
Publishing Your Video
What’s next? Simply go to the File Menu and select Publish movie. The software would then ask you where it should save the video, that is either on your computer, on a recordable CD, a digital video recorder, or to save the video as an email attachment which you can later send on to anyone. The next step is to select the directory where your files will be saved and to select a file name. Then the software will give various information about your video which the application is about to process. There are various settings which you can explore and play around with. If you’re settled, simply click on the Publish movie button, and wait for the software to process your request.
As soon as it’s done, you can start now sit down, relax and enjoy your video.


