Ever wished you had some help in organizing what you have to do in your everyday life? Do you often forget to do things because you lost a post-it note or because your phone went dead? Read this article to find out how a freeware program called Task Coach can help you in that.
Introduction
Task Coach is a relatively simple open-source program which is aimed at every computer user who wants to be a bit more organized. Its large variety of functions can be somewhat bewildering at first, but once you get acquainted with some of them it becomes more straight-forward with this Task Coach tutorial.
This freeware program is available for both Windows and Linux, and you can get it in a portable version as well. This is particularly convenient if you are on the move a lot and you want to carry all your organizing information with you in case you need it. Of course now many people have an iPhone, which can help them in that, but Task Coach can function in parallel, as it allows you to import and export data in iPhone format, as we’ll see later on.
Getting Started
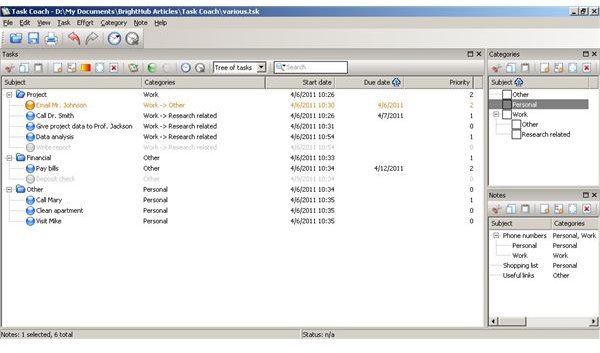
First of all, you need to download and install the program to your computer. Then you double-click on the program icon to run it. Once you do that you should see the program’s
(this may not look exactly the same in your computer, but that’s irrelevant). Once the program is running, you should also see its

. There are several things you can do with this program, all focused around tasks. For a list of the program’s functions you can refer to the
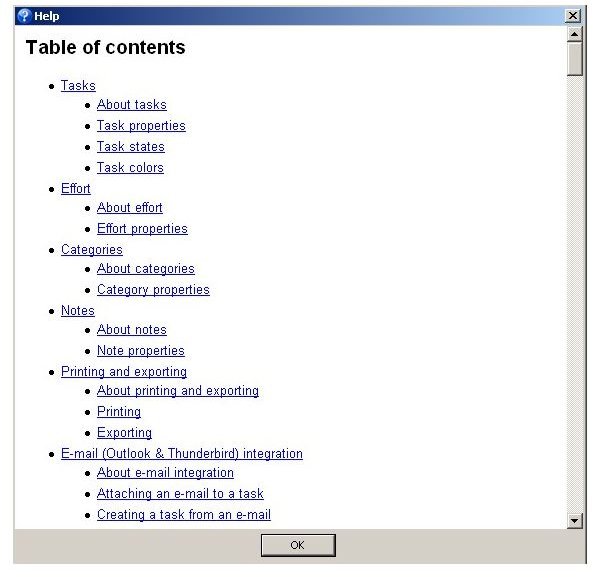
(Control-H), which provide a good reference. Furthermore, if you prefer another language, you have plenty to choose from in the
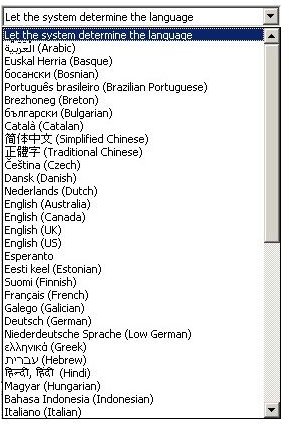
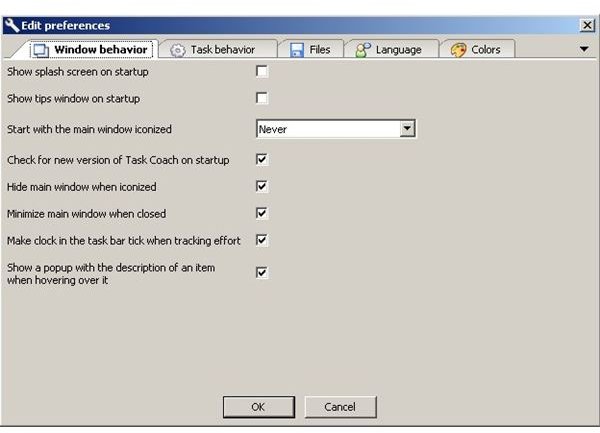
(forth tab in the Preferences Menu: Alt-P). You can also get additional help by visiting the developer’s website .
Setting Categories
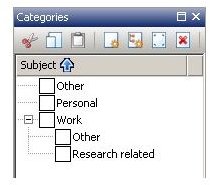
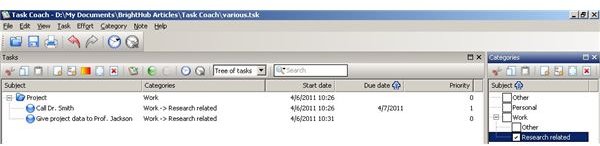
If you plan to avoid getting lost in all the tasks you may have in your schedule, categories is the way to go. This feature allows you to organize your tasks and notes so that they are easier to access and more importantly filter, when they are too many. If the category viewer is not visible, you can set it up by going to the
.
To add a category simply click on the
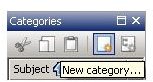
in the categories window. Then simply give a name to the category and, if you want, a description as well. Repeat this process for the other categories you wish to create.You can also include sub-categories as well, which can be added using the fifth icon. Don’t worry if you can’t think of all the categories you will need. You can always amend this list later.
Setting Notes
This is a very interesting feature, as it allows you to put additional information to your task, categories, or your list in general. Also, you can organize your notes in a tree structure, just like your categories and tasks. Of course you can also put notes in the description section of a task, but sometimes you need to append information that relates to many tasks, to the whole list, or to no task at all. This is when the notes features comes in handy.
First of all you need to be able to see the notes section. To do that simply go to the
and select the last item (Note). Then the notes viewer should appear somewhere on the right part of the screen. To add a new note click on the
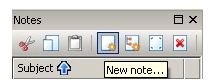
on the top of that window. If you want to add a sub-note, use the fifth button after you select a parent note. Writing a note is just like creating a task, but you don’t need to put any date information to it.
Setting Tasks
Naturally, this is the most useful feature of the program. If you have managed to work with the categories part, this should be easier as much of the functionality is the same.
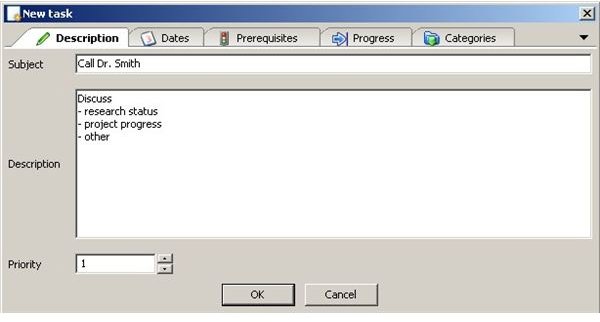
Adding a new task is similar to adding a new category. Simply click on the
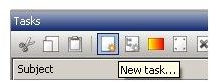
on the top of the task window. Alternatively, if you want to use one of the templates (tasks due either on the same day or on the day after), click on the
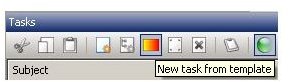
. If you want to add a sub-task to an existing task, click on that task once and then on the
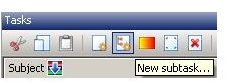
.
Once you create a new task (or when you edit it, by double-clicking on it), you are presented with the edit window, which has a variety of
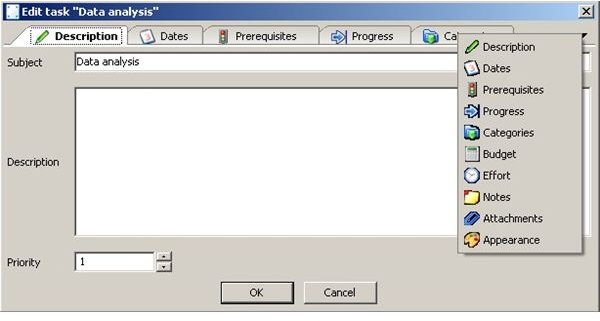
you can set. The most important ones are the ones in the
, which relate to what the task is about. Even though you don’t have to fill in the description box, sometimes it can be useful. If you have tasks that depend on each other, you might want to look into the
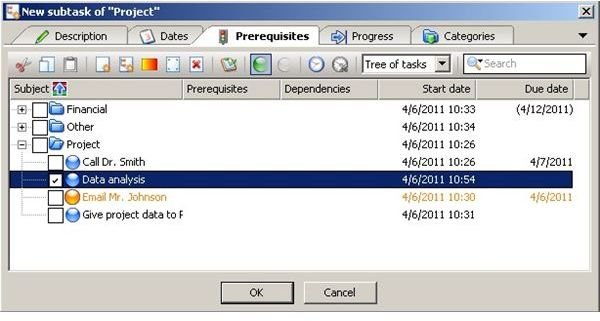
, which allows you to create dependencies among tasks.
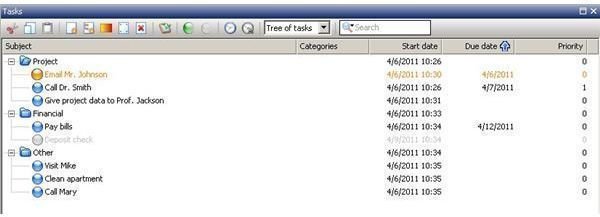
Although the viewing of the tasks is by default
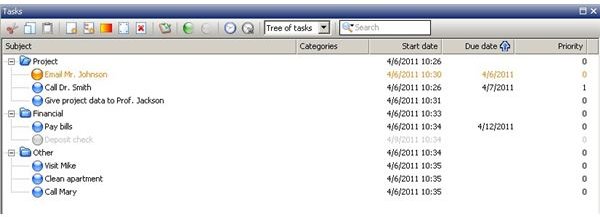
, you can also see them as a
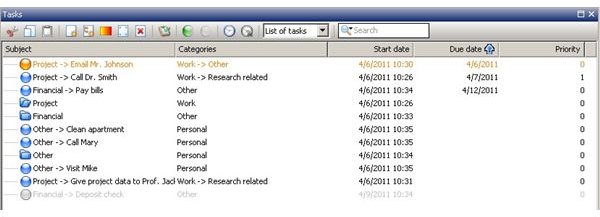
, by clicking on the drop-down box on the top of the task window. It’s not clear how this can be useful, but it’s good to know that you have this option as well. Generally the tree view is more practical, particularly if you have a lot of tasks, as it allows you to hide them by

.
If a particular task is quite lengthy, you can set its progress status. You can do that by double-clicking on it and then going to the
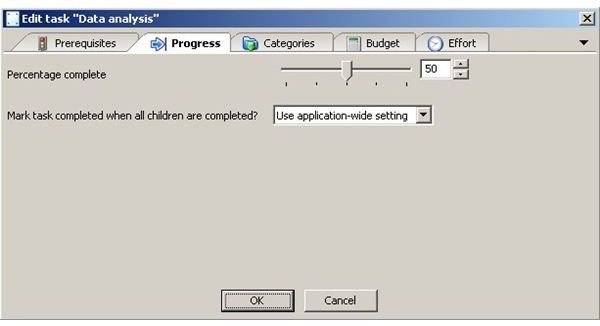
.
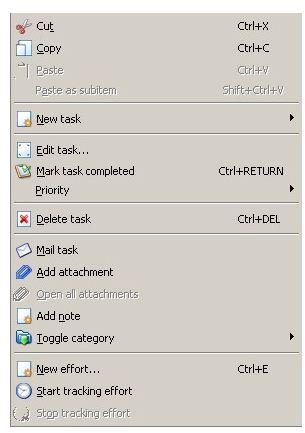
If you want to keep track on how much time you’ve spent on a particular task, you can do that by right-clicking on the
and
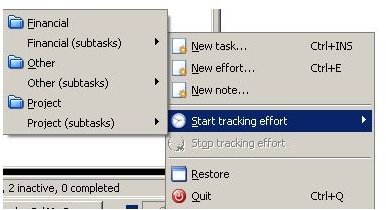
from the menu that appears. Once you do that,

so that you don’t forget it. You can stop tracking effort by repeating the process but this time choosing “stop tracking effort” instead.
Other Functions
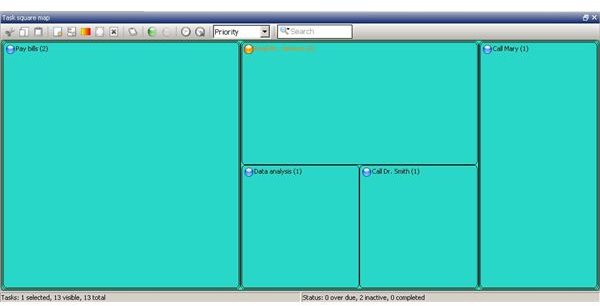
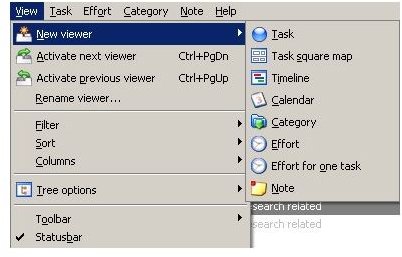
Apart from categories, task, and notes, Task Coach has a number of other functions, too. For example, it allows you to look at your tasks on a
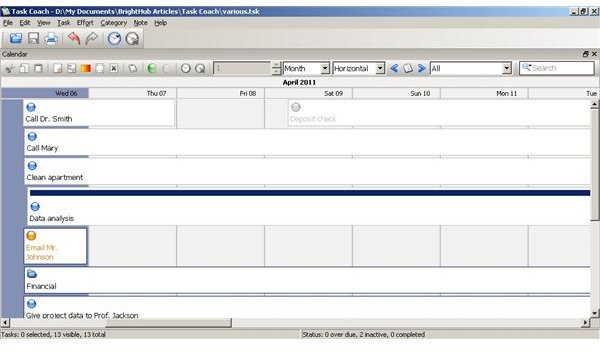
, or on a map structure that allows you to compare them in terms of time spent on them (if you have been tracking effort) or on your priorities (example: image on the left). Both of these functions can be accessed by the corresponding viewers which can be activated by the
.
A quite useful function that relates to the effort feature of the program is the effort reports. If you go to a task’s properties (double-click on a task), on which you have tracked some effort, you can see a report on that, by clicking on the track effort tab. The report can be
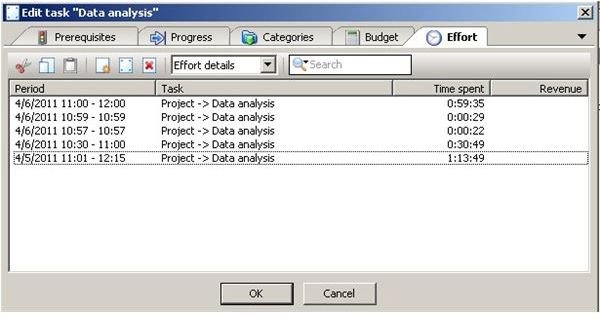
or a
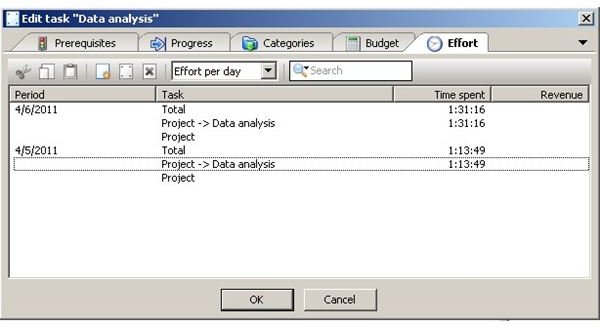
.
Another useful function, which can be employed in all the items of this program (tasks, categories, and notes) is the attachment feature, which allows you to attach any file to one an item (see
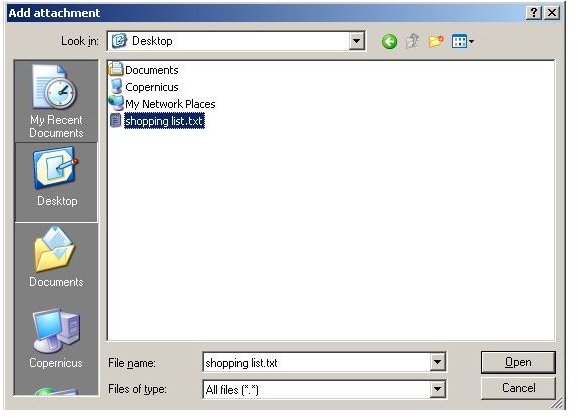
and

). This is particularly convenient for notes, which can be accompanied with text files and the like. To add an attachment simply right-click on an item and select “add attachment” from the
that appears.
Often it’s very useful to filter taks. You can do that by clicking on
or
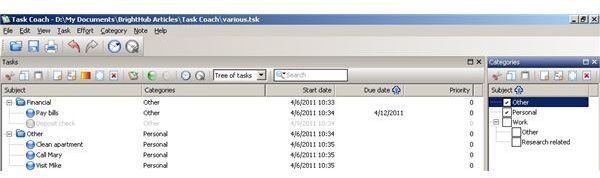
of the category boxes on the category window. Also, you can hide completed tasks by clicking on the
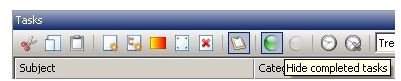
(you can mark a task as competed by clicking on the
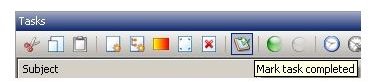
on the task window)
Notes on the Use of the Program
As the program has too many functions to learn all at once, it makes sense to concentrate on the ones you find more useful. Once you learn to use them, you can expand to other functions, one at a time. It’s best to practice with dummy data first and only move on to real ones when you have gotten the grip of the program. It’s also good practice to erase completed tasks every once in a while, so that your list file doesn’t get too large.
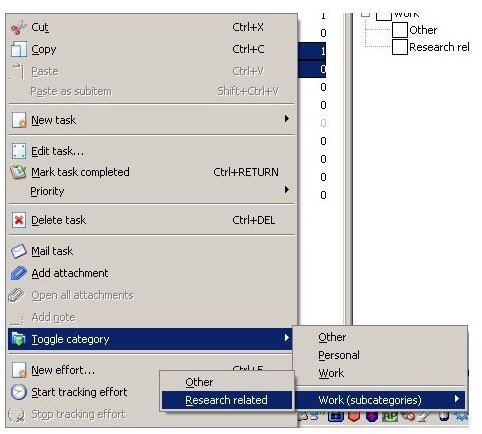
The program becomes particularly useful when you make use of the filters that it offers, as well as the tree structure, especially if you have a lot of tasks. Also, remember to put due dates on all the tasks, as well as starting dates so that you don’t have them all appear at once. Moreover, if you haven’t selected a category for a task, or if you wish to change it, you can do that easily by right-clicking on the task and selecting
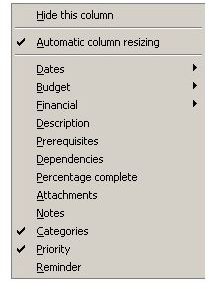
. You can also tweak the view of the tasks if you want, by right-clicking on the column headings and then selecting which fields you want to be visible, from the
. Finally, if you have so many tasks on your list that you cannot afford to browse through them to find a particular one, you can search the list using the

on the top of the task window.
Exporting Data
Task Coach allows you to export your data, either on paper through its quite descent
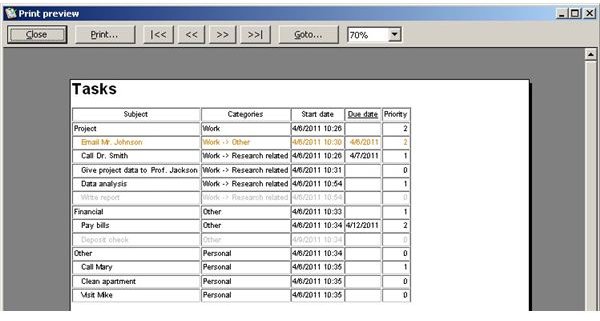
, or through three
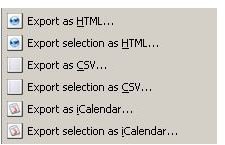
. This is particularly useful, especially if you plan to use that information somewhere where you cannot take your computer with you. To export your data in a digital format, simply go to File menu → Export. There you will see various options as you can export the whole list or just a selection of it, in three formats: HTML, CSV (which you can view through Excel), or iCalendar. If you want to print your list, go to File → Print or File → Print Preview (so that you can see what the print-out will look like before it is on paper).
Final Notes
Hopefully by now you have a clear idea of how this program works. Even if you don’t know all of its functions, you can still make good use of it and make your life easier through that. Remember to always save your task list (.tsk file) and if possible, keep a copy of it somewhere, just in case. When you have time, you can explore more of the program’s function using the help feature or by simply trying out different commands from the menu. You’ll be surprised how consistent the various features are with the ones you’ll already seen. In addition, you can learn about the more subtle aspects of the program by exploring the various
it has. Moreover, if you enjoy this program, keep an eye open for new updates, which are bound to have more features and more refined versions of the existing ones.


