We often times install games and applications on our computers. Later down the road, we may need to clean our computer to make room or speed it up. One way to do this is by removing games and other applications we no longer need. This guide will help users with removing applications from Windows 7.
Understanding Games and Application Installations
Majority of us download and install games and other applications on our computers. Sometimes, our children or loved ones may also get on our computers and download games and applications. No matter what the case is, over time, these things will slow our computers down. They will also take up space which will require us to clean our computers to make space for new stuff.
When games and applications are downloaded and installed on our computers, 95% of the downloads can be found in the Add/Remove panel of Windows. The other 5% can be found in the Start menu of Windows. In this guide, I am going to show you how to remove applications and games from Windows 7 using the Add/Remove panel and the Start menu.
Opening Your Add / Remove Panel in Windows 7
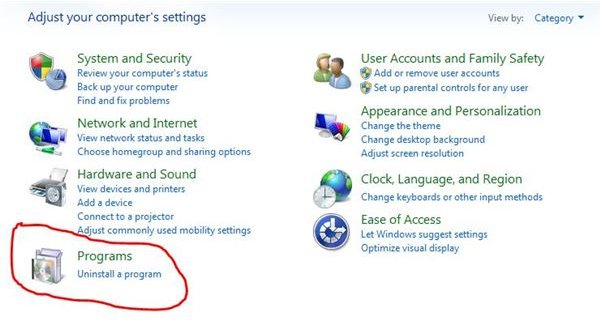
To begin cleaning up Windows 7, you can open your Control Panel. Click the Start (orb) button and select the Control Panel link. A window will open with a few different links. In this window, find the Programs link and click the “Uninstall a Program” link below it. This will open the Add/Remove panel we were just discussing. This is where we will remove applications and games first.
Removing Games and Other Applications in Windows 7
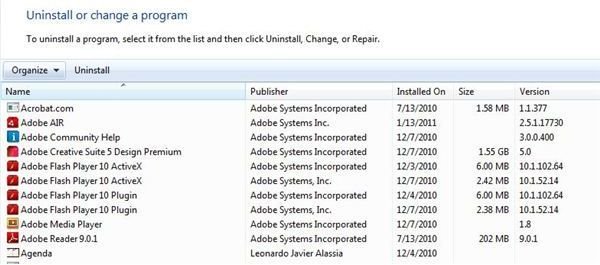
In the window that opened, you will see majority of the applications, games, and other programs installed on your computer. To begin removing applications from Windows 7, you will need to browse through the list and find something you no longer need. Once you have located a program you want to remove, click it one time to select it. Go to the top of the window, look beside the Organize button and click the Uninstall button. A box will open and ask if you really want to uninstall the program, click Yes, Ok, or whatever it is to continue the uninstalling. When it has finished, it will alert you that it was uninstalled successfully. You can now start browsing again to find another program you want to uninstall. In other words, continue doing this until you have cleaned this section up. When you are finished cleaning up Windows 7 this way, you can close the windows and continue with the next section to clean your computer through your Start menu.
Uninstalling from the Start Menu
Next, I am going to show you how to remove applications from Windows 7 by going through the Start menu. First, click the Start button (orb) and open your Start menu. In the Start menu, click the All Programs link. You will now see all of the applications and games you have installed on your computer. The majority of them should be in folders. You may have to scroll down the list to see all of them.
Find something that you want to uninstall and click the folder. The contents in the folder will expand and you should see the Uninstall link. Click the link and you will be asked if you want to uninstall, click the option to continue. Once it has finished uninstalling, you can move to another game or application and uninstall it the same way. You can continue this route until you have uninstalled everything that you no longer need on your computer. If there is no ‘Uninstall’ link, then use the method above to remove it from the Programs list.
Resources
Screenshots were taken by the author for educational purposes only.


