Detailed tips on how to perform an installation of Microsoft Windows 7 Original Equipment Manufacturer (OEM).
Microsoft Windows 7 is Microsoft’s latest operating system. There are currently four editions of the operating system available; the four editions are known as “Starter,” “Home Premium,” “Professional,” and “Ultimate.” These versions differ in terms of the core functionality that are available within the operating system. For instance, the Starter Edition has very little networking functionality in comparison with the Ultimate edition of the product. Furthermore, the Professional and Ultimate editions of the product are marketed towards the professional / corporate market, whereas the Starter and Home Premium Editions are designed for the home user.
OEM versions of Windows 7 are included with computer system purchases of a variety of hardware brands, such as Toshiba, Sony and Dell. If you’re purchasing a brand new computer system — on which Windows 7 OEM is installed — a version of the operating system should be pre-installed on the system. However, you may wish to reinstall Windows 7 in which case there are some important considerations to contemplate.
Clean Install
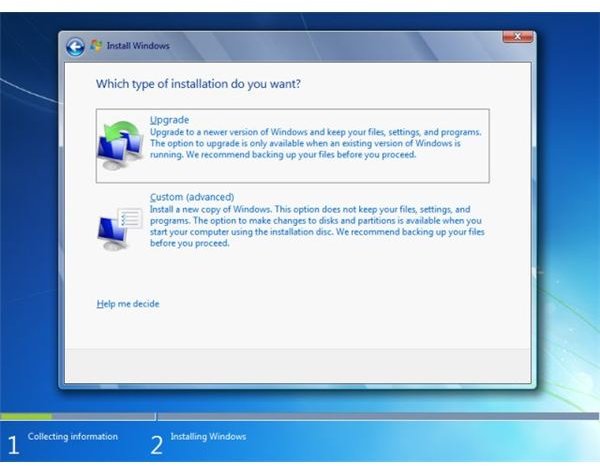
It is highly recommended that you perform a “clean install” of Windows 7, regardless of the version; a clean install refers a brand new installation of the product. The best way to perform a clean install is to boot the installation program directly from the installation media — usually in the form of a DVD. When the installation program has loaded, you’ve clicked on the options to install the program and have agreed to the license terms, the best course of action is to delete the partition and format your hard drive prior to the installation. The following screenshot shows the options that are available:
Delete Partition & Format HDD
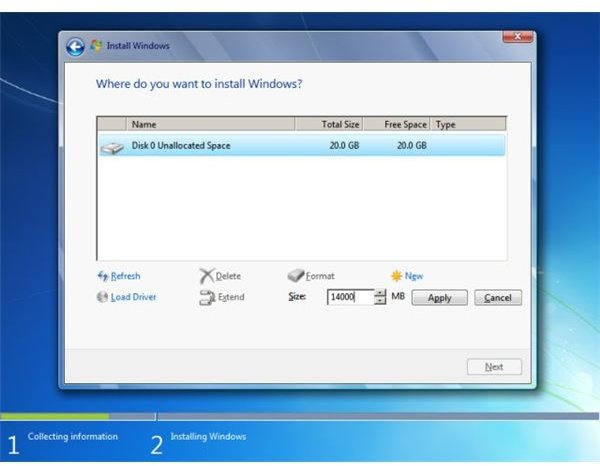
Deleting the partition and formatting the hard drive ensures that your installation will be 100% clean. If you decide to install Windows 7 OEM on-top of another version of Windows (upgrade), problems can occur. You need to click on the “Custom (advanced)” option, then a new set of options will appear. You will then be required to click on the “Drive options (advanced)” option, this will direct you to the HDD format options. The next step is to click on the “Delete” option to delete the current partition after which you’re required to click on the “New” option to create a new partition — the partition size will be automatically filled according to the size of your hard drive, so leave this option alone. Click on the “Next” option to commence with the installation. The installation process will be practically automated from now on.
Important Tips
Prior to commencing with the clean installation of Microsoft Windows 7 OEM you MUST back up all of your important files in Windows. Performing the clean installation will completely wipe your hard drive in which case there will be very little chance of recovering any lost data. It is recommended that you use an external storage device such as a USB flash drive or an external hard drive to back up the files.
Please note that your OEM version of Windows 7 is designed specifically to work with the exact model of your computer. If you attempt to use this version of the operating system on another computer, you will not be able to proceed with the installation — the product key will be returned as invalid. Furthermore, if you make any significant changes to your computer hardware — such as a motherboard upgrade, for example — you may, again, not be able to proceed with the installation of Windows 7 OEM.
References
Windows: Installing and Reinstalling Windows 7 [https://windows.microsoft.com/en-US/windows7/Installing-and-reinstalling-Windows-7]
PC Magazine: How to Install Windows 7 [https://www.pcmag.com/article2/0,2817,2354687,00.asp]


