You can use MS Outlook to schedule things and for reminders. This article helps you with calender planning and MS Outlook tasks. If you want to know how to create a task and subtask in MS Outlook, this article will teach you.
How to Create Task and SubTask Entries in MS Outlook
If you have been wondering how to create task and subtask in MS Outlook, this article helps you do so. It tells you how to easily create a task and subtask in MS Outlook so that you are alerted when the tasks are due.
Outlook tasks provide for calendar planning so that you do not miss out on anything important. You can also share the calender with others using a simple mail.
First, we will talk about how to create task and subtask entries in MS Outlook. To create a task in Microsoft Outlook:
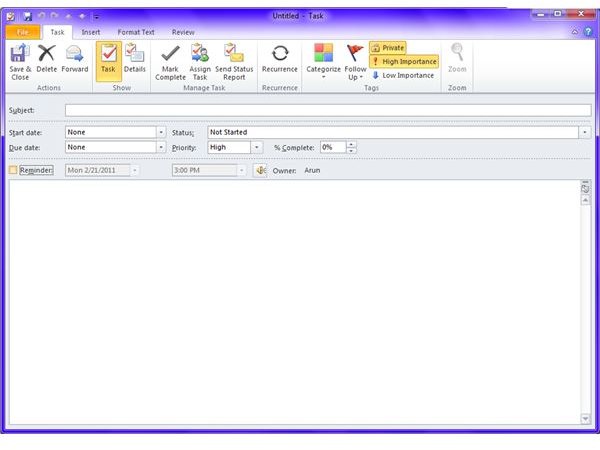
- Double-click on the task pane in MS Outlook. It is located toward the right of the Outlook window. Or you can click on the New Items listed under the Home tab and select Task.
- In the New Task window that appears, type in the task summary in the Subject field (see image to the right).
- Add a detailed description to the task if you wish. You can add the detailed description in the big edit box located at the bottom of the New Task window.
- Select the Start Date (optional) and the Due Date.
- To set a reminder for yourself, click to select the check box against Reminder. Select the Date and Time when you want MS Outlook to alert you.
- If you want Outlook to automatically repeat the task for you, continue from step 7 below; else click on Save and Close.
Note that you need to have MS Outlook running to receive alerts. In case MS Outlook is not open during the “reminder time”, it will display the reminder when you next open the MS Outlook.
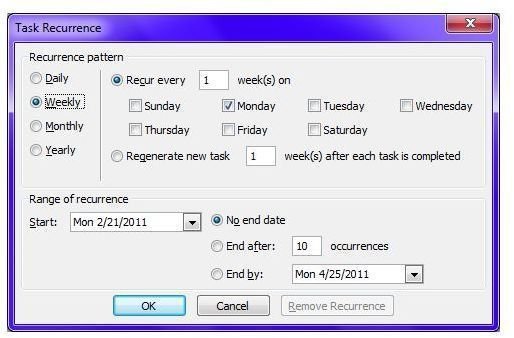
To create the subtasks or recurrence, click on the Recurrence button. You will find the Recurrence button on the Ribbon (under Task tab). In the Recurrence window that appears:
-
 Advertisement
Select if you want the task to repeat daily, weekly, monthly or yearly.
-
You can also select the particular weekday when you want the task to repeat. Just select the weekday listed.
Advertisement -
Select Regenerate new task… and fill in the value of number of weeks by which, you want the task to be repeated (applies only if you select a particular weekday).
-
Select No end Date if you want MS Outlook to regenerate the task until you delete it manually. Else, select how you wish to end the task recurrence by selecting one of the options: End after (n) recurrences or End Date.
Advertisement -
Click on OK to close the recurrence dialog.
-
Click Save and Close to close the new task window.
Advertisement
Calendar Planning: MS Outlook Tasks
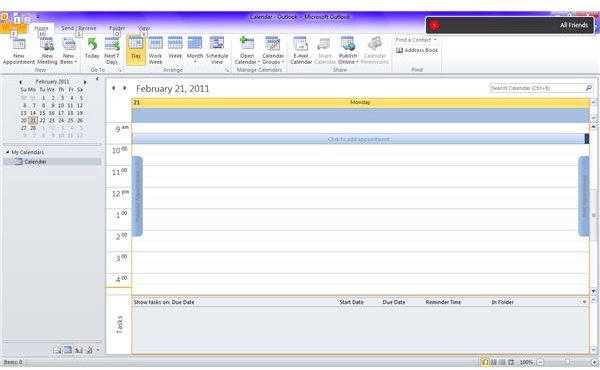
You can plan the calender using the same method that creates tasks in MS Outlook . Instead of directly creating the task, you go through the calendar option. Double click on the desired date in the calender (found on right side of the Outlook window) to open the calender. Once you open it, select the time when you want to create the task/reminder. Note that each hour is divided into two parts. For example, if you want to set the time around 9, it would be 9:00 to 9:29 and then the lower part depicts 9:30 to 9:59. Double click on the desired time period to open the New Task window. The rest of the procedure is same as explained above.
This explains how to create task and subtask in MS Outlook. If you have any doubts, please feel free to use the comment boxes.
This post is part of the series: MS Outlook - Tips and Tricks
This series on MS Outlook assists you use the email software better by offering you different tips and tricks. It helps you create tasks, organize yourself, how to view images in HTML email, and more.


