“Help! I can’t get online; what does it mean I can’t communicate with the DNS server?” Sound familiar? This article will walk you through the steps to sort out this error message, quickly and easily.
Windows Errors
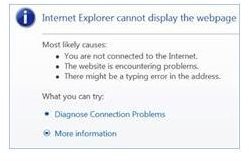
You are ready to get online but you get the dreaded message, “Internet Explorer cannot display the webpage.” You look at the bottom
corner and you see the yellow exclamation point over the icon that represents your internet connection. If you get the ‘cannot communicate’ error message, then the problem usually lies in your Internet settings.
What Does It Mean?
If you are using a modem or server that serves as a separation point between your computer(s) and the Internet, and the IP address of that modem or router is different from what your computer is attempting to reach when it is trying to access the internet, this error appears. Most users report this problem after upgrading their operating systems on their computers or after some event that modifies their equipment settings.
Modems and routers use a process where they assign themselves and any equipment connected to them an IP address that begins with 192.168.xyz.xyz. More often than not, the modem/router takes the IP address 192.168.1.1 or something similar. Depending on the settings used, the computer may be trying to access another address in its attempt to access the internet. Occasionally, the problem may occur beyond the modem and router as it contacts an outside resource.
What’s Next?
There are two basic approaches and the first is to reset the TCP/IP settings on the computer. The TCP/IP is a set of instructions that governs how the PC functions on the internet. For the beginner, Microsoft offers a downloadable fix that be saved to a disc or flash drive and then run on the affected computer. The protocol can also be restored manually, but this is a task for an experienced user or IT professional.
The second approach involves verifying and changing the IP addresses being sought by the computer. This can be accomplished by the following process:
- Connect to your router (by typing 192.168.0.1 or 192.168.1.1 in the Internet Explorer address bar) and log in. Check your modem/router’s user manual or documentation if you do not know the log-in credentials.
- Make sure you are in the Setup -> Basic Setup category.
- Scroll down until you see ‘DHCP Server’; if it is disabled, select ‘Enable’.
- Scroll down and click ‘Save Settings’.
If your ISP has assigned you a specific IP address to use for access, you may enter it instead of selecting DHCP which effectively links you to whatever address is available.
Next:
- Click on Start and then Control Panel.
- Go to Networking and Sharing Center and then click on Change Adapter Settings.
- Right click on Local Area Connection and choose Properties.
- Highlight Internet Protocol Version 6 and click on Properties.
- Choose Obtain DNS Server Addresses Automatically and press Ok.
- Choose Obtain IP Address Automatically.
- Repeat the steps for Internet Protocol version 4 as well.
Again, if you have a fixed IP address, you will want to enter it in here as well. Fixed or static IPs are usually assigned to commercial or enterprise customers who have their own IT professionals.
This should remove the error and allow you to enjoy trouble-free browsing. As any tech support person would suggest, do not despair if the repair does not work before you powercycle and reboot the computer, modem, and or router. You will want to power off beginning at the computer and work your way to the wall; after waiting about 30 seconds begin powering up the equipment in reverse order, starting with the modem and ending with the PC.
If this is not successful, you can always reach out to your ISP support group for further troubleshooting and settings help. It is not nearly as complex as it sounds once you become familiar with your equipment, and 95 percent of the time a settings change does the trick.
References
- Image Credit: cdhtalkstech.com


