Learn how to troubleshoot and fix Windows 7 HP Print problems caused by unsupported drivers or HP Printer misconfiguration following a few simple steps and tweaking the Windows Registry and Print Processor.
Checking the Printer
Many of you have printing problems with HP Printers and would like to know how to solve them. I will try to describe in a few steps how you can try to fix these problems by yourselves without the need of a computer expert. Most of the printing problems appear because of bad or incompatible printer drivers or because of unstable operating system. With Windows 7, the issue of the unstable operating system is not such a big problem anymore as Windows 7 is a pretty stable operating system, but the driver problem is still there and becomes a bit more challenging when it comes to debugging and error finding. Before we get to the drivers, you will first have to make sure your printer is OK and can print. First things to check are (even if it sounds stupid it worth to try, wont take to much of your time):
- Does the printer power supply work? - Usually the home/small office HP Printers come with an external power supply that has an greed LED. Is the LED on?
- Does the printer get power? Check if the power supply/power cord is properly connected to the printer.
- Does the printer power up? Press the “ON”/“Power” button on your printer and check that the printer is on and is operational. Usually the display should state “Ready” or something similar.
- Can you hear the printer heads move (in case of ink jet printers) or can you hear the printer Fuser/motors turning when you power on the printer?
If everything is as it should be then you can continue with the troubleshooting, if not go back and fix the issue. Before going any further you should try to see if you get any specific error message when you are trying to print. Check the printer status in the task bar for any messages when you try to print, and also check the Windows Event Viewer for any print related error messages.
Checking the Printer Connectivity
The next step in our guide involves checking the printer connectivity. These days there are usually two common ways to connect your printer to the computer, by a USB Cable or by a Network Cable. Some of the HP Printers support both or even more connection types as Bluetooth or Wireless Network Connection.
Checking the USB Connectivity:
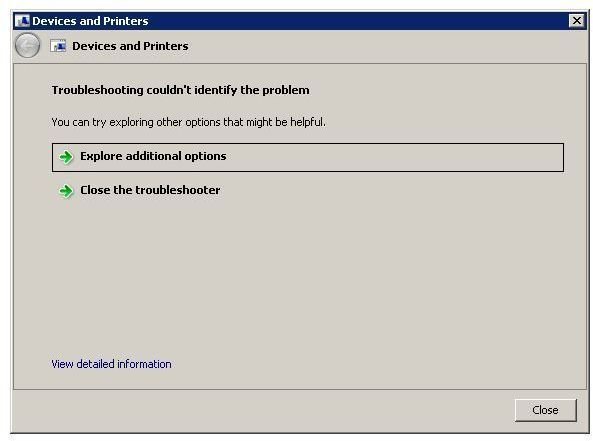
With your computer and printer turned on try to plug the one end of the USB cable into the printer and the other end into one of your computer’s USB ports. The Windows 7 operating system should automatically detect the printer and start installing the necessary drivers if they are available. If not, Windows should prompt you for a driver media source or ask you to connect to the internet in order to download the necessary drivers. If Windows 7 does not come with any message regarding the detection of a new USB device, you might want to check the USB cable and try to replace it with another one. Also your drivers could be already installed and you should check the “Devices and Printers” in your start menu. Go to Start and select Devices and Printers from the menu. Check if your printer is available and if it’s not in “Offline” status. If the printer is there you can alternatively right-click the printer and select “Troubleshoot”. Windows will try to automatically detect the problems and fix them.
Checking Network Connectivity:
If your printer is a network printer, plug the network cable into the printer and the other end into your Router or Switch or what other networking device you might have. Check if the two LED’s on the printer network card lit up. One of them should be ON all the time while the other one should flash indicating network activity. If they are try to print out a network configuration report from the printer menus and from your computer try to ping the printer by using the IP address listed by your printer. If no lights come up on your printer network card check the network cable or the networking device that connects the printer to your network.
Next Page: Taking a look at the HP Printer Drivers.
Checking the HP Printer Drivers
Before you go any further you might want to check this article on “Solving Windows 7 Print Spooler Problems ”. Check first if your Printer Spooler service is running and if it’s not this service that causes the problem.
Once we are sure the printer is working, that we have a connection between the computer and the printer, and you still can’t print, we will try to take a look at the software and printer drivers.
Each HP Printer comes with a CD or DVD with the printer software and printer drivers supported by your printer. Even if the Windows 7 detected your printer automatically and installed its built-in drivers, I always recommend installing the drivers provided by the manufacturer, in our case HP. Your Windows 7 might have the right drivers but they might be too old or depreciated to support all the functions of your new printer. Go on and insert the CD/DVD provided by the manufacturer and install the software and drivers provided. Follow the guide when connecting the printer as usually HP software is a bit tricky and will tell you to only connect the USB cable to the computer in the middle of the installation. Follow the guide exactly.
If you do not have the driver installation media available, you can always download and install the newest drivers from the HP website. Go to https://www.hp.com and select “Support and Drivers”. On the next page select “Download drivers and software (and firmware)” and type in your printer model. Select the appropriate printer drivers, download and install them.
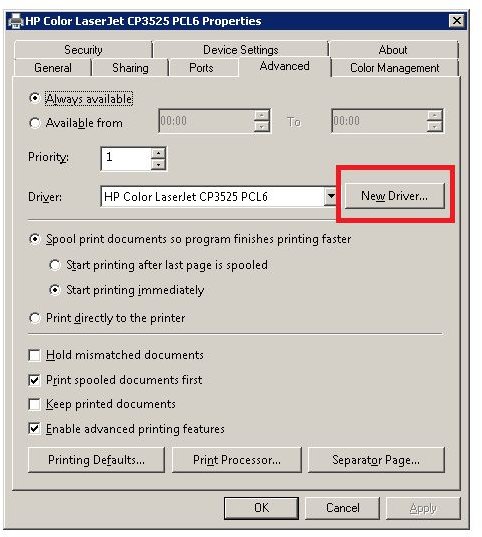
If you already have the drivers installed you can always replace them by selecting the “New Driver” option on the “Advanced” tab of Printer “Properties”.
After installing the newest printer drivers, try to print again.
Going Deeper into Printer Drivers
If installing the newest drivers still did not solve your problem you will have to troubleshoot some more. We can even try to use some alternate drivers and see if this will help. From the HP support site search for your printer and check if other type of drivers are available. Usually HP provides PCL printer drivers (Printer Command Language) or PS (Post Script) printer drivers. Try with both types and see if other type of drivers will solve your problem. All the time check the Windows Event Viewer to see if you encounter any specific print errors that would help you solve the problem.
If the printing issue is still there we can try the HP Universal Print Drivers. Lately HP is starting to provide an HP Universal Print Driver Series for Windows. Go to the HP Drivers and Support as specified earlier and Search for “HP Universal Print Driver”. Select your operating system, in our case Windows 7 (32-bit) or (64-bit), download them and try to replace your current print drivers with the HP Universal Print Driver.
Assuming that this still not solved the problem we can try to temporarily disable some unnecessary services. Go to Start > Run (or search) and type “services.msc”. The services window will open and you should look for a service called “Pml Driver HPZ12”. Try to stop this service. This service handles two way communication (non printing related) with the printer. Also look for the “Net Driver HPZ12” and try to stop it and see if the issue is still there.
Next Page : Windows Registry and Printers
Windows Registry and Printers
If nothing yet solved your problem it’s time to start troubleshooting some registry keys. Open a registry editor by going to Start > Run (or search) and type “regedit” followed by enter. Registry editor should open.
Navigate to : HKEY_LOCAL_MACHINE\SYSTEM\CurrentControlSet\Control\Print and select the key. Right click it and Export the registry key for backup purpose. Locate the HKEY_LOCAL_MACHINE\SYSTEM\CurrentControlSet\Control\Print\Monitors\Local Port and check that the “Driver” value on the right side called “localspl.dll”. If it’s not there, edit the key and replace it with “localspl.dll”. Locate HKEY_LOCAL_MACHINE\SYSTEM\CurrentControlSet\Control\Print\Monitors\Standard TCP/IP Port and make sure the “Driver” value it’s set to “tcpmon.dll”, if it’s not then edit the value and edit it with “tcpmon.dll”.
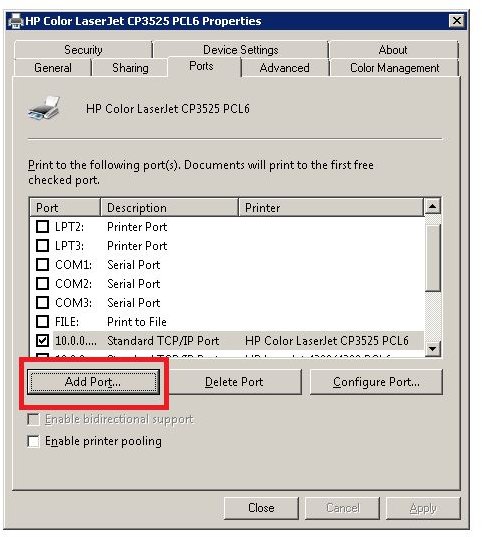
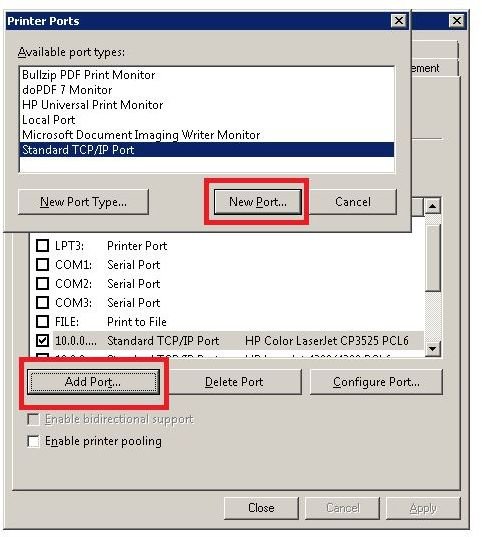
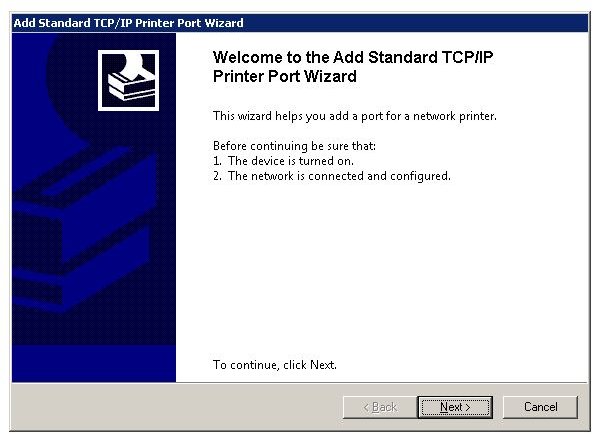
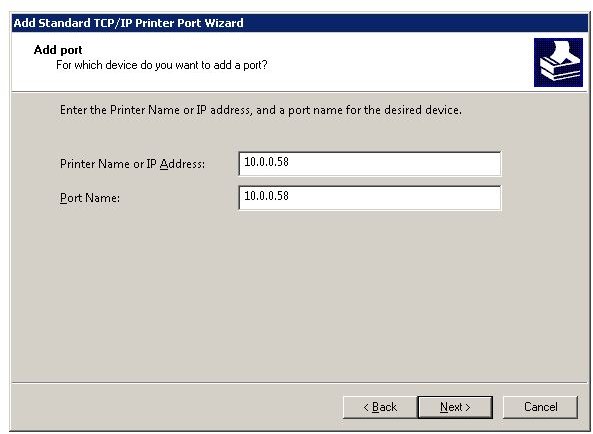
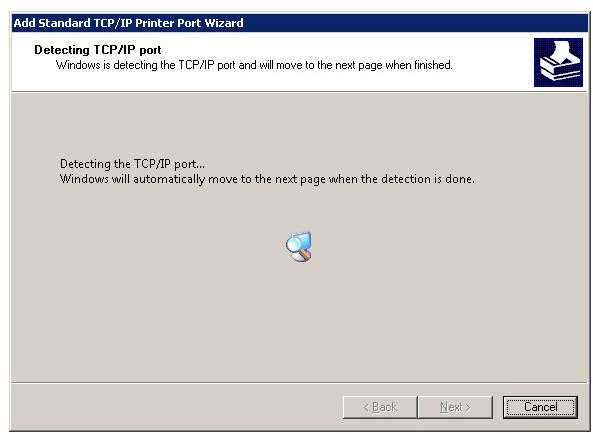
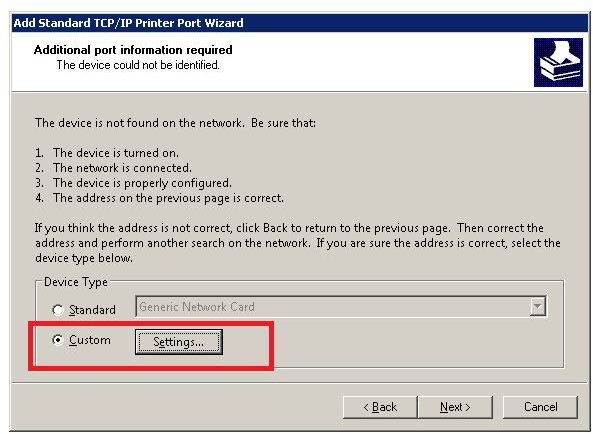
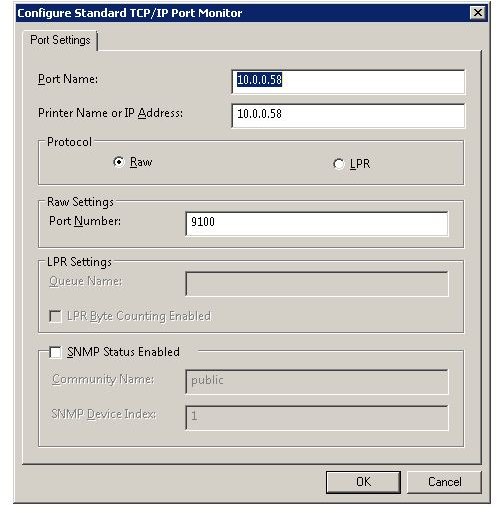
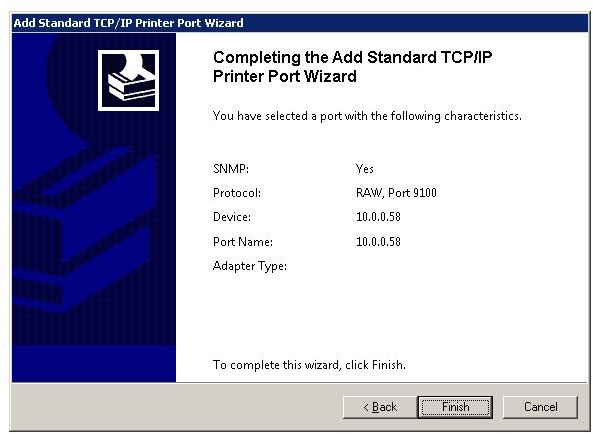
Go back to the HKEY_LOCAL_MACHINE\SYSTEM\CurrentControlSet\Control\Print\Monitors key and check what other printer monitors are installed. You will see some different port monitors installed and you will also see the HP Print monitors. They usually start with “HPxxxx” or “HP Universal Print Monitor”. If your printer it’s a network printer go to the “Devices and Printers” check the printer properties, go to the “Ports” tab and add another port for your printer by selecting “Add Port” then select “Standard TCP/IP Port”. On the next screen type the IP address if the printer, select “Next” and select “Custom” settings. Press “Custom” then “Next” and select “RAW” or “LPR” at the “Protocol” then Finish. Now restart the “Printer Spooler” service and check if you can print. To restart the Printer Spooler service just go to Start > Run (or search) and type “services.msc”. Locate the Printer Spooler and restart it.
Images
Windows Registry and Printers Continued
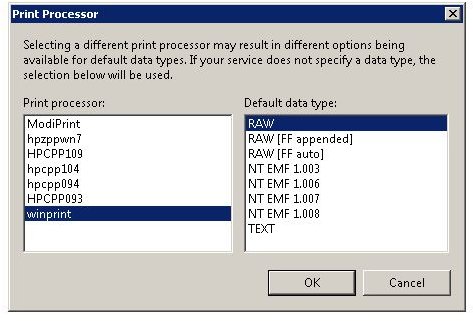
If your printer is a local printer you can try and replace the HP Print Processors with the Windows print processor.Go to the registry editor and find the HKEY_LOCAL_MACHINE\SYSTEM\CurrentControlSet\Control\Print\Environments\Windows NT x86\Print Processors\winprint key. Make sure that the value of the “Driver” on the right side it’s “winprint.dll”. If it’s not edit the “Driver” value and replace it with “winprint.dll”. Then open the “Devices and Printers”, select your printer and check the “Printer Properties”. Go to the “Advanced” tab and select “Print Processor”. On the next screen you will see a series oh HP Print Processors and at the bottom of the list you will see the “winprint”. Select “winprint” as print processor and “RAW” as the default data type. You can also try to remove any third party print processors in the registry.
Look for the HKEY_LOCAL_MACHINE\SYSTEM\CurrentControlSet\Control\Print\Environments\Windows NT x86\Print Processors key and remove all the other print processors but the “winprint”.
Restart the “Printer Spooler” service and check if you can print now.
If you still cant print your problem could be more serious and you should start thinking at debugging the Print Spooler service and taking some memory dumps for some more deep analysis but we will do this in another article as this requires a bit more comprehensive understanding of the memory dumps and even direct contact to Microsoft to help you debugging the issue. But hopefully you won’t need that and by now you should be able to use your printer.


