
Knowing what’s up with your hosted website can help in ensuring stable uptime, that your TCP ports are set without risk of vulnerabilities and that any database stores (like with MySQL) are functioning properly. We can learn of these with Tenable Nessus, and we’re guiding you through the software.
Introduction
Knowing what’s up with your hosted website can help in ensuring stable uptime, that your TCP ports are set without risk of vulnerabilities and that any database stores (like with MySQL) are functioning and properly set up for any linked server-executed application scripts (like with Joomla, Drupal, etc.) Tenable Nessus does all of this and provides the results with concise, easy to browse results that show any detected issues marked with the necessary attention level ranging from lowest to highest severity.
However, before we get to a discussion on running a Nessus scan we may as well take you on a tour of the Nessus client interface. As such, this particular guide will show you each of the four main sections of the Nessus client, and helps you to get started as well.
First-Time Setup
The first thing you should do after installing the Nessus scanner is to specify the plugin feed that you intend to use. This procedure is specific to the nature of your use of the Nessus scanner. If you’re using the scanner for personal use, you can request a key for the home user feed; professional users, on the other hand, are mandated to pay for the premium feed by nature of the scanner’s licensing terms. Since I will be describing the use of the scanner from a personal user’s standpoint, we are going to use the free plugin feed for this discussion; however, aside from the payment for registering a professional user’s feed the process should be close in structure to what I am describing here.
With that said, we are going to register a feed key in the Nessus scanner. To make things easy to describe – and for the purposes of illustrating the platform used to implement this guide – we will be performing the configuration under Windows 7. Windows Server, Vista and XP users can follow these procedures as well; however, the procedures are somewhat different under BSD, Linux, etc. so refer to the official Nessus activation instructions (requires Adobe Reader ) for instructions specific to cases of that nature. The only difference in such a case is within the bounds of using a Mac, in which case the procedures used for Windows installations apply.
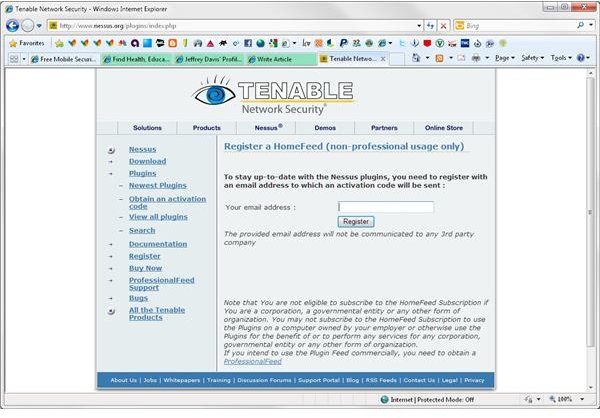
First, go to www.nessus.org and install the scanner from the provided links. Run the installation after download and follow the instructions, and then go to the activation code registration system . Since we are following the home user instructions, select Home Feed (professional use officially mandates use of the alternate option) and read the rules, accepting them in order to continue. You will now be asked for the email address for receiving the activation code so provide the desired address target (I will leave that blank in the example screens for privacy reasons) and select to register.
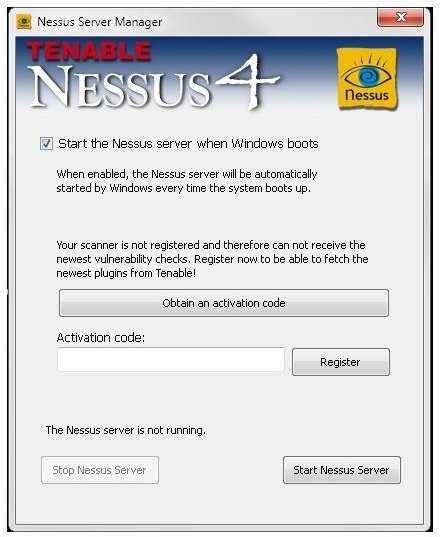
Now open your Explorer (or Finder) document browser to your hard drive (using the computer view if under Windows) and open Program Files (or Applications). Next, open Tenable Nessus (or simply Nessus if applicable) and open nessussvrmanager (or Nessus Server Manager if applicable). Again, the registration key is going to be empty for privacy reasons (and besides, I already used the key anyway) so make sure you enter your key as required and select Register.
Scanner Activation Process Screenshots:
Preparing to Use the Nessus Scanner Interface
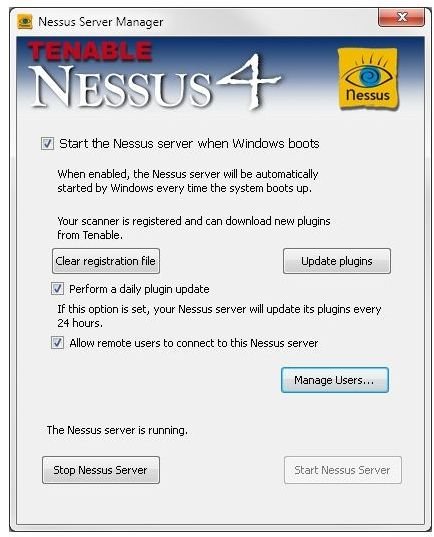
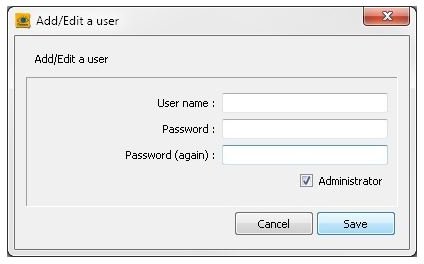
The rest of this guide will illustrate the Nessus client interface. If you haven’t set up a user to access the client at this point, select Manage Users from the Server Manager as shown and click the + button to add a new user. Enter the desired username along with a default password twice over, and select the Save option. (As usual, the add user dialog is blank for privacy reasons.) Note that if you wish the new user to be an administrator of the Nessus server, you must check the box provided for that specific purpose before saving the username (if you forget, don’t worry as the setting for that user can be switched back and forth; however, the username cannot be changed without removing the applicable username).
Scanner Interface Screenshots:
Getting Started with the Nessus Client
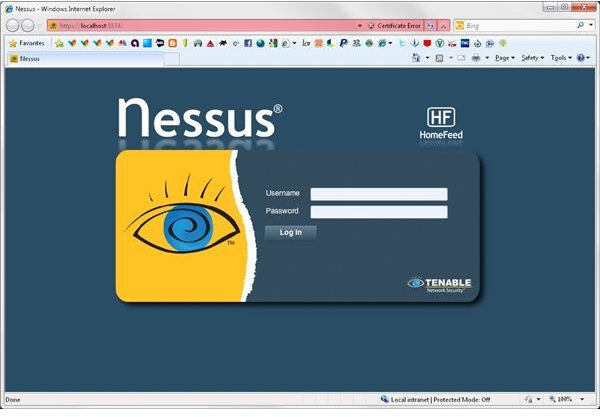
Now it’s time to get into the Nessus client interface. Start by opening your web browser and go to https://localhost:8834/ (or just copy and paste the address from here, as it’s not a live hyperlink in case you don’t have Nessus installed yet) in order to launch the client. Then input the username and password you provided earlier in the blank spaces. Once again, I left everything blank for privacy reasons so approach the process as usual from the screenshot that I have provided below:
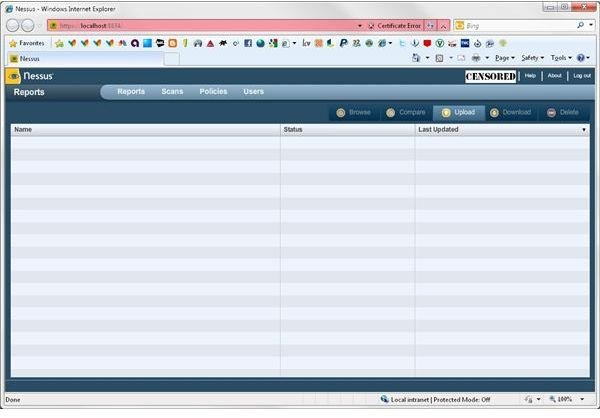
You should arrive at the reports screen upon completion of your processed login, as shown below:
Oh yeah, and don’t worry about the certificate error that may pop up: Nessus is totally, completely and entirely harmless. Simply go ahead and tell Internet Explorer to ignore the warning, and you will not be asked about it again for the remainder of your browsing session. if you’re using Firefox, you can set an exception for Nessus to prevent this occurrence completely.
About the Reports Screen
Before we go any further, let’s describe the interface. The near-top from left to right takes you back and forth across the various function screens of the Nessus interface. The near-top row – from left to right – will take you to any of the other screens for Nessus functions concerning Reports, Scans, Policies and Users, respectively. The current location is shown to the left of the function screen toggles – in this case, we are at the first of the four choices, meaning the Reports screen. At the very top of the interface and to the far left are the system functions, as well as your username. The illustration below should clarify things further:

Note that I censored my username here and henceforth (you should know why by now) – however, rest assured that yours will be displayed. Also, the system functions themselves are practically self-explanatory so there’s no need to go into detail with that.
With that out of the way, let’s talk business. The reports screen shows your recent scans and permits you to browse their results, compare multiple scans, and upload/download to your computer if accessed over the internet (which is beyond the scope of this guide as it is). Of course, you can also delete the reports if you no longer need them – but once you do, they’re officially gone for good (well, duh!) so don’t be reckless when deleting scan results.
About the Scans Screen
The next screen in the sequence details the active and scheduled Nessus database scans. An example is shown below:
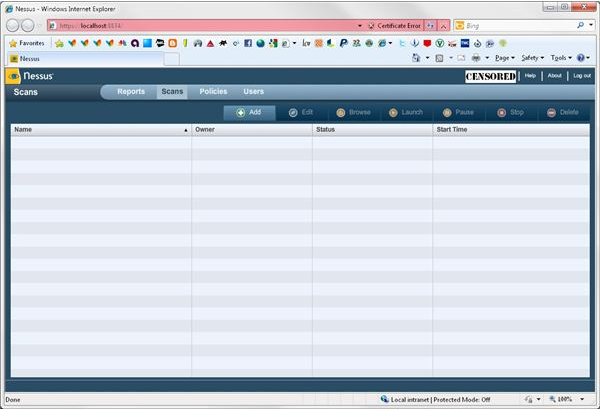
Similar to the reports screen, the list of scans displays the active and scheduled database scans. From here you can add new scan tasks and edit any scans that are listed accordingly. The browse function works much like on the reports screen in that you can view the progress of a scan (and in fact you can access this from the reports screen as well). You can even manually start, pause or stop any particular scans that are listed (note that scans set to run immediately are displayed only while they are in progress) as well as delete any scheduled scans that are no longer needed.
About the Policies Screen
The policies screen is slightly different from the previous two screens in that certain functions only apply here; otherwise, the procedures are essentially similar to what has already been described. Refer to the following screenshot to get an idea of the layout of the policy editor:

As the policy editor and scanning interface are linked insofar as configuring Nessus for running a scan, there will be a separate guide for these two portions of the Nessus client in order to describe the procedures required for setting up and running your first Nessus scan. That being said, using the Policies screen allows you to add new policies, edit existing ones, make copies of policy profiles, import policy data and delete any unneeded policy profiles (be aware, however, that deleted policies are gone for good as well).
About the Users Screen
Finally, the users screen is where you can add, edit and remove any Nessus users that you have registered. Now obviously this is an administrative function so regular users shouldn’t even see this (outside of managing his/her password and such); but for those who do have administrative access, here’s an illustration of the user manager:
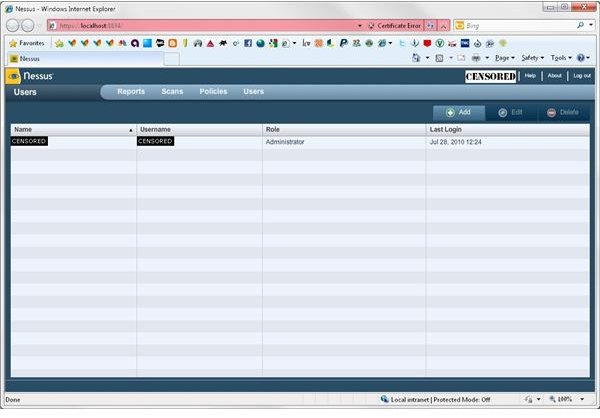
Setting up users from this screen is similar to adding your initial user from the desktop server manager, except that we can use this interface away from the computer on which Nessus is installed should that be enabled within the firewall settings pertaining to whatever computer Nessus is running on. To begin, let’s add a user now to demonstrate adding a test username. Unlike the first user we added, this additional user will not be set up for administrative access so the functionality in the case hereof will be more limited than otherwise. Begin by clicking the Add button, and you should see the following:
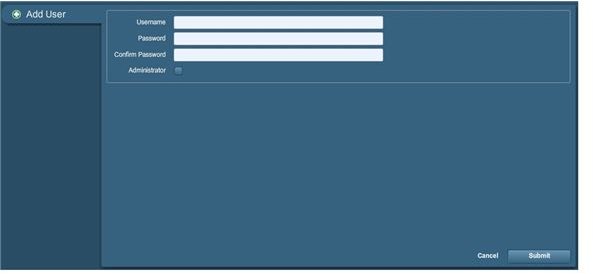
As you can see, the process of adding a user within the client looks much the same as when our first user addition was performed to implement the administrator username. Compare this with the server manager username implementation window (which is displayed one more time below here) and you’ll see what I mean:

With that out of the way, we can now add our new username by typing in the following:
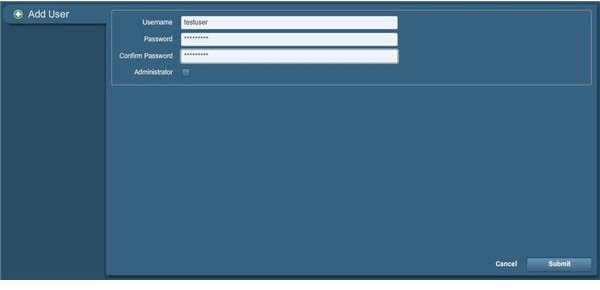
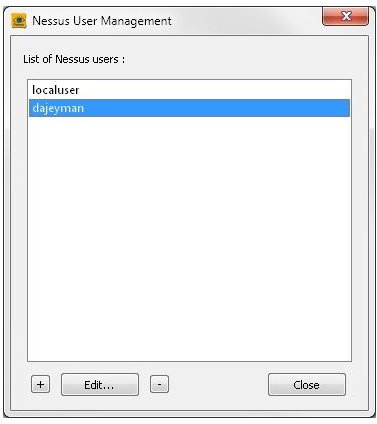
Note that we didn’t check the Administrator option this time, since we don’t want that implemented for our test username. Now click Submit, and the new username will be shown on a new line within the user manager, like this:
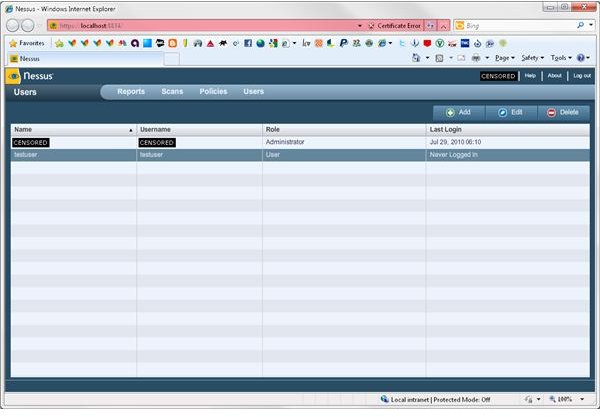
You can edit and delete usernames from this screen as well. Editing a username brings up a near-perfect copy of the new user screen, except you can only change the password and/or administrative status for the selected user; otherwise, it’s exactly the same and thus we need not show an example this time. If you totally screwed up, or want to remove an unneeded username, just select that user, click Delete and confirm to remove that user. Obviously you cannot remove yourself, of course; but there’s no need to. As with deleting anything else we described, deleted users are gone for good as well.
And that’s a wrap! If you found this useful, then be sure to check any of the other how-to guides available right here on the Hub. Until next time…


