Antivirus programs are essential for securing Windows 7, so essential that Windows itself prompts you to install one if you don’t have one. AVG Free Windows 7 is one of many antivirus products with a free version; it detects the same viruses and spyware as the paid version.
Installing AVG Free
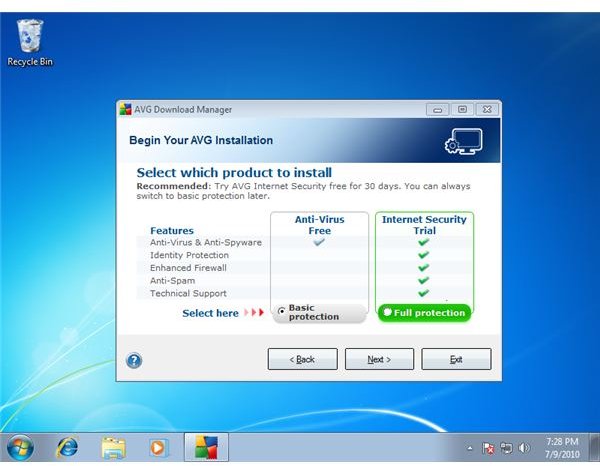
Download AVG Free from the official download mirror site and run the installer. When you’re prompted to choose an AVG product, click “Basic Protection” under “Anti-Virus Free.” AVG’s free version includes full antivirus and anti-spyware protection. The installer downloads the required files for installation of the AVG product you selected, how long it takes will depend on the speed of your Internet connection.
Read the license agreement in the installer screen once the files finish downloading, then click ‘I Have Read the License Agreement" and “Accept” if you accept. Install AVG Free with the default settings by clicking “Next” in the “Select Installation Type” window. Type your name into the “User Name” box in the “Activate your AVG Free License” window and click “Next.”
Select whether you want to install the AVG Security Toolbar , then decline the change of your default search engine to Yahoo! if you prefer Yahoo!, click the “Set Yahoo! as my default search engine” checkbox and then click “Next.” Once you have installed AVG Free for Windows 7, click “Finish” when prompted.
Configuring AVG Free
AVG prompts you to perform an “Optimization Scan” after installation. The optimization scan increases the speed of future system scans by scanning trusted system files which, if unchanged, won’t need scanning in the future. Perform an optimization scan by clicking “Optimize Scanning Now” when prompted. If you click “Wait Until the First Scheduled Scan Starts,” AVG’s first scheduled scan takes longer as the optimization scan is performed.
Open AVG Free by double-clicking the AVG icon in your system tray at the bottom-right corner of your screen.
Configure scheduled scans by clicking “Scan Computer” at the left side of the AVG window and clicking “Manage Scheduled Scans.”
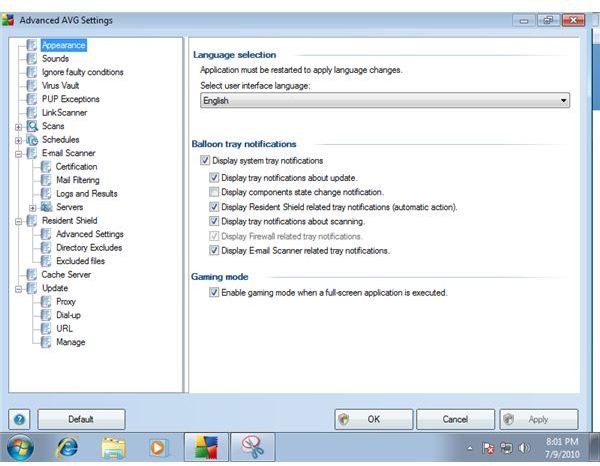
Access the Advanced Settings window by clicking “Tools” and “Advanced Settings” in the AVG window. Disable system tray notifications if you don’t like seeing them by clicking the “Display System Tray Notifications” checkbox and clicking “OK.” For more information about available AVG settings, click the question mark icon at the bottom-left corner of the “Advanced AVG Settings” window or see our article here on utilizing AVG Free for Windows 7.
Using AVG Free
AVG Free for Windows 7 runs in the background all the time, inspecting each program for harmful viruses or spyware before it runs. Open AVG Free’s window by double-clicking the AVG icon in your system tray.
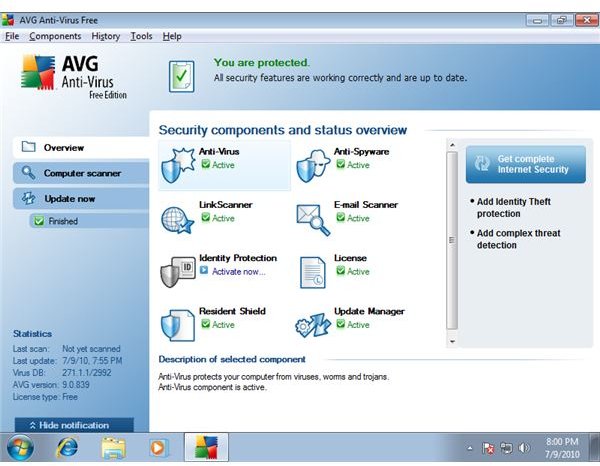
The “Overview” window, displayed by default, informs you of the state of all the AVG protection services on your computer. If everything is fine, it reads “You Are Protected” at the top of the AVG window.
AVG updates itself automatically, but you can also update it manually. Perform an update by clicking “Update Now” at the left side of the AVG window.
Perform a scan by clicking “Computer Scanner” at the left side of the AVG window. Scan your entire computer by clicking “Scan Whole Computer.” Scan suspect files or directories by clicking “Scan Specific Files or Folders,” clicking the checkmark next to a directory and clicking “Start Scan.”
Now you know how to install, configure, and use AVG Free for Windows 7.
Screenshots: AVG Anti-Virus Free Edition / Chris Hoffman


