AVG Anti Virus is a great low-cost tool for protecting your computer against viruses and other types of malware, but how should you configure it to get the most protection for your system? Read on to find out.
Overview
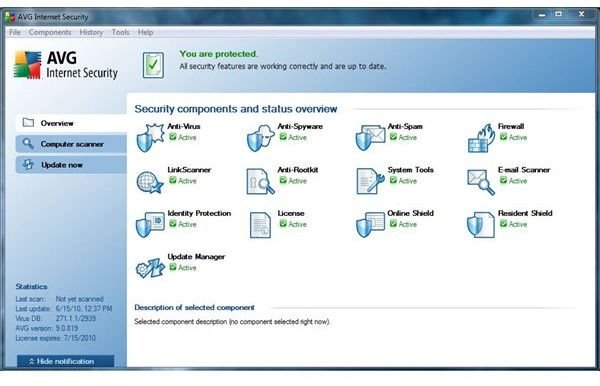
For the purposes of this article, I will go through configuration of AVG Internet Security 9.0 – one of AVG’s two paid products. Although AVG anti virus configuration isn’t difficult, with the numerous modules AVG uses to protect your computer (Figure 1) there are some best practices to set up to ensure your system will remain protected. I’ve broken down the configuration by section within the AVG Advanced Settings interface (Figure 2). If you haven’t picked up AVG yet and want to get some more info on other great Anti Malware tools, check out this article on “What is the Best Free Antivirus Software ” by Donna Buenaventura.
Identity Protection, Virus Vault, PUP Exceptions and Anti-Spam
I’ve written this article walking step by step through the Advanced settings. Open AVG and go to the Tools menu, then Advanced Settings…
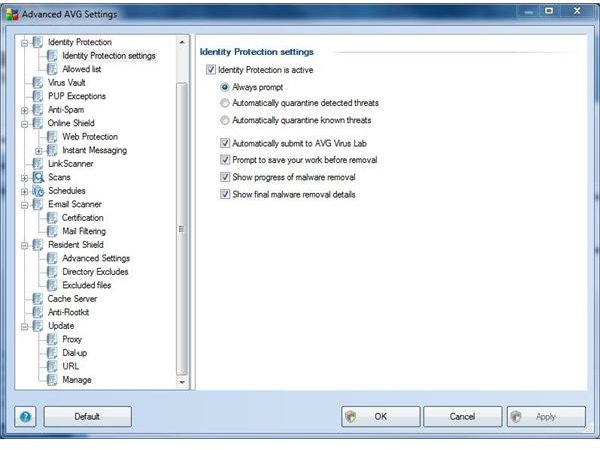
Identity Protection: The identity protection (IP) module is similar to other vendor’s real-time scanning. The IP module monitors running processes and looks for potentially malicious acts. Ensure IP is enabled and selected to always prompt you when something is found. The remaining checkboxes should be checked (Figure 3). The IP Allowed list can remain empty for now.
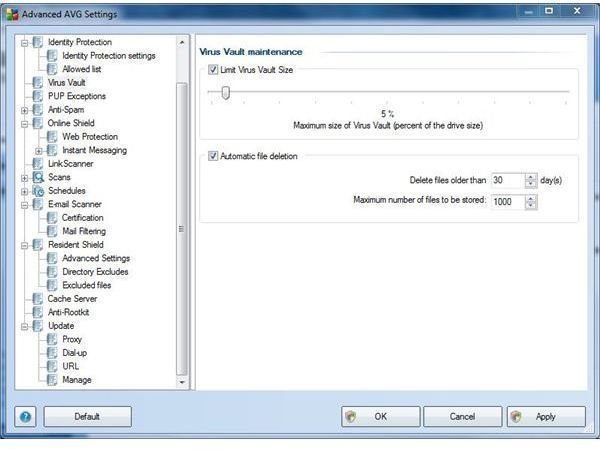
Virus Vault: The virus vault is your quarantine for items that aren’t automatically deleted. The default size of 10% is a bit on the high side – you should be safe going down to 5% or less. I’d recommend keeping the Automatic file deletion box checked with the default settings of 30 days and 1000 files (Figure 4).
PUP Exceptions: This section can be left as is. This gives you the opportunity to exclude “potentially unwanted programs” from being quarantined.
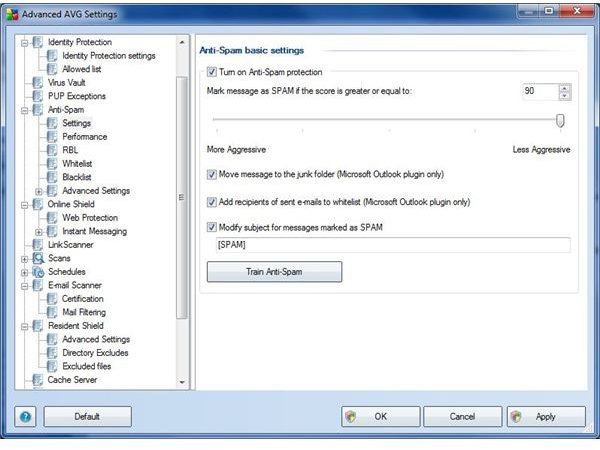
Anti-Spam: Most of the defaults here can be kept, but I would recommend checking the “Add recipients of sent e-mails to whitelist” – assuming you have Microsoft Outlook (Figure 5). I would also investigate using a Real-Time Black list such as Spamhaus or DNSBL.
Online Shield, Link Scanner, Scans, Schedules
Online Shield: This module protects you from downloading potentially malicious software while browsing and using instant messaging. Ensure the main checkbox to “Enable Online Shield” is checked. The remaining configuration items can be left at default.
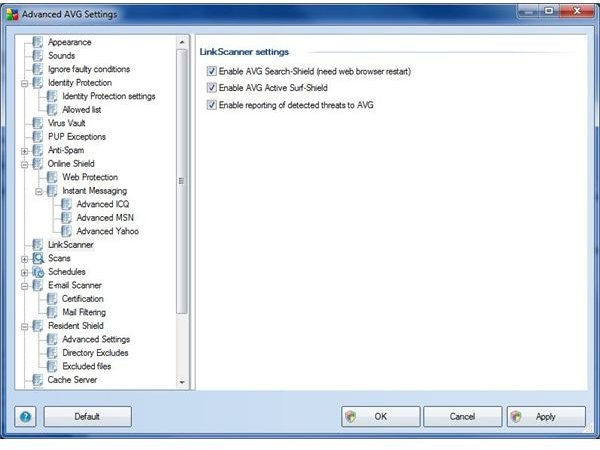
LinkScanner: The LinkScanner is similar in functionality to the Online Shield but protects you against exploits and more complex malware. Ensure all three checkboxes are enabled (Figure 6).
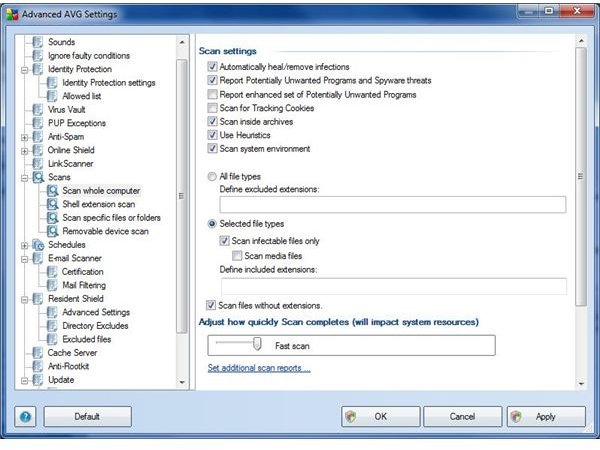
Scans: Each type of malware scan can have unique settings. For the “Scan whole computer” scan, I would enable scanning inside of archives. This may slow the scan down, but will be more thorough. You can also choose to bump up the “Adjust how quickly Scan completes," but realize it will slow your computer down (Figure 7). Also, be sure to enable the “Removable device scan” option. Keep the same settings as on the “Scan whole computer” scan.
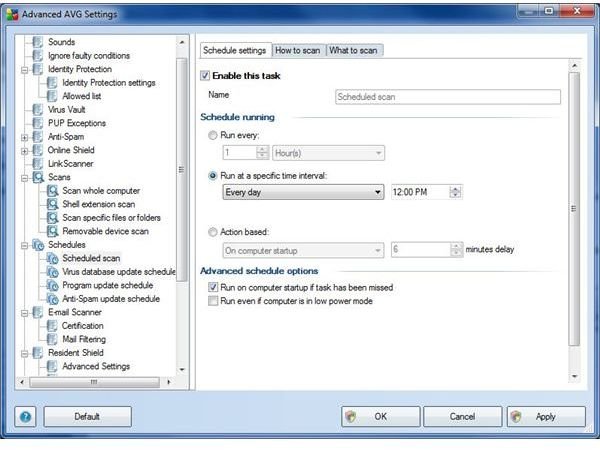
Schedules: The Schedules module controls not only scans, but program and definition updates as well. I would recommend having your scan set up to scan daily (Figure 8). Under the “How to scan” tab, select to scan for Rootkits and adjust the resources slider accordingly. The remaining schedules can be left as default.
E-Mail Scanner, Resident Shield, Cache Server, Anti-Rootkit, Update
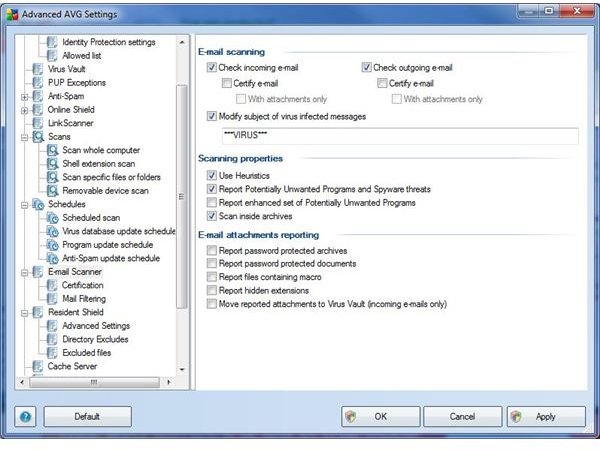
E-Mail Scanner: Check the “Check outgoing e-mail” checkbox – this way you’ll know if your computer is compromised and sending out viruses. Also, check the “Modify subject of virus infected messages” box (Figure 9).
Resident Shield: The Resident Shield is your real-time file scanner. Ensure it is enabled and leave all other settings at the default.
Cache Server: The default settings here are sufficient.
Anti-Rootkit: The default settings here are sufficient.
Update: The default settings here are sufficient, but can easily be changed to accommodate your preferences.
With that, you should feel safer knowing you’ve got AVG anti virus configured according to best practice.
Image Credits: Screenshots taken by Ryan Tetzlaff