You can now install Windows Vista, Windows 7 or any other windows directly from USB or Flash drive without even worrying about the corrupted data as it used to be with CD/DVD. This tutorial will guide you on how to create bootable windows flash drive & install windows within minutes. Read more…
Preparing Bootable Flash Drive
Alternatively, there could be too many scratches on the disk leading to a corrupt setup, in which case, you might have to skip many of the files during the windows installation. At least, I have been facing all these problems myself. Recently, I purchase a DELL Notebook, and to my bad luck, the CD/DVD-RW drive stopped working. I got it replaced 4 times, but no luck. Without even using the drive, it stopped working. So, I thought of using a USB or a flash drive, to install the windows and here, I am with this small easy to follow tutorial.
You need to have all the following things:
- A flash drive
- Windows Vista or Windows 7 Bootable DVD
- Windows Vista or Windows 7 operating system
- diskpart and bootsect utilities
Windows Vista and Windows 7 users already have the 2 utilities present on their operating system. However, if you don’t have these, then you can download them here: diskpart and bootsect
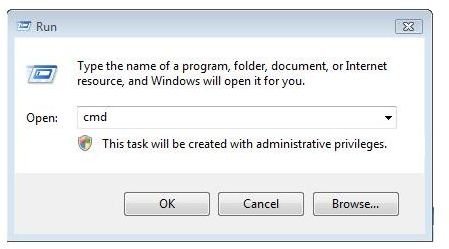
Step 1: I assume that you have the utilities preinstalled on your system. Press Windows + R key to open the Run Prompt. Type cmd and press Enter key to launch command prompt. You must use the command prompt in Administrator mode.
Alternatively, you can browse to the command prompt from Start Menu, Programs and then Accessories. Right click on the command prompt option and click “Run as Administrator” to open the command prompt with Administrator privileges.
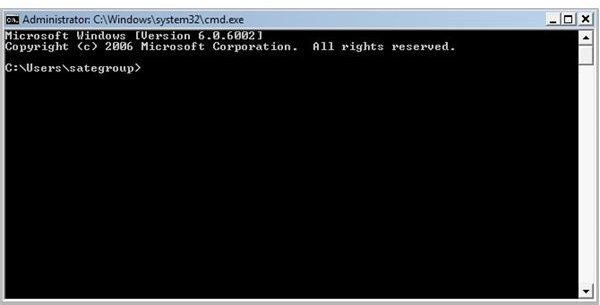
Step 2: Plug-in your flash drive. On the command prompt, type the following command ‘diskpart’ and press Enter.
Step 3: Type the following commands line by line without the double quotes.
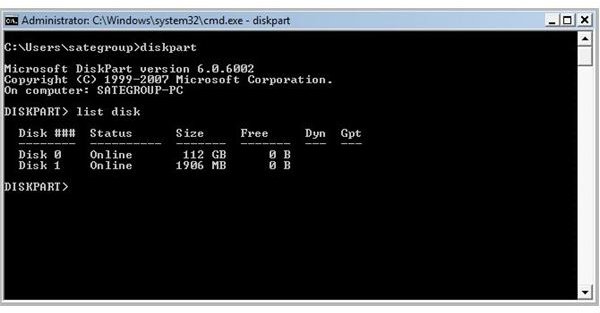
“List disk” - This will list the drives connected to your computer. My flash drive was listed as Disk 1
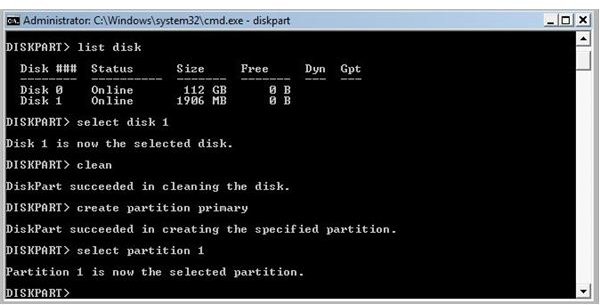
“Select disk 1” – This will select your flash drive.
“Clean” – This will clean the flash drive bringing it to a raw state.
“Create partition primary” – This will create a primary partition on the flash drive.
“Select partition 1” – This will select the primary partition.
“Active” - This will make the primary partition active.
“Format fs=NTFS quick” – This will format the flash drive in quick mode. If you want a full format, you can remove the quick option, but it will then take time depending on the size of the flash drive.
“Assign” – This will assign a drive letter to the flash drive.
“Exit” – This will exit the diskpart utility.
Your bootable pen drive is now ready to boot your system with Windows Vista or Windows 7 installation, as the case may be.
Images

Images Credit
Command Prompt screenshots by Microsoft
This post is part of the series: How to Create a Bootable Windows Vista or Windows 7 Flash Drive
Using a bootable CD or DVD to install Windows is a story. Today, embedded chips are being used everywhere from a flash drive to a digital watch, so why not move along with the technology. In this tutorial, I will guide you on How to Create a Bootable Windows Vista or Windows 7 Flash Drive.


