The Windows Registry was introduced back in Windows 3.1 in order to provide a mechanism to store important application related information in a central repository. Since most applications and Windows itself relies on the Registry, it’s important to understand what it is and how you can back it up.
Overview
Whenever you make a change to your desktop preferences or install an application, you’ve probably stored those changes in the Registry. The Registry was set up to be a central repository for configuration information. Prior to the Registry, INI files were used to handle application configuration and preferences. The problem with this approach however is that each vendor had their own format for INI files and they were scattered all over the hard drive.
The Registry helped resolve some of the issues with using INI files by giving application developers a single place (with standards!) to put their information…but as the saying goes, it’s not a good idea to put all your eggs in one basket. Since you don’t have a say as to where configuration information goes, you need to make sure you’ve got a good copy of your Registry at all times.
Backing up the Registry
Since the Registry is a cornerstone of the Windows Operating System, Windows automatically creates a partial backup upon successfully booting Windows. If you have issues booting Windows at another date, you can run Windows using the “Last Known Good Configuration” to automatically restore a portion of the Registry called the Control Set.
In any case, it’s still a good idea to create a full backup copy and store it on some type of removable media such as a USB thumb drive, a separate hard drive or optical media.
To create your backup, follow these steps:
- Go to Start, Programs, Accessories, System Tools, Backup.
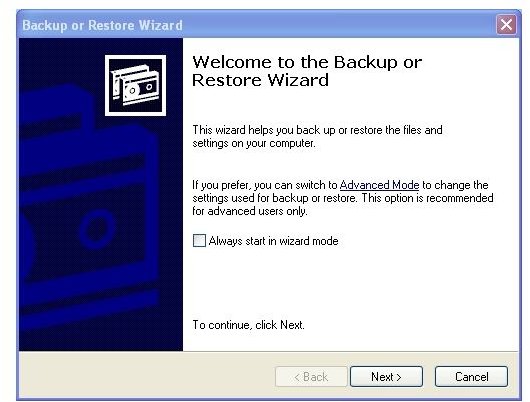
- The Backup Wizard should start (Figure 1). Click Next.
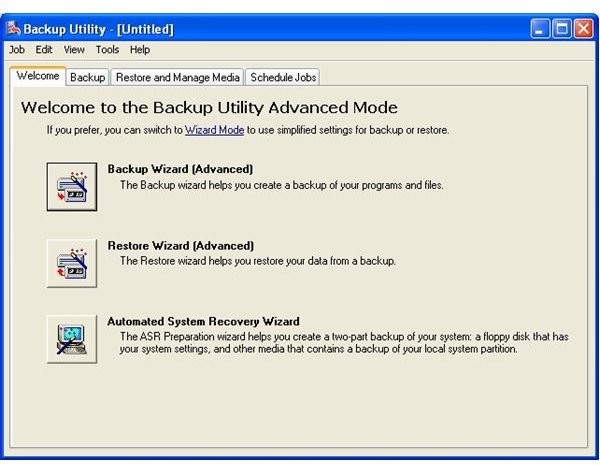
- If the Backup Utility starts – without starting the Wizard as shown in Figure 2, click the link labeled “Wizard Mode”.
- On the Backup or Restore window, click “Backup files and settings”. Click Next.
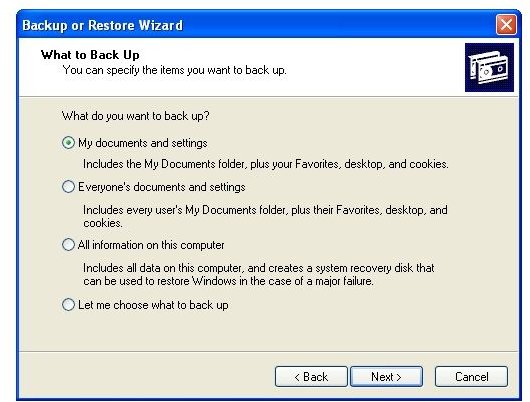
- On the “What to backup” window, select “Let me choose what to back up” (Figure 3). Click Next.
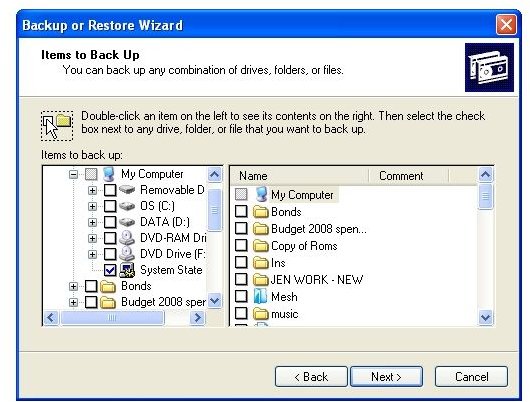
- On the “Items you want to back up” windows, expand “My Computer” and select “System State” (Figure 4). Click Next.
- Select a location to save your backup to and click Next.
- The summary screen will display the settings you select. Click Finish to start the backup.
- The backup will begin. Note that depending on how many applications you have installed on your computer – or whether or not you’ve ever run a Registry cleaner, the backup may be quite large.
After a few minutes, the backup will be complete. Remember to keep your backups current - especially after any major application changes including installation and uninstalls.
Images