Here is an easy to use tutorial for copying DVDs on a Macbook Pro.
Because of the fear of piracy, DVDs have never been easy to make digital copies of in the same way that you can rip MP3s from audio CDs. Instead of just being able to rip DVDs to your computer as a standard, most people have to resort to more clandestine means to rip DVDs. A Macbook Pro is a powerful notebook computer that is known for its media specialities. Though the Macbook pro will be able to handle the process needed to rip DVDs, it does not have the software as a standard. Instead you will have to download, install, and use a DVD ripping software for copying DVDs on a Macbook Pro that comes as a free download. Here is a step by step process on copying DVDs on a Macbook Pro quickly and for free.
DVD Ripping
What you are going to need to do is to download and install HandBrake , which is a video compression, video conversion, and DVD ripping program that is easily available for free download.
Click Here for the HandBrake Free Download
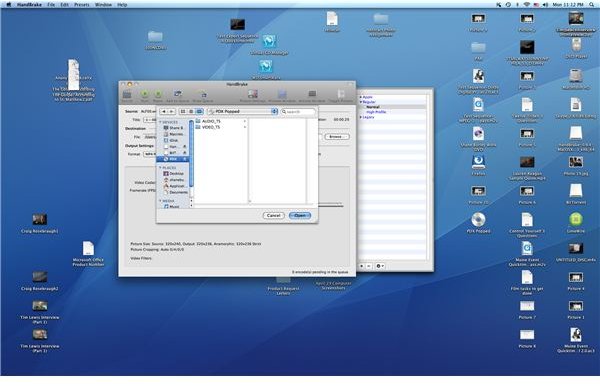
Once it is installed go ahead and insert the DVD that you want to copy on your Macbook Pro, and then close out any DVD player application that pops up automatically. Go ahead and open up Handbrake, and it will either initiate a prompt where you can identify the source media you want to rip and convert or you can hit the Source button in the upper left hand corner. You will likely see different folders within that DVD source, but just hit the Open button instead of selecting further.
This will bring your DVD into HandBrake as the source file and you can begin to make alterations that will be
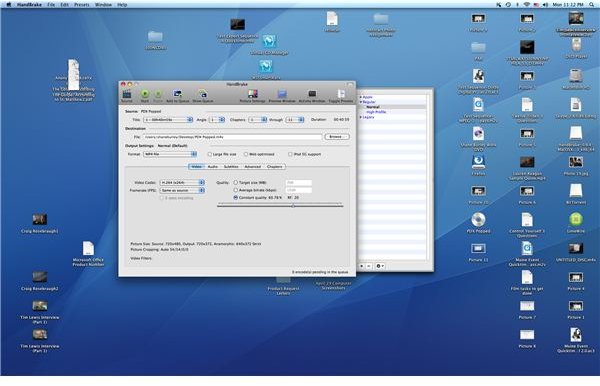
specific when copying this DVD on your Macbook Pro. It will list the given name of the DVD, how many chapters are available and it will be copying, and where the file is going. You can leave it to copy the DVD to an MP4 file, or you can choose an MKV. You can make choices about how the HandBrake video compression will go as you can identify how large you want it to be or how much quality you want remaining.
Once you have made your choices then you will hit the Start button in the upper right hand corner and HandBrake will begin copying the DVD on your Macbook Pro. This will not take too long and will leave you with a specified video file that was determined ahead.
Later Use
After HandBrake is finished you will have to decide how you want to continue with the DVD copying process. If you are looking to take that video and put it onto your own DVD you will need to use a video compression program for compressing to DVD formats and then a DVD authoring program to work in tandem: such as Apple’s Compressor and DVD Studio Pro .
If you would just like to play the video on a mobile device like an iPhone then you may have to convert further and then put into your iTunes queue for sync to your device. This will also depend on the specifics of the device you are trying to connect with and the video formats it accepts.


