Putting a new hard drive into your MacBook Pro is like giving it a new lease of life. Not only will the added storage space allow you to store more, it will also let you get more mileage out of your computer if you install a faster hard drive than the one that is already in there.
Tools and Things before you begin your install
There are a few tools that you will need in order to install a new hard drive in your MacBook Pro. Not only will you need to get yourself a set of tools that make setting up the computer ready, you will also need to find a smooth and clean surface to complete the operation on; after all, you don’t want the screws from your computer’s hard drive bay falling into the crevices in your computer.
So other than the obvious new hard drive, what else will you need?
- A T6 Torx Screwdriver
- A Spudger
- A Phillips #00 Screwdriver
Before we go further, a word of caution to everyone who has the latest iteration of the unibody MacBook Pros. Unfortunately, you can’t replace the hard drives on your computer because both the computer’s battery as well as the hard drive are sealed inside and require the special skill set possessed by an Apple employee (and SJ’s permission) to open up and perform the necessary modifications. Doing so risks voiding your Apple Care Protection Plan.
Ready, Set, Go.
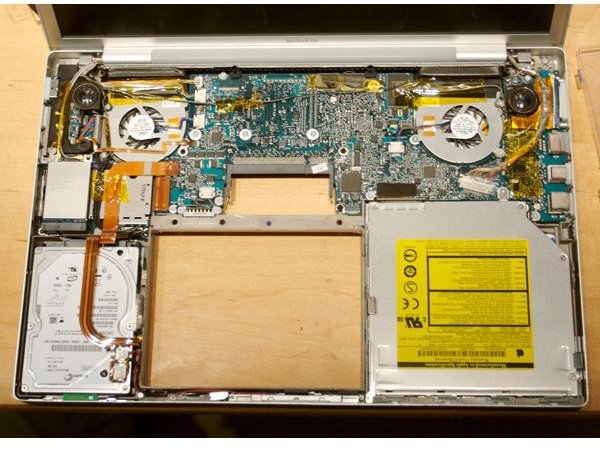
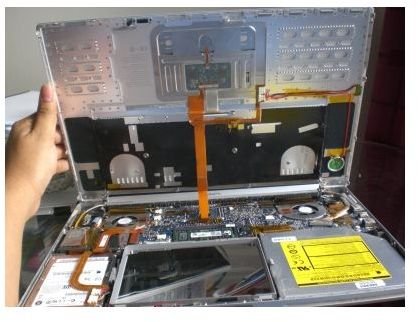
Now that you’ve got all the tools, you need to figure out how you’re going to get the MacBook out on its belly. Make sure that the computer is unplugged from the power source and take the battery out. You don’t have to worry about losing your data as the computer will probably be in sleep mode when you do this and the built in Safe Sleep mechanism will ensure that your computer opens up in the same state that you left it in. The following is what I would refer to as a quick reference to the process of putting in a new hard drive. If you would like to have a look at a detailed guide with pictures then you can check the material that the iFixit people have put out.
- Take the battery out of the socket.
- Remove the RAM access door and lift it up and out of its place.
- Unscrew the door to it’s side marked with the hard drive icon.
- Make sure that you haven’t left any screws still set into the chassis and then lift the top of the computer up.
- There will be an orange ribbon which connects the keyboard to the mouse and the trackpad, gently disconnect it by using the head of the plug and not pulling on the ribbon itself.
- With that done, remove the two screws that are holding down the hard drive. Then gently unplug the connector the the hard drive and set your new hard drive in it’s place.
- Repeat all the steps listed above in reverse and your MacBook Pro will be good as new in a jiffy.
Installing a new hard drive by yourself is one of the cheapest ways to add storage space to your MacBook and with the instructions above as well as the detailed photo-guide from the guys over at iFixit, you shouldn’t have any issues.


