
Handbrake is an Open Source video transcoder that can be used to rip DVD movies and convert videos for playback on your iPod, iPhone and AppleTV. Lets take a look at how we can use handbrake to encode videos for various devices.
Using Handbrake for Video Encoding
In today’s world of mobile devices and culture of consuming media when and where you want, keeping up with file formats and proprietary software can be a real challenge.
I appreciate Open Source applications and generally welcome the idea of sharing code but, I’ve got to tell you, there are very few Open Source applications that I really love! One exception being Handbrake for Mac. If you have ever had to do anything with video, for example, ripping, transcoding, etc Handbrake is definitely a name you’ve come across. The best open source video transcoding application in the world, describes Handbrake in one simple sentence. Depending on your choice of computing environment you can download Handbrake for your operating system here .
Using Handrake for Mac - iPod & iPhone
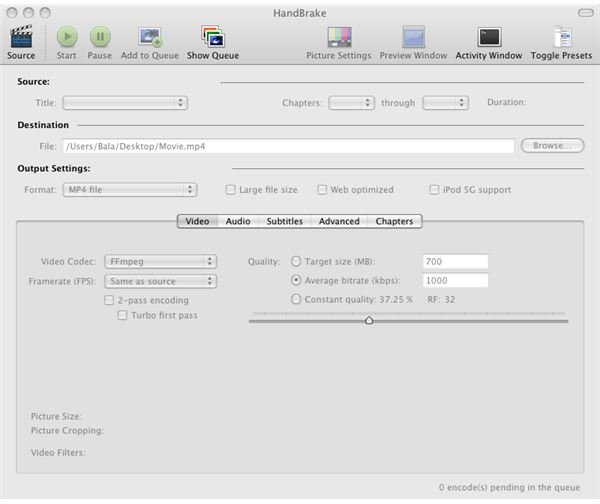
Encoding videos for portable video players and the conversion of video formats is a breeze with Handbrake. The first step involves selecting the video that you wish to convert or encode. Once you have selected your source its time to configure the output options.
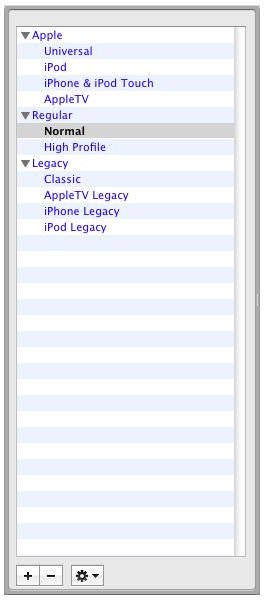
There are several output options that come as presets in Handbrake for Mac which can be accessed from the presets pane. In most cases these presets will work fine and handle most of your encoding needs.
If you are encoding for a non-standard format you have the choice of skipping the presets and directly configuring the encoding and output options in the dialog box below which provides a plethora of options for fine tuning your encoding process.
Once you setup the options you are ready to let handbrake do what it does best. Depending on the file size and the quality of encode the process may take some time. Most modern machines can handle the encoding process easily though and you should be done soon enough. From now on downloading that funny video on Youtube or Google Video and carrying it with you on your iPod or iPhone is going to be a breeze using Handbrake.
DVD Ripping with Handbrake
Contrary to what many people think, current versions of Handbrake for Mac cannot rip DVDs alone! Do not despair, installing the wonderful VLC media player on your Mac will bring back this capability. So first thing to do after installing Handbrake is to go ahead and install VLC Media player (which you should consider installing regardless, its an awesome open source free media player).
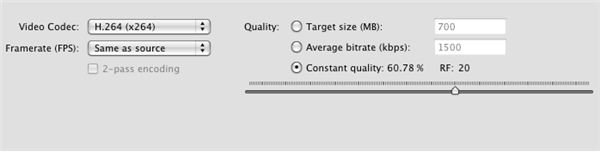
Depending on whether you want to rip files directly from the DVD or from files copied to your hard drive select the appropriate source. Handbrake will automatically select the default settings for ripping your media. The encoding settings box below will allow you to fine tune your settings like output file size, average bit rate or constant bit rate quality and frames per second. Higher bit rates will result in larger files, better quality and will take considerably more time to encode.
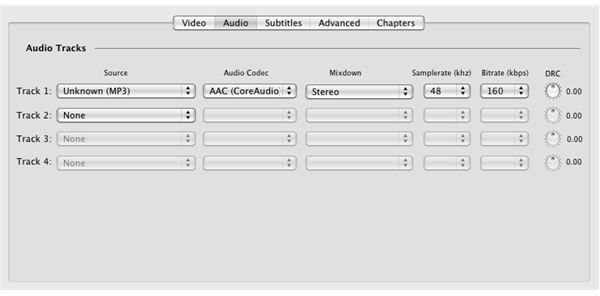
Audio encoding options come in handy if you want your output file to support surround sound. Standard stereo should do fine for most portable media players which do not output in surround sound but if your encoding for playback on a Mac or AppleTV which does support surround then AC3 sound should serve you well. Depending on the type of audio encoding your output file size will also vary. The subtitles can be loaded from the DVD itself or an external .srt file can be added if required.
Chapters on the DVD will be automatically detected by Handbrake for Mac which will allow you to select content you want to have on your output file or remove it. As far as other advanced options go, it is best to leave the advanced setting alone unless you know what they do and want to get into the nuts and bolts of video encoding. So there you have it! You now know how to make use of Handbrake for Mac and enjoy your videos!


