Do it yourself iMac Memory Upgrades. The process is not as hard as you might think!
This article will walk you step-by-step through the process of upgrading the memory in your iMac. This guide is here for informational purposes only and neither the author nor Bright Hub can be held responsible for any damage to you or your iMac while using this guide as a reference. Upgrading the memory in your iMac while it is still under the AppleCare warranty will potentially void your warranty, so please keep this in mind should you decide to upgrade the memory in your iMac yourself.
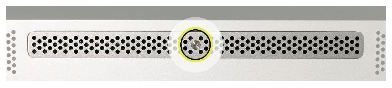
With that out of the way … lets get started! We will assume at this point you have researched and purchased the memory you plan on installing in your iMac. With that assumption the first thing we will need to do is make sure we have the proper tools to perform the upgrade. You will need a phillips #2 screwdriver, a static free area to work and a soft, clean, lint-free towel. Once you have gathered your tools, disconnect all cables and wires and lay the towel out on your workstation. Place your iMac, face down, on the towel with the bottom of the stand facing you. This will reveal the memory access door and allow you to remove it. Take your phillips #2 screwdriver and carefully remove the screw on the memory access door by turning it gently counter-clockwise.
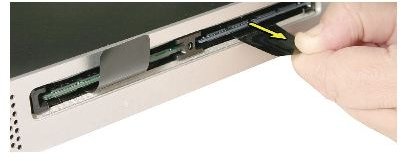
Now that you have removed the memory access door set aside the door and screw in a safe place. You now have access to the memory modules. To remove a memory module simply untuck the tab connected to it and pull to eject the memory module. Place the old memory aside and grab the memory upgrade you purchased for your iMac. Insert the new memory module into the vacated slot, being careful to line up the notch in the memory with the notch in the memory slot. Once lined up push firmly on the memory until you hear a click. Repeat for the other memory slot if you are upgrading both memory modules.
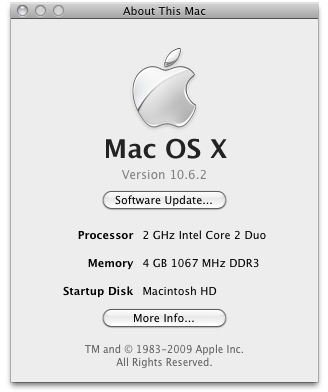
Finally, you will want to replace the memory access door, being careful not to over-tighten the captive screw. With this completed you are ready to stand your iMac back up onto its base, reconnect the wires and check Mac OS X to make sure your iMac memory upgrade was a success. Once you have logged into your Mac OS X account click the apple in the top lefthand corner and click “About This Mac”. The second heading under the “About This Mac” screen will report how much memory your iMac is detecting. If this matches the amount of memory you just installed in your iMac, congratulations! If the amount reported is incorrect you will need to follow these directions again, making sure you have inserted your new memory modules securely into the DIMM slots. As always, when upgrading the internal components of your iMac exercise extreme caution. Good luck with your iMac memory upgrade!


